


Hardware components | ||||||
 |
| × | 1 | |||
 |
| × | 1 | |||
Software apps and online services | ||||||
| ||||||
 |
| |||||
 | ||||||
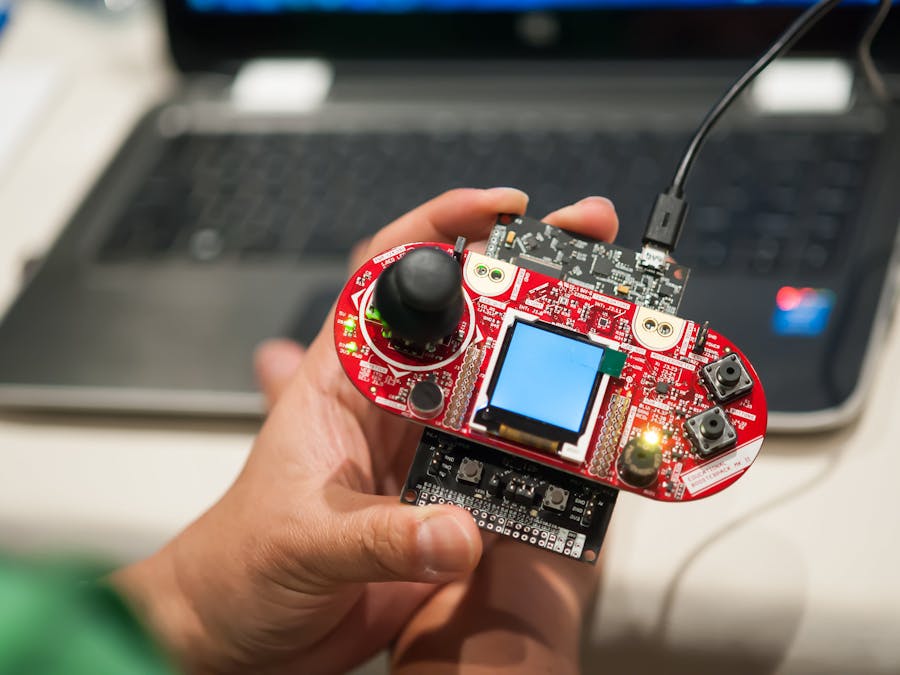
Building your own Internet of Things (IoT) device can be easy with the MSP432 LaunchPad evaluation kit coupled with the SimpleLink Wi-Fi® CC3100 BoosterPack. Use easy to learn, Energia, an Arduino style programming method, along with Temboo, a cloud-based code generation platform, to quickly connect your hardware to the internet. In this workshop, students and instructors will have fun using the new Educational BoosterPack MKII with joystick, pushbuttons, piezo, LCD screen and more to make their creation come to life. Great preparation for senior design projects. Each participant will need to arrive with their laptop preloaded with the Energia software. Just go to www.energia.nu/download for instructions.
Introduction
The purpose of this guide is to get users up and running with the new MSP432 LaunchPad and Educational BoosterPack MKII. The user will also be exposed to the basics of adding internet connectivity to a design using Temboo, an API aggregator service that let's us easily do cool things on the web from our hardware.
Before we begin, please ensure you:
1. Download and install the latest version of Energia. Energia can be downloaded from http://energia.nu/download/
a. Below the download links there are specific installation instructions for each operating system version. Please follow these instructions as you may also need to install drivers depending on your OS.
b. NOTE: In Windows, Energia must be installed to a path without spaces in order to function properly.
c. ALTERNATIVELY: we can also use the CCS cloud tools at http://dev.ti.com. You will need to sign up for a myTI account and download the CCS Cloud Agent and browser extensions.
2. Create an account on Temboo.com.
Lab 1: Blink an LED
The goal of this lab is to verify the hardware and software is setup correctly and to give the student a first taste of rapid prototyping in Energia.
1. Plug in your LaunchPad with the supplied USB cable.
2. Open Energia.
3. From the Tools menu at the top of the window, select Boards -> LaunchPad w/ MSP432 EMT (48MHz).
4. From the Tools menu at the top of the window, select Serial Port, and then pick the serial port associated with your MSP432 Launchpad.
5. From the File menu at the top of the window, select Examples -> 01. Basics -> Blink. This will open the blink example program.
6. Examine the code to see the basic structure of the program.
a. All Energia programs have two required functions: setup() and loop(). Setup is run one at startup and then loop runs continuously.
b. pinMode is used to set the direction of a GPIO.
c. digitalWrite is used to set the state of a GPIO.
d. delay pauses execution for a given number of milliseconds.
7. Click the red arrow pointing to the right at the top left of the Energia window. This will compile and upload your program to the board.
8. After programming completes verify that the red LED is blinking on your LaunchPad.
9. To take this a step further try:
a. Fading the LEDs by changing the calls from digitalWrite to analogWrite.
b. Try using the other colored LEDs on the board
i. RED_LED
ii. GREEN_LED
iii. BLUE_LED
Lab 2: Educational BoosterPack
The goal of this lab is to familiarize the student with the concept of a BoosterPack and how software libraries can speed development of advanced applications.
NOTE: You will need to make a small file change in the LCD library. Go to your Energia folder and go to hardware > msp432 > libraries > EduBPMKII_Screen > Screen_HX8353E.cpp on line 68 you should see #if defined(__LM4F120H5QR__) || defined(__MSP430F5529__) || defined(__TM4C123GH6PM__) || defined(__TM4C1294NCPDT__) || defined(__TM4C1294XNCZAD__) || defined(__MSP432P401R__). Make sure "defined(__MSP432P401R__) is included. Close and restart Energia IDE to complete this change.
1. Plug the Educational BoosterPack MKII into the LaunchPad’s BoosterPack headers.
2. From the File menu at the top of the window, select Examples -> 09.EducationalBP_MKII -> AccelerometerLED
3. Click the red arrow pointing to the right at the top left of the Energia window. This will compile and upload your program to the board.
4. Verify the color of the RGB LED changes when you tilt the board.
5. Dance around with your LaunchPad like you were at a rave.
6. Experiment with other examples for the Educational BoosterPack. Trying combining multiple examples to build a full application.
a. This time is meant to be free form so you can experiment and learn on your own.
Lab 3: IoT
The goal of this lab is to introduce the student to the basics of adding internet connectivity to an application.
1. Plug the CC3100 BoosterPack into the bottom of the LaunchPad. The stack should now be:
a. Educational BoosterPack MKII
b. MSP432 LaunchPad
c. CC3100 BoosterPack
2. Create a new program in Energia (File -> New)
Part 1: Weather
For the lab, we are going to use the Temboo cloud service to get the weather report whenever we push a button. Go to www.temboo.com/hardware/ti and sign up for an account. Once logged in find the GetTemperature API under Yahoo > Weather > GetTemperature.
Make sure IoT mode is on. You can add a new connection which will let you type in your WiFi router information.
Enter the address you want to get the temperature from and Temboo will generate the Energia code for you. You can copy and paste that into Energia and upload it to the board.
Make sure to include the TembooAccount.h. To add this click the small down arrow and select new Tab. Call the new tab TembooAccount.h and click ok. You should have a blank area where you can past the TembooAccount.h information.
When you upload the code, click the Serial Monitor (magnifying glass in the upper right corner) in Energia and you should see the LaunchPad connecting to Wi-Fi and getting the temperature data.
To modify the code, so that it is pushbutton activated. Simply take the part where it does the choreo call in the loop function and enclose that with an if(digitalRead(PUSH2) == 0) and it will only query the temperature when the button is pushed.
To view the Temboo Tutorial go to www.energia.nu/temboo
The Temboo site does a great job of explaining how to use their APIs so refer there for additional help.
Part 2: Twitter
3. Go to your Temboo account and navigate to the Twitter Choreos
a. Once there, go to Tweets, Statuses Update
4. Scroll down this page and copy the contents of the header file box.
5. In Energia, at the top right of the window, click the down arrow and select new tab. Name this new tab Temboo.h.
6. Paste the contents of the header file box into this tab.
7. Update the WIFI_SSID #define to reflect your wireless network.
a. If your network has a password create a new #define called WIFI_PWD and type your password in quotes
8. On Temboo, copy the contents of the Code box and paste them into the main sketch file in Energia. Be sure to select everything in that sketch before replacing it with the code from Temboo.
9. Add the following lines to your program:
// Set Choreo inputs
String
AccessTokenValue =
"3361531038-PfYFeP3r9ykZ9hZzWCcsaQp4AHSHAX0BcBbVQ2K";
StatusesUpdateChoreo.addInput("AccessToken",
AccessTokenValue);
String
AccessTokenSecretValue = "RzlVqDmPHKaD1L315bvJ2MqhKfJW7Zsr76YfkomuKrL2a";
StatusesUpdateChoreo.addInput("AccessTokenSecret",
AccessTokenSecretValue);
String
ConsumerSecretValue =
"f1S7cqL2aJi3HVyFOnQ9wCihao0080OIQxm0rpp41AB1yc91xJ";
StatusesUpdateChoreo.addInput("ConsumerSecret",
ConsumerSecretValue);
String
ConsumerKeyValue = "oa1pgd6ibazJFOa8X9Gp5BrmF";
StatusesUpdateChoreo.addInput("ConsumerKey",
ConsumerKeyValue);
String
StatusUpdateValue = "Look ma, I'm on twitter!";
StatusesUpdateChoreo.addInput("StatusUpdate",
StatusUpdateValue);
These lines should be placed right before the call to StatusesUpdateChoreo.run(). For the tweet to be successful it needs to be unique so please change the text. Twitter will prevent duplicate messages from being sent within a certain timeframe.
No Shenanigans Please!
10. Compile and upload the code to your board. Open the serial monitor in the top right of the Energia window to view the debug output.
11. If everything looks ok in the serial monitor, go to twitter.com/iotdump and see if your tweet was successful.
12. Experiment by combining this twitter functionality with some of the example for the Educational BoosterPack. For example you could use the LCD_Joystick example to send out the coordinates of the cursor on screen whenever Button 2 is pressed.
a. A completed example of this is provided in the code section below.


Comments