


Hardware components | ||||||
 |
| × | 1 | |||
 |
| × | 1 | |||
Software apps and online services | ||||||
 |
| |||||
Original tutorial from Energia website: http://energia.nu/cc13xx-cc3100-wifi-iot-gateway
This post is how to get your low power CC13xx based LaunchPad/SensorTag published to the cloud; utilizing a CC13xx LaunchPad + CC3100 BoosterPack using PubNub as the publishing agent and Freeboard as the visualization service.
What you will need- Free PubNub account. You can create one here.
- Free Freeboard.io account. You can create one here.
- CC3100 BoosterPack. You can get one here.
- 2 x CC1310 LaunchPad. You can get them here.
- IoT gateway and sensor node Sketch. You can get them here.
After you have created an account at PubNub go to the account homepage, and click the “NEW APP +” button. The button is located on the right corner of the screen.
In the dialog that pops up type your desired APP name (e.g. CC13xx IOT Gatway) and click create.
Click the app you just created on your account homepage:
Once in the app click the key info button on the top left of the screen, if you are not already on the key info screen.
On the tab navigation locate “All Keys,” scroll down and select Demo Keyset.
The loT gateway and sensor node sketch should be saved in the Energia Library(Documents->Energia-> libraries). Open Energia and locate EasyLinkRx, it should be in your “Examples” library.
Navigate to the Wifi tab and replace the pubkey and subkey with your keys displayed in the PubNub “Demo Keyset” detail window. Just copy and paste the keys into your Sketch. Still in the WiFi tab replace ssid and password with your WiFi network name and password.
Wiring/Testing
On one of the LaunchPad’s place the CC3100 BoosterPack as per the instructions that came with the BoosterPack (CC31xx Quick Start Guinde pg. 18).
Your Gateway is now setup and ready to go.
Plugin the LaunchPad with the WiFi BoosterPack and upload the EasyLinkRx Sketch.
*Note: Install EasyLink library by following these steps: Sketch->Include Library->Manage Libraries->EasyLink->Install
*Note: Change the baud rate in the UART to match your sketch
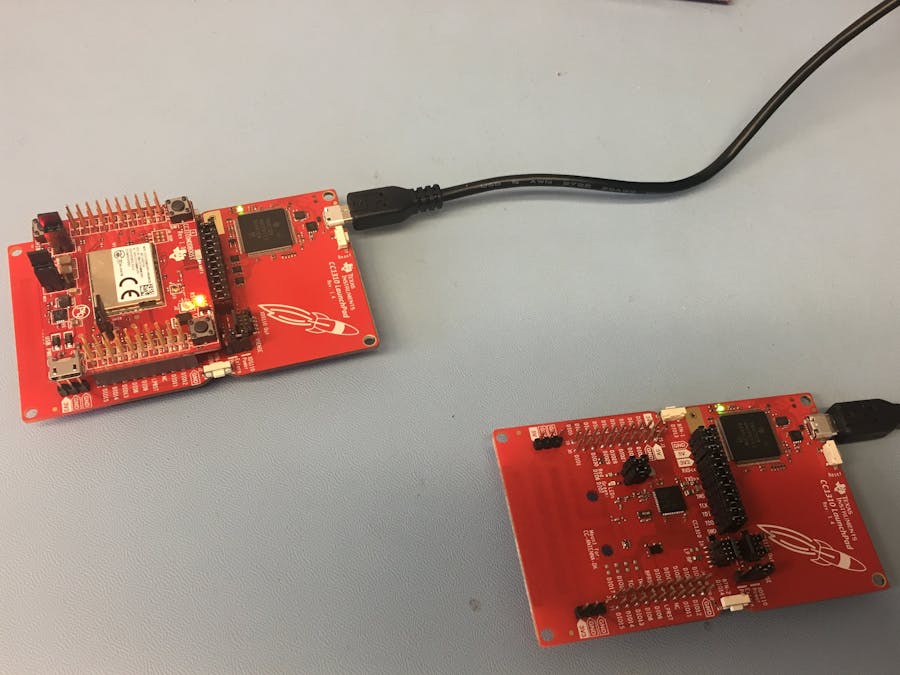
Unplug the LaunchPad with the WiFi BoosterPack. Open the EasyLinkTx Sketch, plugin the other CC1310 LaunchPad and press Upload. Now plug the LaunchPad with the WiFi BoosterPack back in. Both LaunchPads should be connected, see below for reference.
The LaunchPad will now connect to WiFi and start receiving data from the sensor node, publishing it to PubNub.
Setting up Freeboard.ioSetup your freeboard.io account here. On your account homepage enter a name for your board (e.g. CC1310 IOT) and click the “Create New” button.
On the dashboard that appears, click “ADD” under DATASOURCES.
In the Datasource pop-up select PubNub as the type from the “Select Type” drop down menu.
In the “DATASOURCE” details dialog, fill in the following details:
Name: Any name you want to give it. e.g. “CC1310 Sensors”
Subscribe Key: This is the key you earlier got from PubNub and pasted into the WiFi Sketch.
Channel: hello_world
Once the details are filled in click the “SAVE” button.
Back on the board home screen click the “Add Pane” Button.
In the newly created pane click the “+” sign.
In the Widget dialog select Sparkline.
In the Widget details fill in:
Title: The tile for the sparkline. e.g. Analog
Value: If your CC1310 gateway is already running then by clicking the + Datasource will show you the data sources available. Keep clicking the value that pops up until the value field shows: “datasources[“CC1310 Sensors”][“analog”][0]”
Keep the rest of the fields as they are and click Save.
If your IoT gateway and sensor node are running you should see a nice spark line showing the analog value from the sensor node that is send to the IoT gateway.


Comments