

Hardware components | ||||||
 |
| × | 1 | |||
Software apps and online services | ||||||
 |
| |||||
The Simulink Support Package for LEGO® MINDSTORMS® EV3 Hardware enables you to create and run Simulink models on LEGO MINDSTORMS EV3 hardware. It includes a library of Simulink blocks for configuring and accessing LEGO MINDSTORMS EV3 sensors, actuators, and communication interfaces. This example is based on the Robot Educator built from the LEGO MINDSTORMS EV3 Education Core Set . The building instructions are included in every set. This robot can also be created using the retail set (31313) with addition of some extra parts such as –
- Ball pivot
This example creates and runs a Simulink model on the EV3 Robot Educator, makes it follow an edge of a path (black stripe on white background) and stop smoothly upon sensing an obstacle in front.
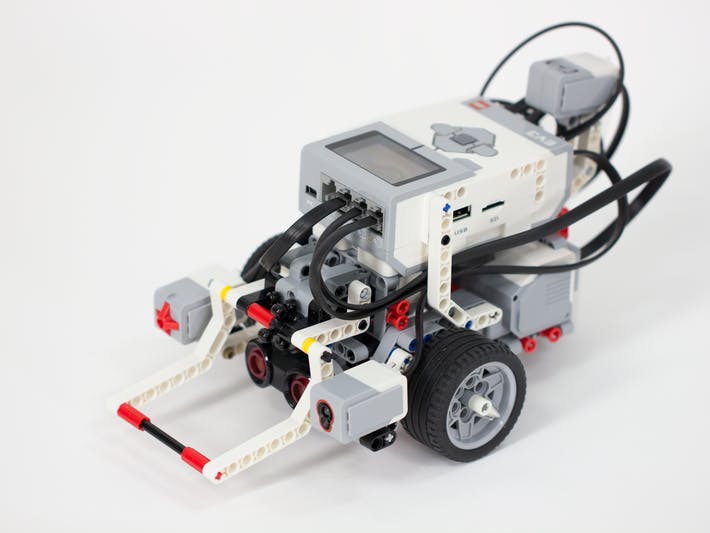
FilesTask 1: Build LEGO MINDSTORMS EV3 Robot Educator- Build the robot using the Brick, 2 Large Motors, 1 Medium Motor, 1 Touch Sensor, 1 Color Sensor and 1 Ultrasonic Sensor. The Color Sensor acts as an ambient light sensor. This configuration is part of the building instructions.
- Minor changes for this project comprise turning the Color (Light) Sensor to face downwards and repositioning the Touch Sensor to be mounted on any side facing upwards.
Required hardware for connections to computer –
- NETGEAR® N150 Wi-Fi USB Adapter (WNA1100) Wi-Fi dongle suggested by LEGO for use with EV3
- Wi-Fi router ensemble (e.g., TRENDnet® 300Mbps Wireless N Home Router (TEW-731BR))
Verify the EV3 firmware version and set up the LEGO MINDSTORMS EV3 network connection. Refer to Getting Started after downloading and installing the support package.
Task 3: Create Simulink model for Robot EducatorThe goal is to create a simple model with these specifications:-
- Detect and follow edge which has black color on the left and white on the right.
- Stop from an obstacle on the path at a distance of 15 cm.
Simulink allows us to model the structure of the robot into smaller, simpler components. The easiest way to get started is by using the Line Trackingexample that is shipped with the Simulink Support Package for LEGO MINDSTORMS EV3 Hardware. Let us look and understand what this model is doing.
The approximate speed of the robot at a given time is compared to a known target speed. Based on this, the voltage bias to the robot wheels is increased or decreased using a P controller. Secondly, the amount of light reflected onto the light sensor is measured to know its position with respect to the edge. The target light intensity value is the mean of the amounts of light reflected from the white and black portions of the path, which is maintained by a PID controller.
Now, let’s add the ability to do obstacle sensing. This will require us to use the Ultrasonic Sensor. The voltage bias from the speed and edge tracking control needs to be provided to motors only when the obstacle distance value is above a certain threshold. In the subsystem, where I added the obstacle sensing and avoidance, I used two levels of 25 cm. and 15 cm so the robot reduces speed smoothly.
Finally, we add the Touch Sensor to allow us to enable/disable the robot movement. The Touch Sensor outputs ‘1’ when the sensor is pressed, and ‘0’ when released. Robot movement is disabled at the start.
Now, that we have built the model, go to Tools > Run on Target Hardware > Options… and follow these steps:
- Change ‘Target hardware:’ to LEGO MINDSTORMS EV3.
- Enter the correct IP address in its field. Refer to the Getting Started page.
- Click OK.
Whenever sensors are involved, generally they require calibration. We need to see what values are needed for the Constant blocks of ‘Speed (m/s)’, ‘White Value’ and ‘Black Value’, since this will decide how fast and how centered on the edge the robot will move. This task needs to be done because the sensor output may vary due to:
- lighting conditions, sensor distance from the floor (for edge tracking control)
- surface texture, wheel friction (for speed control)
There are multiple ways to calibrate using Simulink. For example, if you want to test the ambient light value from the white portion of the track, one way is to use just the EV3 Color Sensor block and the LEGO EV3 Display block. This displays the intensity value on the Brick’s LCD itself. Once the calibration is complete, you will run the model on EV3 hardware from Simulink. We will do this in an interactive way so we can observe signals and tune parameters.
In order for Simulink to interact with the robot while running the model, we need to change the model to External mode. Then, on clicking the green ‘Run’ button, the model will be downloaded to EV3 hardware over Wi-Fi. Signal data are retrieved and displayed in the Simulink Scope blocks connected to signal lines of interest.
In addition, you can change the parameters in your Simulink model and have the new parameters passed automatically to the robot while it is running. Slider gain blocks can be used for parameter tuning as shown below.
To make sure it maintains its speed and follows the edge, the P controller and PID controller gains need to be adjusted. Here are some online resources which can help with tuning the controllers [link 1, link 2, and link 3].
Final comments:
- Connect the sensors to port A-D and actuators to ports 1-4. You also need to change this for each corresponding block by opening its Block Parameters.
- I observed pulsations in Robot Educator. It was determined this was due to the PWM subsystem in the original demo model, which could be specific to the track in use. I removed it to improve the operation on my track.
The modified Simulink model with above additions and minor rearrangements is shown below.
We built the Robot Educator and a Simulink model to run on it. We started with the Line Tracking example provided in the Simulink Support Package for LEGO MINDSTORMS EV3 Hardware. Working off of the simplified basic layout, we added obstacle avoidance using the Ultrasonic Sensor. Finally, we added input from the Touch Sensor to enable/disable robot movement. We calibrated the sensors, tuned the controllers, and tested the robot using External mode while the robot was running.


Comments