
Hardware components | ||||||
 |
| × | 1 | |||
 |
| × | 1 | |||
 |
| × | 1 | |||
| × | 1 | ||||
 |
| × | 1 | |||
 |
| × | 1 | |||
I love to use WiFi in my home automation projects. On this website, you can find a lot of projects using Arduino along with the CC3000 WiFi chip from TI. However, there is a major issue with this solution: you always need to connect the CC3000 chip to the Arduino board. This is not convenient if you are heavily modifying your projects as I do. You always have extra wires & components to connect (even with a CC3000 shield).
Well, it seems that TI heard us when they came with the CC32000 chip. This little chip contains a CC3100 chip (the updated version of the CC3000, with many bugs fixed) along with an ARM processor, all within the same enclosure! And it’s all compatible with the Arduino programming language.
This allows to rapidly build connected & IoT home automation projects without having several connections to make. And in this article, I will show you how easy it is to build an home automation measurement system & to log these measurements in the cloud. Let’s dive in!
Hardware & Software Requirements
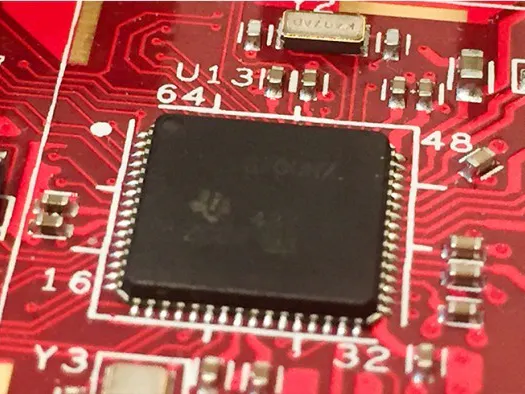
Let’s first see what we need for this project. We will use the official TI CC3200 board, called the launchpad. For the sensor, we will use a DHT11 sensor to measure temperature & humidity, and a PIR motion sensor.
This is the complete list of components that were used in the project:
- CC3200 Launchpad
- DHT11 sensor + 4.7k Ohm resistor
- PIR motion sensor
- Male/male jumper wires & male/female jumper wires
- Breadboard
Then, we’ll need some software to upload code to the CC3200 chip. This chip is not supported by the usual Arduino IDE, but TI made a clone of the Arduino IDE, called Energia. It is the same interface, same commands as Arduino, but it works with TI’s boards. You can find this software, along with a detailed guide on how to get started with the CC3200, on this page:
http://energia.nu/cc3200guide/
Make sure to carefully follow all the instructions on this page if this is the first time you are using the chip. Once the software is installed, you will also need to download the library for the DHT11 sensor:
https://github.com/MORA99/Stokerbot/tree/master/Libraries/dht
Make sure to put the dht folder inside the Energia/libraries folder on your computer.
Hardware Configuration
Let’s now see how to connect everything. This is the complete schematics for this project:
Basically, the DHT sensor is connected to the pin denoted as ‘P02′, and the motion sensor to the pin denoted ‘P62′. Note that these pins are not the pin that we will use inside the code. To find the complete correspondence between the pins noted on the board and the pins that you can use in the code, you can look at:
http://energia.nu/pin-maps/guide_cc3200launchpad/
Especially make sure to have the pink wire connected on the board. Without this wire (that actually fixes a bug of the CC3200 board) the project won’t work at all. This is the final result with all components assembled:
Logging Data in the Cloud
Now that our hardware is ready, we will see how to code the CC3200 chip to measure data and send it in the cloud. As in another article of this website, we will use the Dweet.io service to log our data. It’s a very simple and convenient website to log data in the cloud. It will also be easy to interface it with Freeboard.io, which we will use for the last part of this article.
Let’s first see the code for this part. It starts by importing the right libraries:
Then, we define an instance of the WiFi client:
After that, you will need to define your WiFi network name & password:
You also need to define the name of your ‘thing’ that will contain the data on Dweet.io. I recommend to use a complicated combination of letters & numbers to make sure you take an unique name:
We’ll skip the part where we actually connect the board to the WiFi network, but you can have a look on GitHub. In the loop() function, we read the status from the motion sensor:
And we also measure data from the temperature & humidity sensor:
When the measurements are done, we connect to the Dweet.io server and upload the data:
We also read the answer coming from the server:
You can now get the full code from:
https://github.com/openhomeautomation/cc3200-home-automation
Now, open the code with Energia, and add your own WiFi settings & ‘thing’ name. After that, you can upload the code to the CC3200 board and open the Serial monitor:
If you can see this answer from the server, congratulations, you successfully uploaded data to Dweet.io with the CC3200 chip!
Building an Online Dashboard
Now, we want to display the status of the board in real-time. Indeed, Dweet.io only support JSON data to be logged in the cloud, which is not convenient for visualisation. To actually see the data coming from the board, we will use a service called Freeboard.io.
Go there and create an account, and also create a new dashboard. When this is done, create a new datasource, and link it to your Dweet.io ‘thing’.
After that, create three panels with three widgets, one for each data coming from the board: temperature, humidity, and motion. For temperature & humidity, I used gauges, just like this one:
For the motion, as it is a binary value, I used a Light indicator widget. This is the final result:
You now have a dashboard that you can access from anywhere in the world!
Because we used the CC3200 chip, we didn’t need to connect many cables and/or external components to give WiFi connectivity to our project: it came built-in inside the CC3200 chip. I hope that this simple example gave you an overview of what is possible with the CC3200 chip.
What about you, do you also want to make home automation projects using this chip? Have you already built projects based on the CC3200? Please share in the comments!
Marco Schwartz
 Carlos Ventura


Comments