Use the Arduino IDE with ESP8266 libraries installed to upload the included code.
Hand tools and fabrication machines
Soldering iron (generic)
Rosin Core Solder
Story
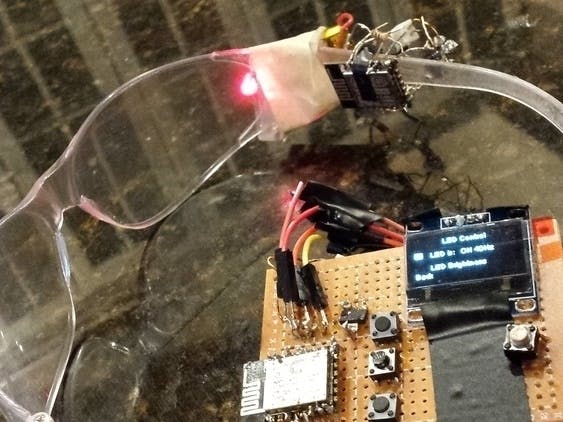
This project is centered around the creation of devices aimed at being used in the study of the effects of Alzheimer's Light Therapy on humans. In December 2016, after publishing my first Instructable, Mr. Sotiris Melissis (graduate student at NYU) contacted me regarding a newly published article on a new Alzheimer's treatment method by MIT (http://news.mit.edu/2016/visual-stimulation-treatment-alzheimer-1207), he suggested that I build a device to aid in the testing of this therapy on humans. We agreed on creating glasses that could administer the (40Hz) light therapy via a small LED in the corner of the lense, and having the glasses be wirelessly controlled by a remote with an OLED display.
The process of building the controller was the first step of creating these devices and due to the idea that they were to be wireless, I decided to work with the ESP8266 MCUs as they allow for the creation of wireless networks with their wireless AP and Client modes. The MCUs are also fairly small and have low power consumption, an attractive feature when making wearables and remote controls. One of the major design decisions of this project was the placement of the LED on the glasses as one of the focuses of the project was to give the user the ability to carry out daily tasks as they receive the treatment; this objective lead to the LED being placed in the corner of the transparent glasses, this was done in order to allow the user to maintain visibility throughout the treatment. The idea to make the glasses wireless was also conjured while the thought of maintaining the user’s freedom of movement through the therapy was in mind.
To occupy the glasses and control them, a remote with an OLED was created and an ESP-12 was is programmed in client mode to control the ESP that is connected to the LED on the glasses which is in access point mode. An menu interface is programmed into the ESP acting as a remote, to allow the user to change the state and brightness of the LED.
Remote ESP with OLED
After establishing a remote connection between the remote and the glasses, the next step was to create a standalone light bright enough to replace a room lamp that could still administer the therapy. Just like the glasses, the idea was to have the light be wirelessly controlled by the existing remote. For this, I incorporated another ESP-12 acting in station mode, the remote could sends a signal to turn on the light, the ESP on the glasses receives the signal, switches to client mode and connects to the ESP on the light to tell it to turn on. The goal to create a light that could replace a lamp, meant there was a need for high powered LEDs, this also meant that the lights couldn’t be powered directly from the ESP’s IOs as the high powered LEDs require more current than the ESP can source. A power adapter was used to provide the required current for the LEDs, and a transistor was embedded into the circuitry to allow the ESP to control the LEDs that make up the light.
ESP connected to glasses
With the circuitry and connection logistics between the remote, glasses, and light worked out, the menu on the remote was updated to accommodate the changes and allow for a sleep mode on the remote. The sleep mode was only incorporated on the remote as it is the only MCU that remains in client mode and thus it does not need to constantly check for received data from the other devices. As for the glasses, a small capacity battery was chosen to power the ESP due to the design restrictions calling for a small device in order to fit on the user’s glasses.
Although the remote is the usual method of controlling the glasses and the lights, they can also be controlled via a computer or phone by manually connecting to their networks and sending a list of commands to specific addresses (I will release the commands involved in this form of control to anyone who is interested in testing them out, just email me at addyirankunda@gmail.com). The instructions on how to build, and use the remote, glasses, and lights are below (the code is also provided).
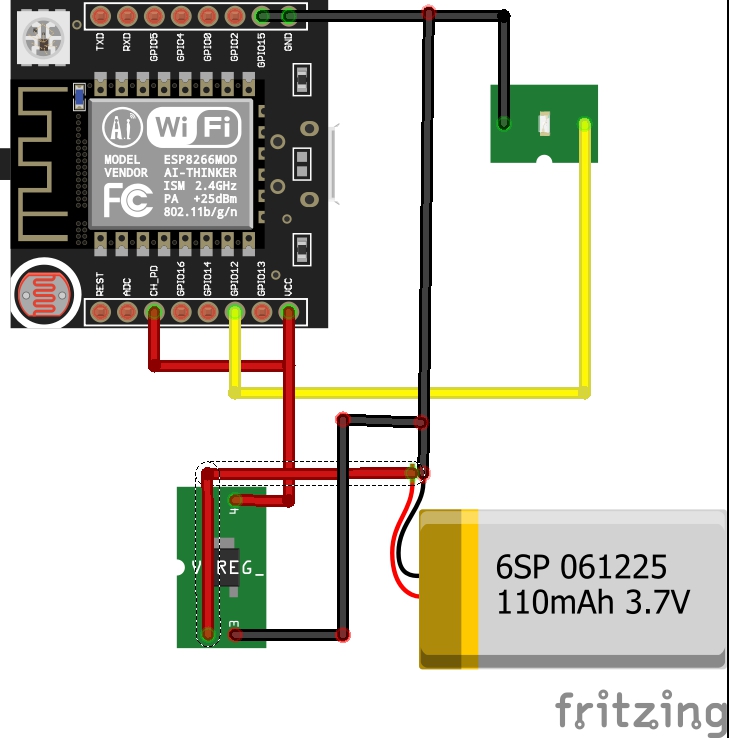
Schematic detailing how to assemble the circuit that gets attached to the glasses. The LED in the schematic should be placed in the corner of the glasses, for visibility by the wearer. The ESP-12f does not look exactly like the one in the schematic, the software that I used did not have the model for a regular ESP-12F, so I used this one
Controller Schematic
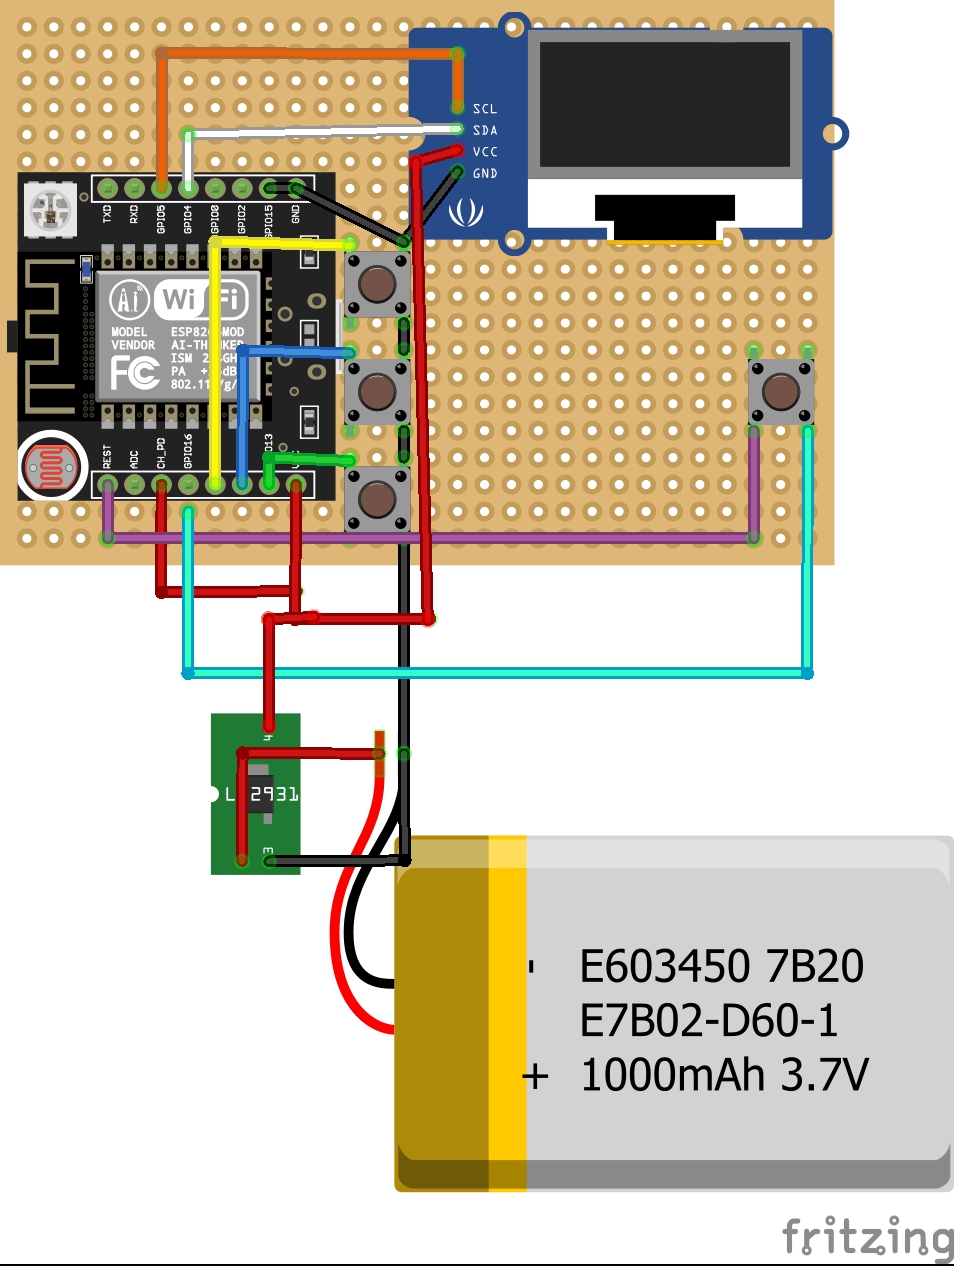
The schematic detailing how to assemble the controller with the OLED screen. In reality, the display will take up more space than portrayed. The ESP-12f does not look exactly like the one in the schematic, the software that I used did not have the model for a regular ESP-12F, so I used this one.
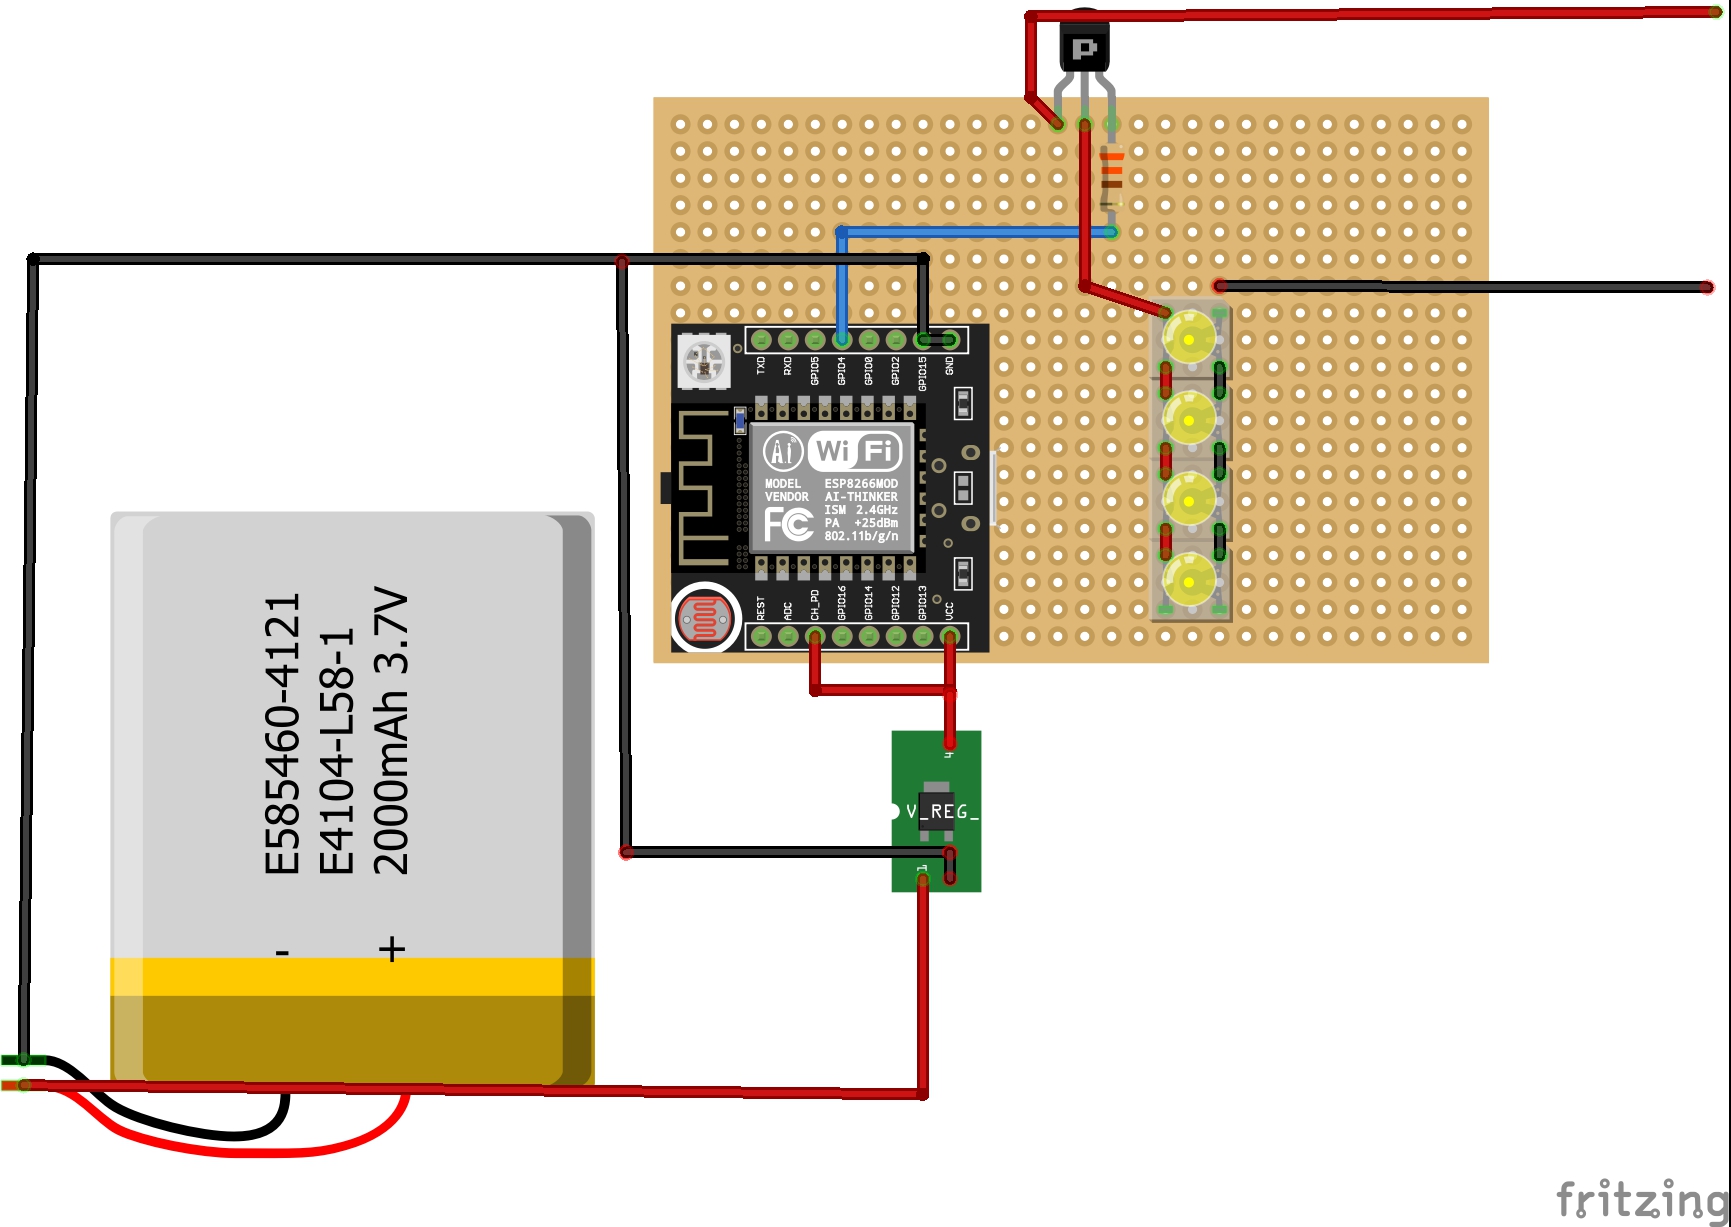
Light Schematic
Schematic detailing how to connect the ESP controlling the main light to the high power LEDs and the NTE12 (PNP transistor, make sure you follow the hookup as shown exactly). The red and black wires going away from the PCB are attached to the anode (+) and cathode (-) of the 3V Power Adapter. PLEASE MAKE SURE YOU DO NOT HAVE THE POWER ADAPTER PLUGGED IN WHILE BUILDING THE CIRCUIT (it has a high power output that can kill you).
Code
Standalone Light
This is the program that runs on the ESP which controls the standalone high power LEDs that are on the transistor/ power adapter circuit.. No custom libraries are required to run this code, other than the default ESP8266 libraries.
Remote Control
The code for the ESP being used as a remote. In order to successfully run and compile this code, you will need to install the "ESP8266 OLED SSD1306" library. You can install it directly in the IDE by searching for it. More information on the library at: https://github.com/squix78/esp8266-oled-ssd1306
Glasses
This is the program that runs on the ESP which controls the LED on the glasses. No custom libraries are required to run this code, other than the default ESP8266 libraries.


_3u05Tpwasz.png?auto=compress%2Cformat&w=40&h=40&fit=fillmax&bg=fff&dpr=2)


Comments