


Hardware components | ||||||
 |
| × | 1 | |||
 |
| × | 1 | |||
 |
| × | 1 | |||
Hand tools and fabrication machines | ||||||
| ||||||
 |
| |||||
As part of the Master in Design in Emergent Futures, I am exploring the significance of materials as carriers of history, culture and human craftsmanship. In today’s world, nearly everything we own is mass-produced. We rarely know where our products come from, how they are made, or who makes them. This detachment strips objects of any personal significance, reducing them to mere commodities in an endless cycle of consumption.
In a material sense, clay perfectly embodies the core ideas of this project. It is one of the oldest and most fundamental materials used by humanity, carrying with it a deep historical and cultural significance. For my final presentation, I am crafting a traditional Indian vessel used for drinking tea, called 'kulhad', as a way of encompassing my entire narrative in the act of drinking tea out of these cups.
On this final leg of my master journey, I wanted to attempt making my own pottery wheel to craft the kulhads. It was a challenge to say the least.
1. Dismantling a discarded heater to use the motor
First step was to scavenge for the parts that I needed. Most important was the motor, I began by disassembling a heater, access the fan motor. The system inside was a bit more complex than I had anticipated. After initial testing, I realized that the motor only worked when the heating coil was switched on. Another issue was that it was an AC Motor drawing 220 Volts, which made it quite unsafe to tamper with, not only during the process of making the wheel but also while working with wet clay. I decided to only use the plastic casing of the fan since it provided a centered based for the motor, and replace the motor with a geared DC Motor, that could withstand pressure without stopping.
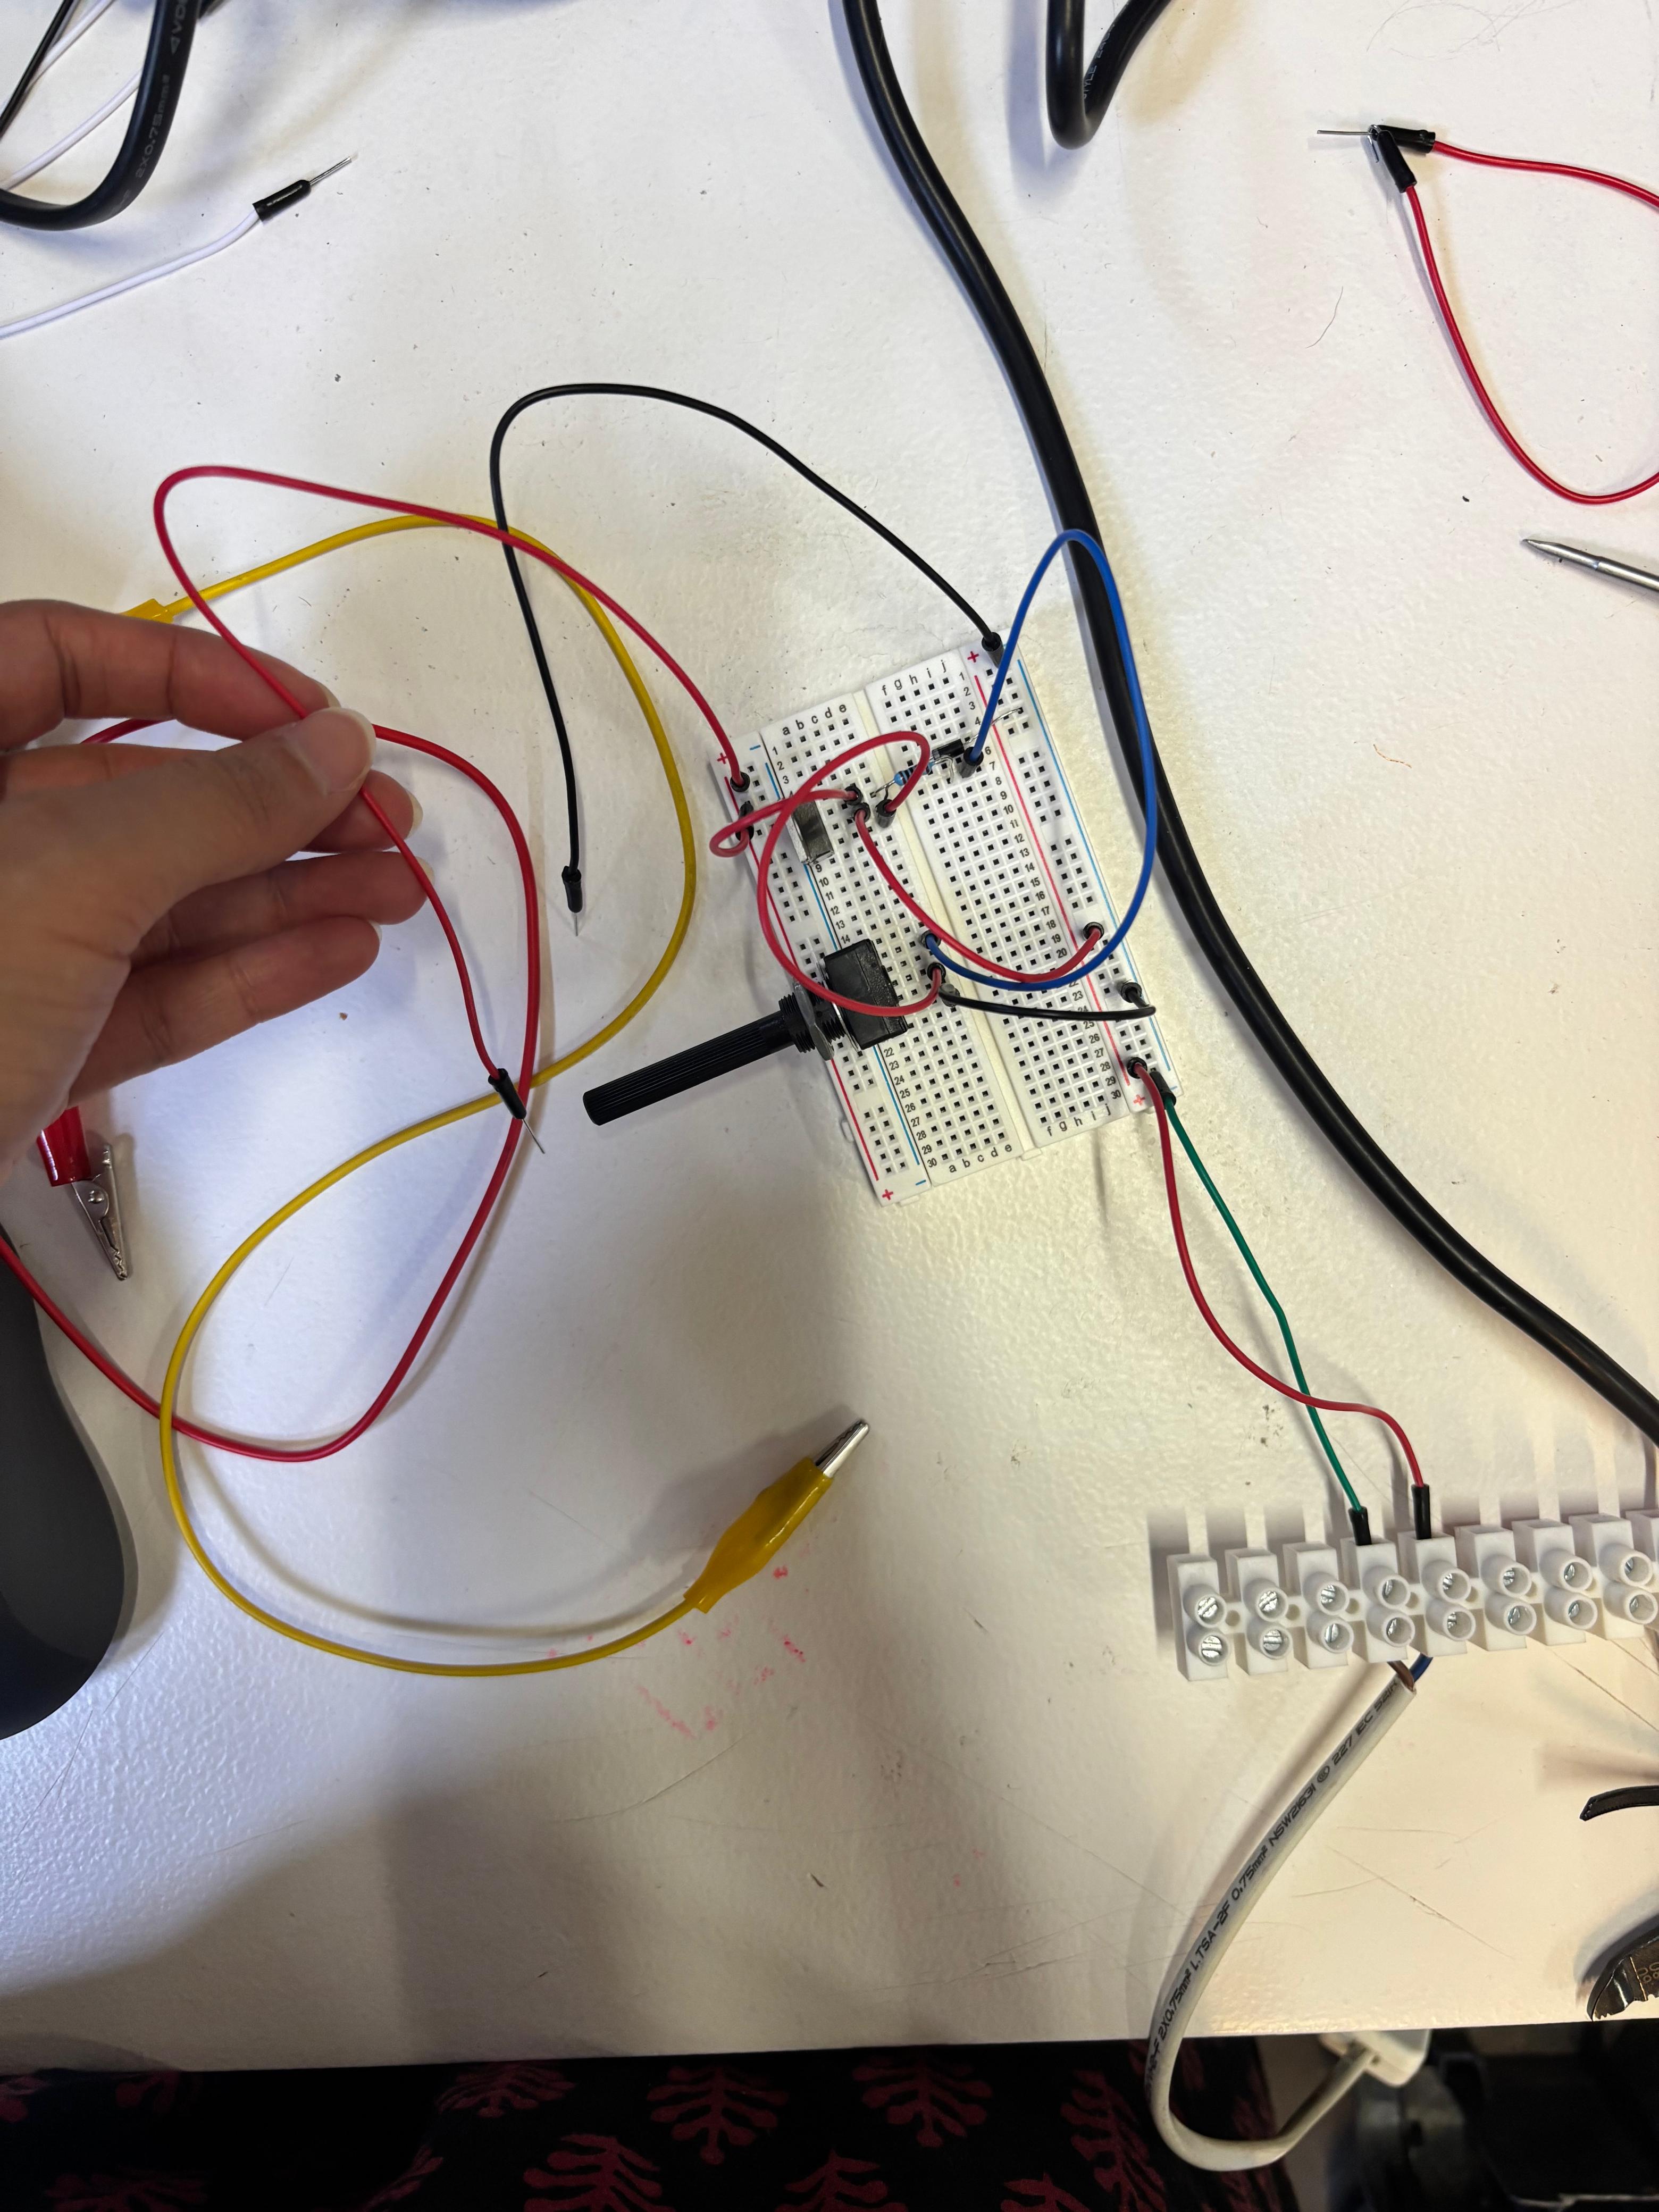
2. Adding a dimmer
Now that I had the motor working, the next step was to make the speed adjustable. With the help of a mentor, I assembled a circuit with a MOSFET and a potentiometer to make a dimmer. Using a 20V power cable, I could achieve a good speed for the wheel.
Assembling the motor and the base
To fit the DC motor onto the existing base, I designed and 3D printed a two part clamp - one that holds the motor and the other attaches to the base.
After everything was in place, I tested the pressure response of the motor with a makeshift wheel. As compared to the motor head, the wheel had too much of a cantilever and hence less stability. It required a support that would distribute the load. I tried to use a metal piece I found to see if it it provides the support it needed, but it was not a snug fit. I tried to 3D print a sleeve to fill the gap but it wasn't working very well.
I tried using another motor to rule out the possibility of a faulty motor, however it ended up burning the MOSFET and not being very useful.
Now the only proposed solution was to 3D print a funnel-like support for the cantilevering wheel to reduce the wobbliness.
Once the support was printed, all that was left was the final wheel to go on top. I made the file, and used a CNC mill to cut the circle and mark the locations of screws of the support. Assembled all the components and finally it was ready to be tested. It still has some issues to be resolved but its working for making small ceramics.
First few tries with the new wheel :
Practice makes perfect! So hopefully this should be just the beginning of my ceramics explorations! :)
CCL v1.0 — AI contributed as Drafting Assistant in Research and Ideation. All other phases were fully human-led.
AI R1 I1 – v1.0


Comments