


Hardware components | ||||||
_ztBMuBhMHo.jpg?auto=compress%2Cformat&w=48&h=48&fit=fill&bg=ffffff) |
| × | 1 | |||
 |
| × | 2 | |||
 |
| × | 1 | |||
 |
| × | 1 | |||
 |
| × | 1 | |||
 |
| × | 1 | |||
Introduction
Project Simulation
Read moreThis project is an example of automatic vehicle gateway.
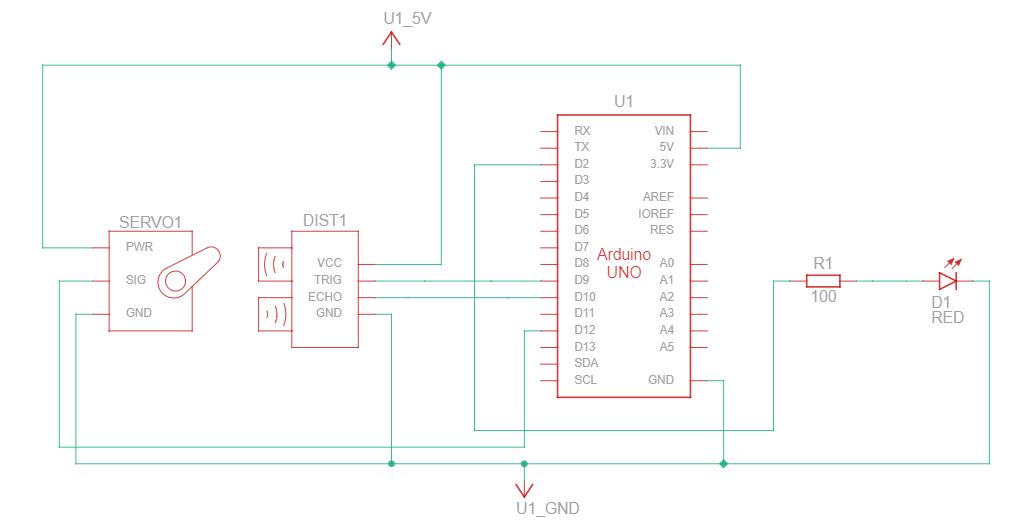
WorkingWhen a vehicle passes in front of the ultrasonic sensor, the servo motor rotates to an angle such that the vehicle can pass through it. When no vehicle is detected, the servo motor rotates to the original so that no vehicle can pass.
PhotoImage
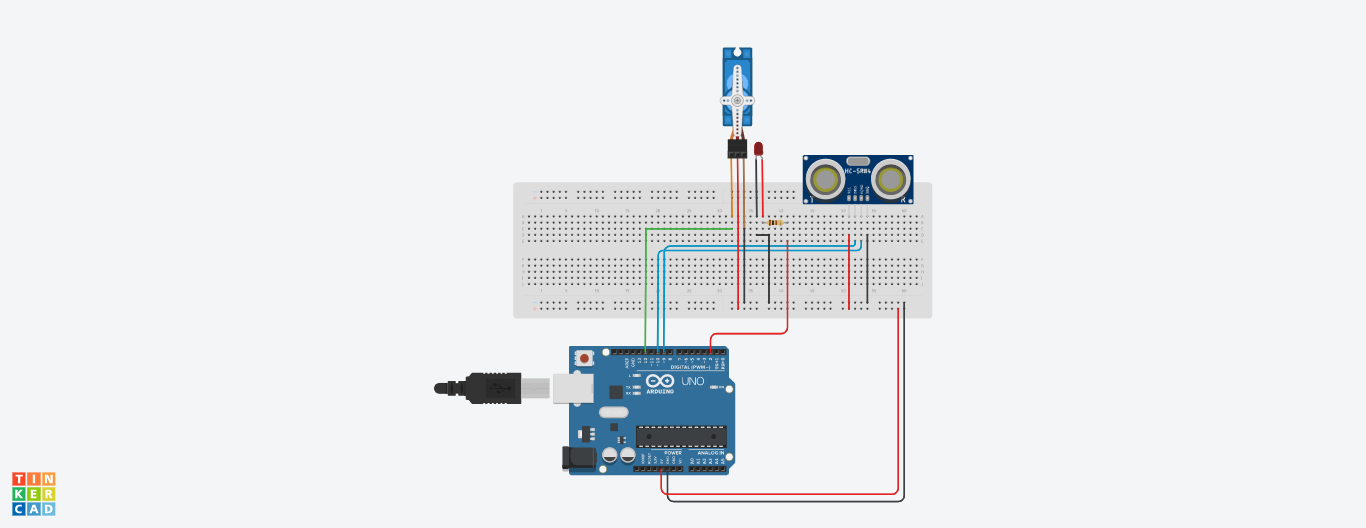
Simulation in AUTODESK Tinkercad


Comments