


Hardware components | ||||||
 |
| × | 1 | |||
| × | 1 | ||||
Software apps and online services | ||||||
 |
| |||||
| ||||||
 |
| |||||
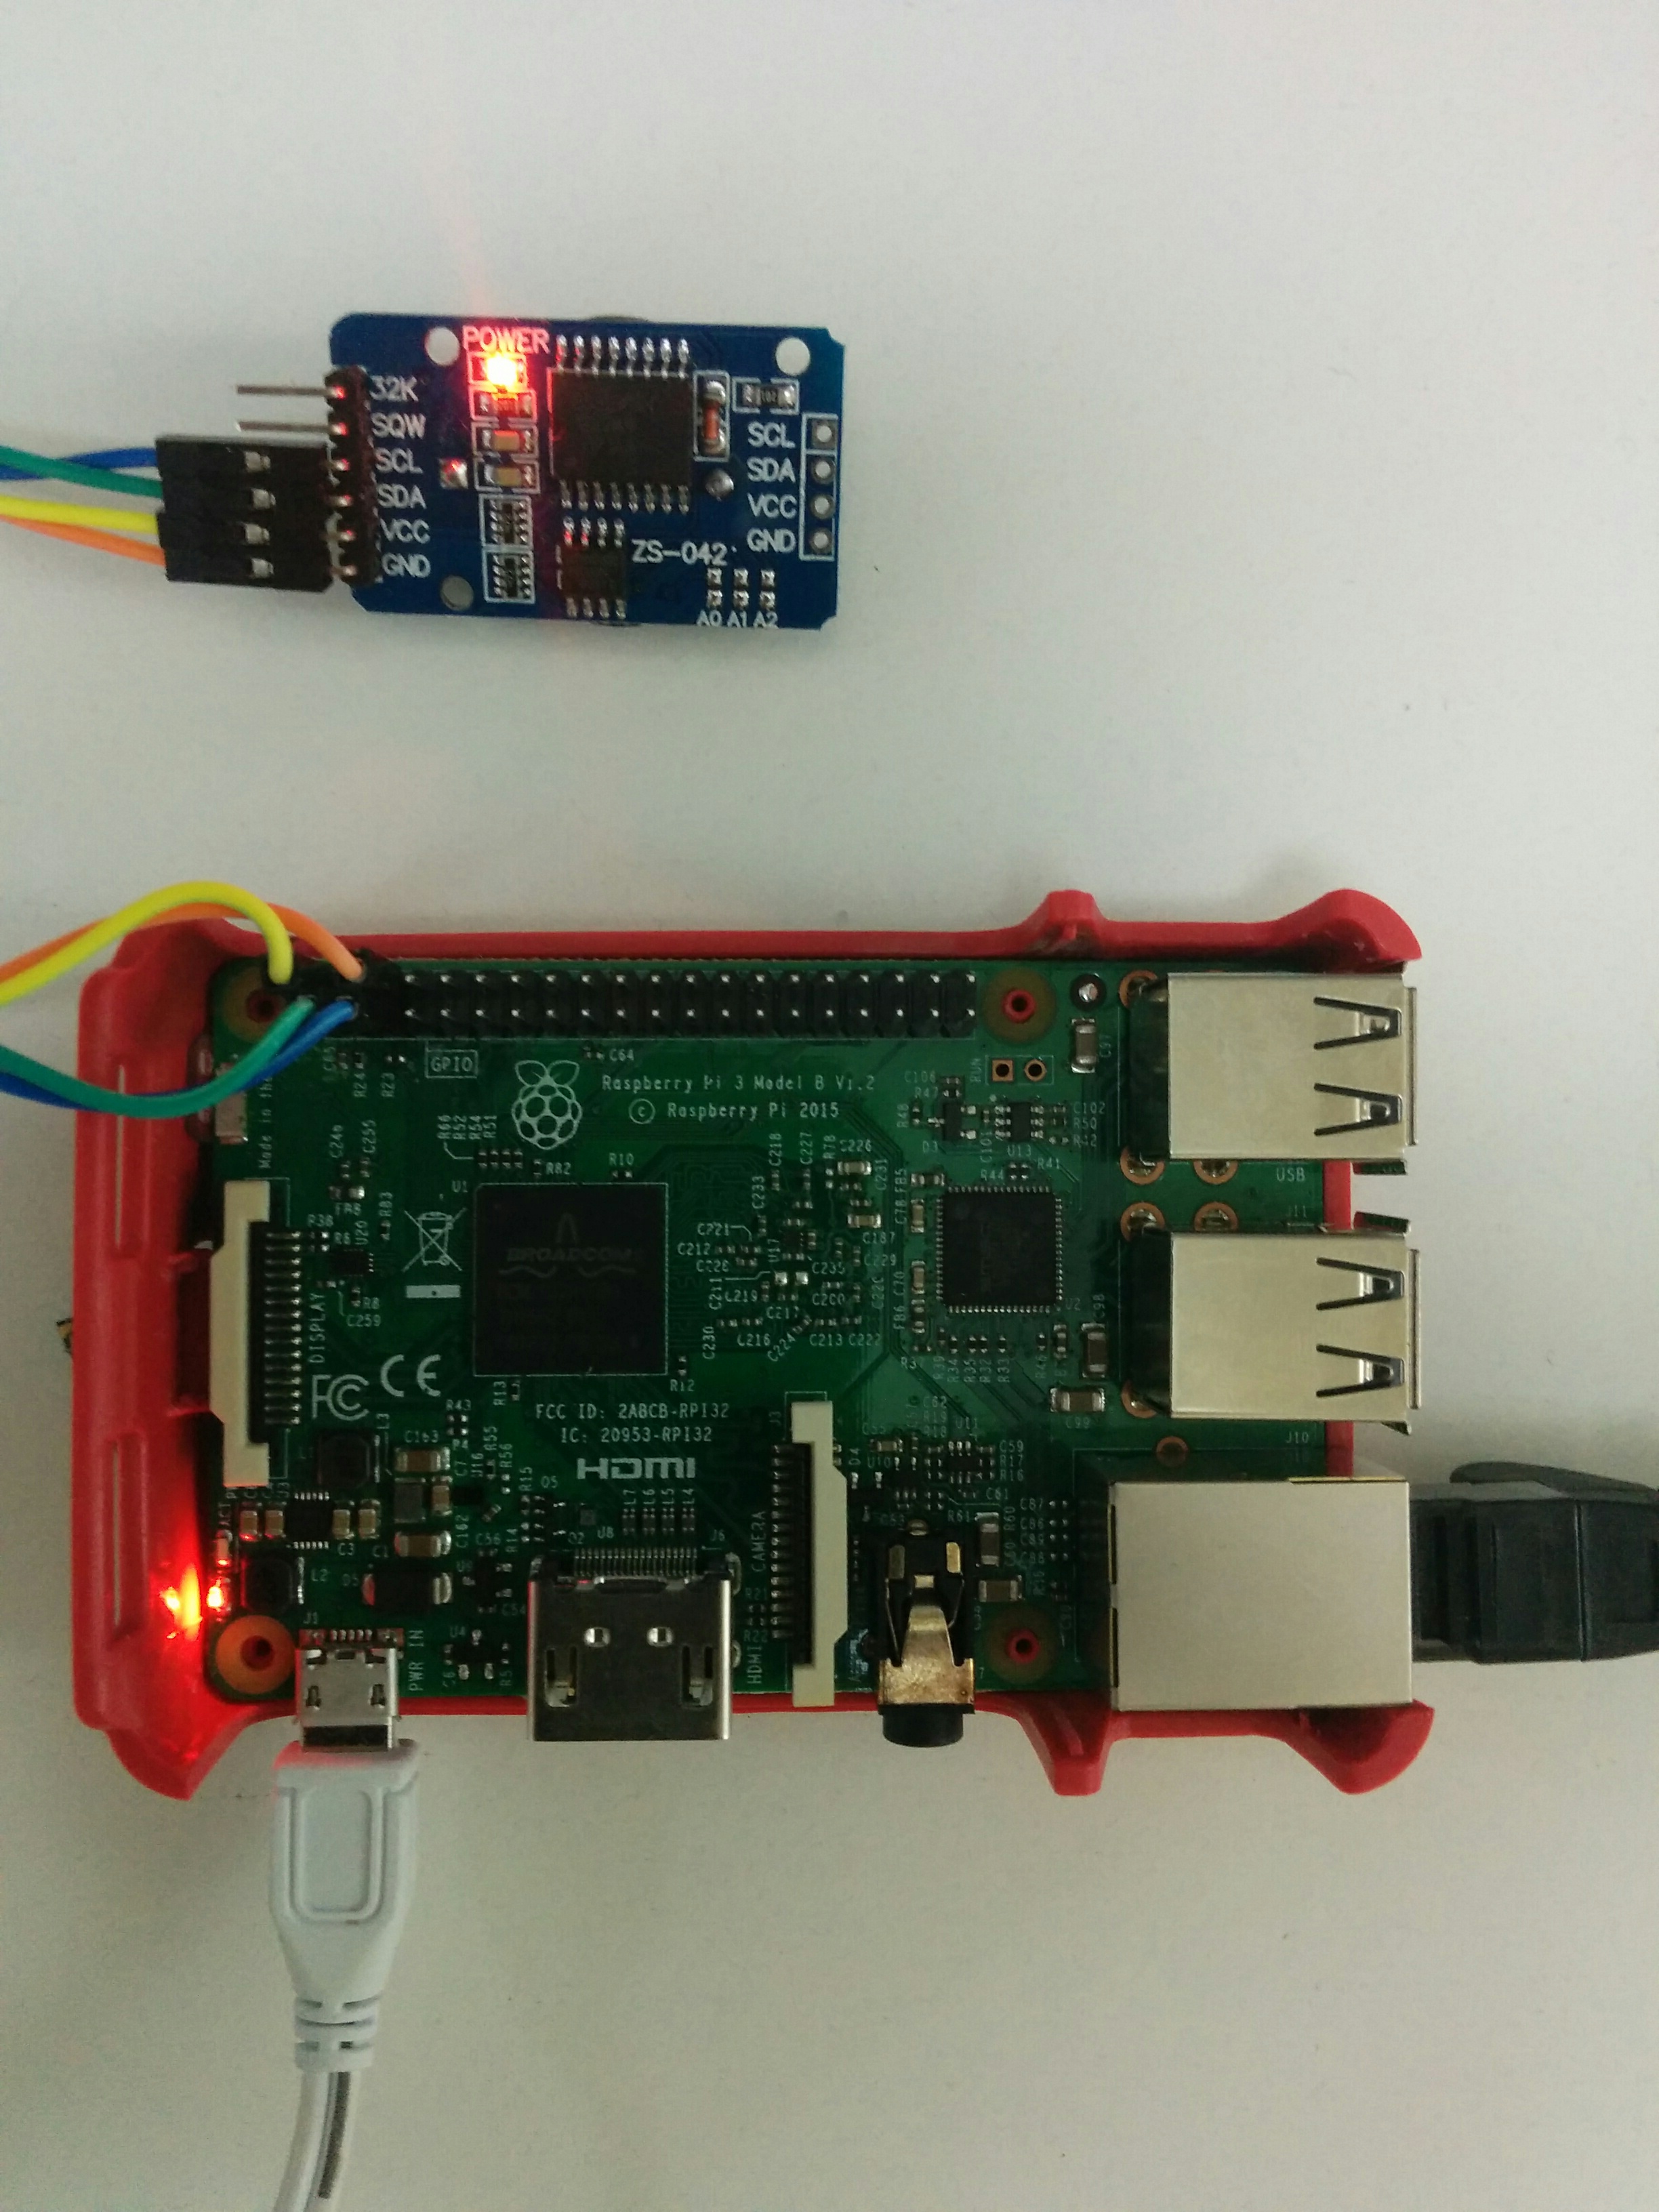
Raspberry PI hasn’t a retentive real time clock, so, at start, we have to manually synchronize it. It is true that the current date and time can be automatically obtained from the network connection, but Raspberry isn’t always online, especially in IoT applications.
Part 1So the solution may be to buy an RTC for little money and to connect it to the board via I2C protocol. I did it buying a DS3231.
I choose Windows IOT as operative system and POWER-KI as development enviroment. It is still little known, but very powerful to quickly develop IOT application, and not only that, even with remotable and cloned interfaces.
All you need is freely downloadable from www.powerberry.tech site. Only for Windows IOT, you have to go on the official website of Microsoft, but on powerberry.tech there are provided all references to freely obtain the operating system from Redmond.
Once you have installed Windows IOT on your micro SD and added PowerBerry (it is a simply copy of files to a folder, as explained on the site), you can add my application, either in full version, either in command line version (to be launched as one-shot at startup to synchronize the Raspberry date and time with DS3231).
The full app pwb-DVC-RTC-DS3231 must be copied to c:\DATA\PWK-PRG\powerberry\
, while the command line version RTC-synch.pka can be put in the same place, or even simply in c:\DATA\
.
The full app is handled through PowerBerry. After you start the system, you can connect from your PC, using the “POWER-KI ES Loc” desktop icon. To have this command you need to have installed the free development eviroment POWER-KI on your PC, or simply its GUI (this is very small, less than 5 MB).
Clicking on the icon, it should appear the main screen of PowerBerry.
This may be preceded by a board selection screen to choose the Raspberry to connect with, but just in case you have more Raspberry with PowerBerry installed on.
The PowerBerry main screen shows the list of applications on your micro SD, among which there should be out pwb-DVC-RTC-DS3231. Select it and click the LAUNCH button that appears to the right. When the application status change to ONLINE, you can connect with the CONNECT button, that appears when the app is ready.
Part 3You can also set the application in autorun, so that the Raspberry automatically active it at launch to synchronize the date and time of the system with DS3231 RTC.
Pressing CONNECT, it appears the main screen.
It is a kind of digital clock: you can see the current time, day of week and date in American format. At the bottom there are tho buttons: TERMINATE, to stop the app execution, and SETUP to configure it. You can also simply close the interface by pressing the dot in the upper right: in this case the app keeps running on Raspberry.
By pressing SETUP, the setting screen appears.
The first section is titled “CHANGE RTC SETTING” and it shows the real time updated time and date on the DS3231. The update ends when you CLICK on any fields. Changing the time and/or date and pressing SAVE, the settings are set to the DS3231, and the fields are again real time updated.
Below you can see the “SYSTEM DATE AND TIME” box, with the current date and time on the Raspberry board. If you have synchronized them, it should match with the DS3231 one, otherwise it may differ. Press the “SYNCHRONIZE SYSTEM DATE/TIME” button to make them identical, synchronizing the board.
If you want the application to synchronize Raspberry automatically at startup, check the “Auto synchronize date/time at startup” box. Obviously you need the application to be automatically launched at the board startup by RaspBerry, and then the app has to be set in autorun as well as RaspBerry (read the RaspBerry explanation on official site).
Part 4Otherwise, the simplest solution is to use the command line version of the software. To activate it, you need to install the PowerBerry enviroment on your Raspberry (ie copy its file) and run this command line:
c:\DATA\PWK-PRG\PWK-IOT.EXE <path of pka>\RTC-SYNCH.pka
You can launch it from the browser control panel of Raspberry, or make it automatically run by the scheduling system, or call it by another program.


Comments