

Hardware components | ||||||
 |
| × | 1 | |||
 |
| × | 1 | |||
Software apps and online services | ||||||
 |
| |||||
| ||||||
 |
| |||||
This ESPWatch Starter Kit is designed for beginners to help learn how to create an ESP watch with a detailed guide. It also enables those starting tou tto dive into the electronics world, with 1-2 hours’ learning, a non-electronic starter can create this ESP watch, to enjoy the joy of creating something by oneself.
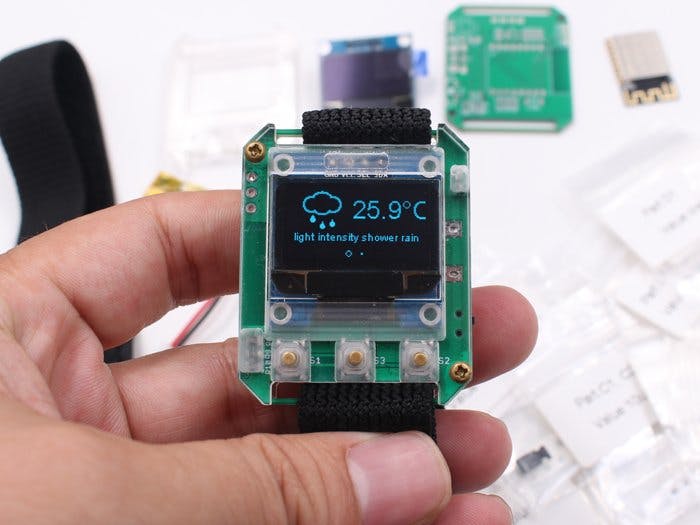
The ESPWatch is based on ESP-12 WiFi module. It gets the date/time and the weather forecasting in few days from Internet server, and can also remote control the local instruments, such as relay/LED/fan. With this learning, you will gain an understanding of basic component skills, like soldering/Arduino programming/WiFi usage/basic http protocol. It's the first and easy step to get into the electronics/programming world.
There we also prepared simple case/watchband, so that you can get it works on your wrist within a few minutes.
Step 1: Soldering & Assembly
Download the Arduino IDE and . add the ESP8266 core into Arduino IDE; and install the :Ntpclient library.
- Arduino-MQTT: https://github.com/256dpi/arduino-mqtt
- ThingPulse ESP8266 OLED SSD1306: https://github.com/256dpi/arduino-mqtt
- TimeLib: https://github.com/256dpi/arduino-mqtt
- ESP8266 Weather Station
- JSON Streaming Parser by Daniel Eichhor
1. Log in the cloudMQTT (you will need to create an account)
2. Create a new instance
3. Then here, you can get the instance info.
We use the ThingPulse (https://docs.thingpulse.com/how-tos/openweathermap-key/) to get the weather forecasting data. The final data from OpenWeatherMap (https://openweathermap.org/price).
Let’s use the free data:
After registering, you will get the API key and city ID:
Connect the ESPwatch to PC with PL2303 UART wire. The drivers can be found: http://www.prolific.com.tw/US/ShowProduct.aspx?p_id=225&pcid=41 After driver installed, it will act as a COMM port:
Open the watch.ino sketches:
1. Change SSID and password of the Wi-Fi.
2. Modify hostname, port, user and user_password for MQTT, and the weather_map_ID and Location_ID.
We can now update the codes to ESPWatch now. Select the right COM port and board in Arduino IDE:
Hold the FLASH button; Power on the ESP8266 by the SW1, while the FLASH button holding on, to put ESP8226 into bootloader mode.
If no exceptions happen, the ESPwatch should work!


Comments