The driving idea of this project is to study different methods of controlling a robotic prosthesis of a human upper limb. Since this prosthesis aims to improve the quality of life of people with upper limb amputations, helping to perform routine tasks considered simple for non-amputees. It is hoped that this study will help in the dissemination of the technologies that will be studied and that in the future it will open doors for the improvement or discovery of new technologies.
Robotic prosthetics, to many people, may still seem like something out of science fiction movies, a technology still unattainable. However, there are already prostheses on the market, especially those for upper limbs, of the most diverse types and purposes. However, like most technological innovations that are commercialized, its access becomes unfeasible for low-income people due to the high cost of the technology used.
Despite the prostheses that are commercialized have a high value, the technologies that compose them can easily be replicated in the home environment for a much lower price than the commercial prosthesis. However, when trying to replicate these prostheses, the main challenge is to find a way to effectively control them, managing to repeat the most diverse possible movements that the amputated limb would be able to perform.
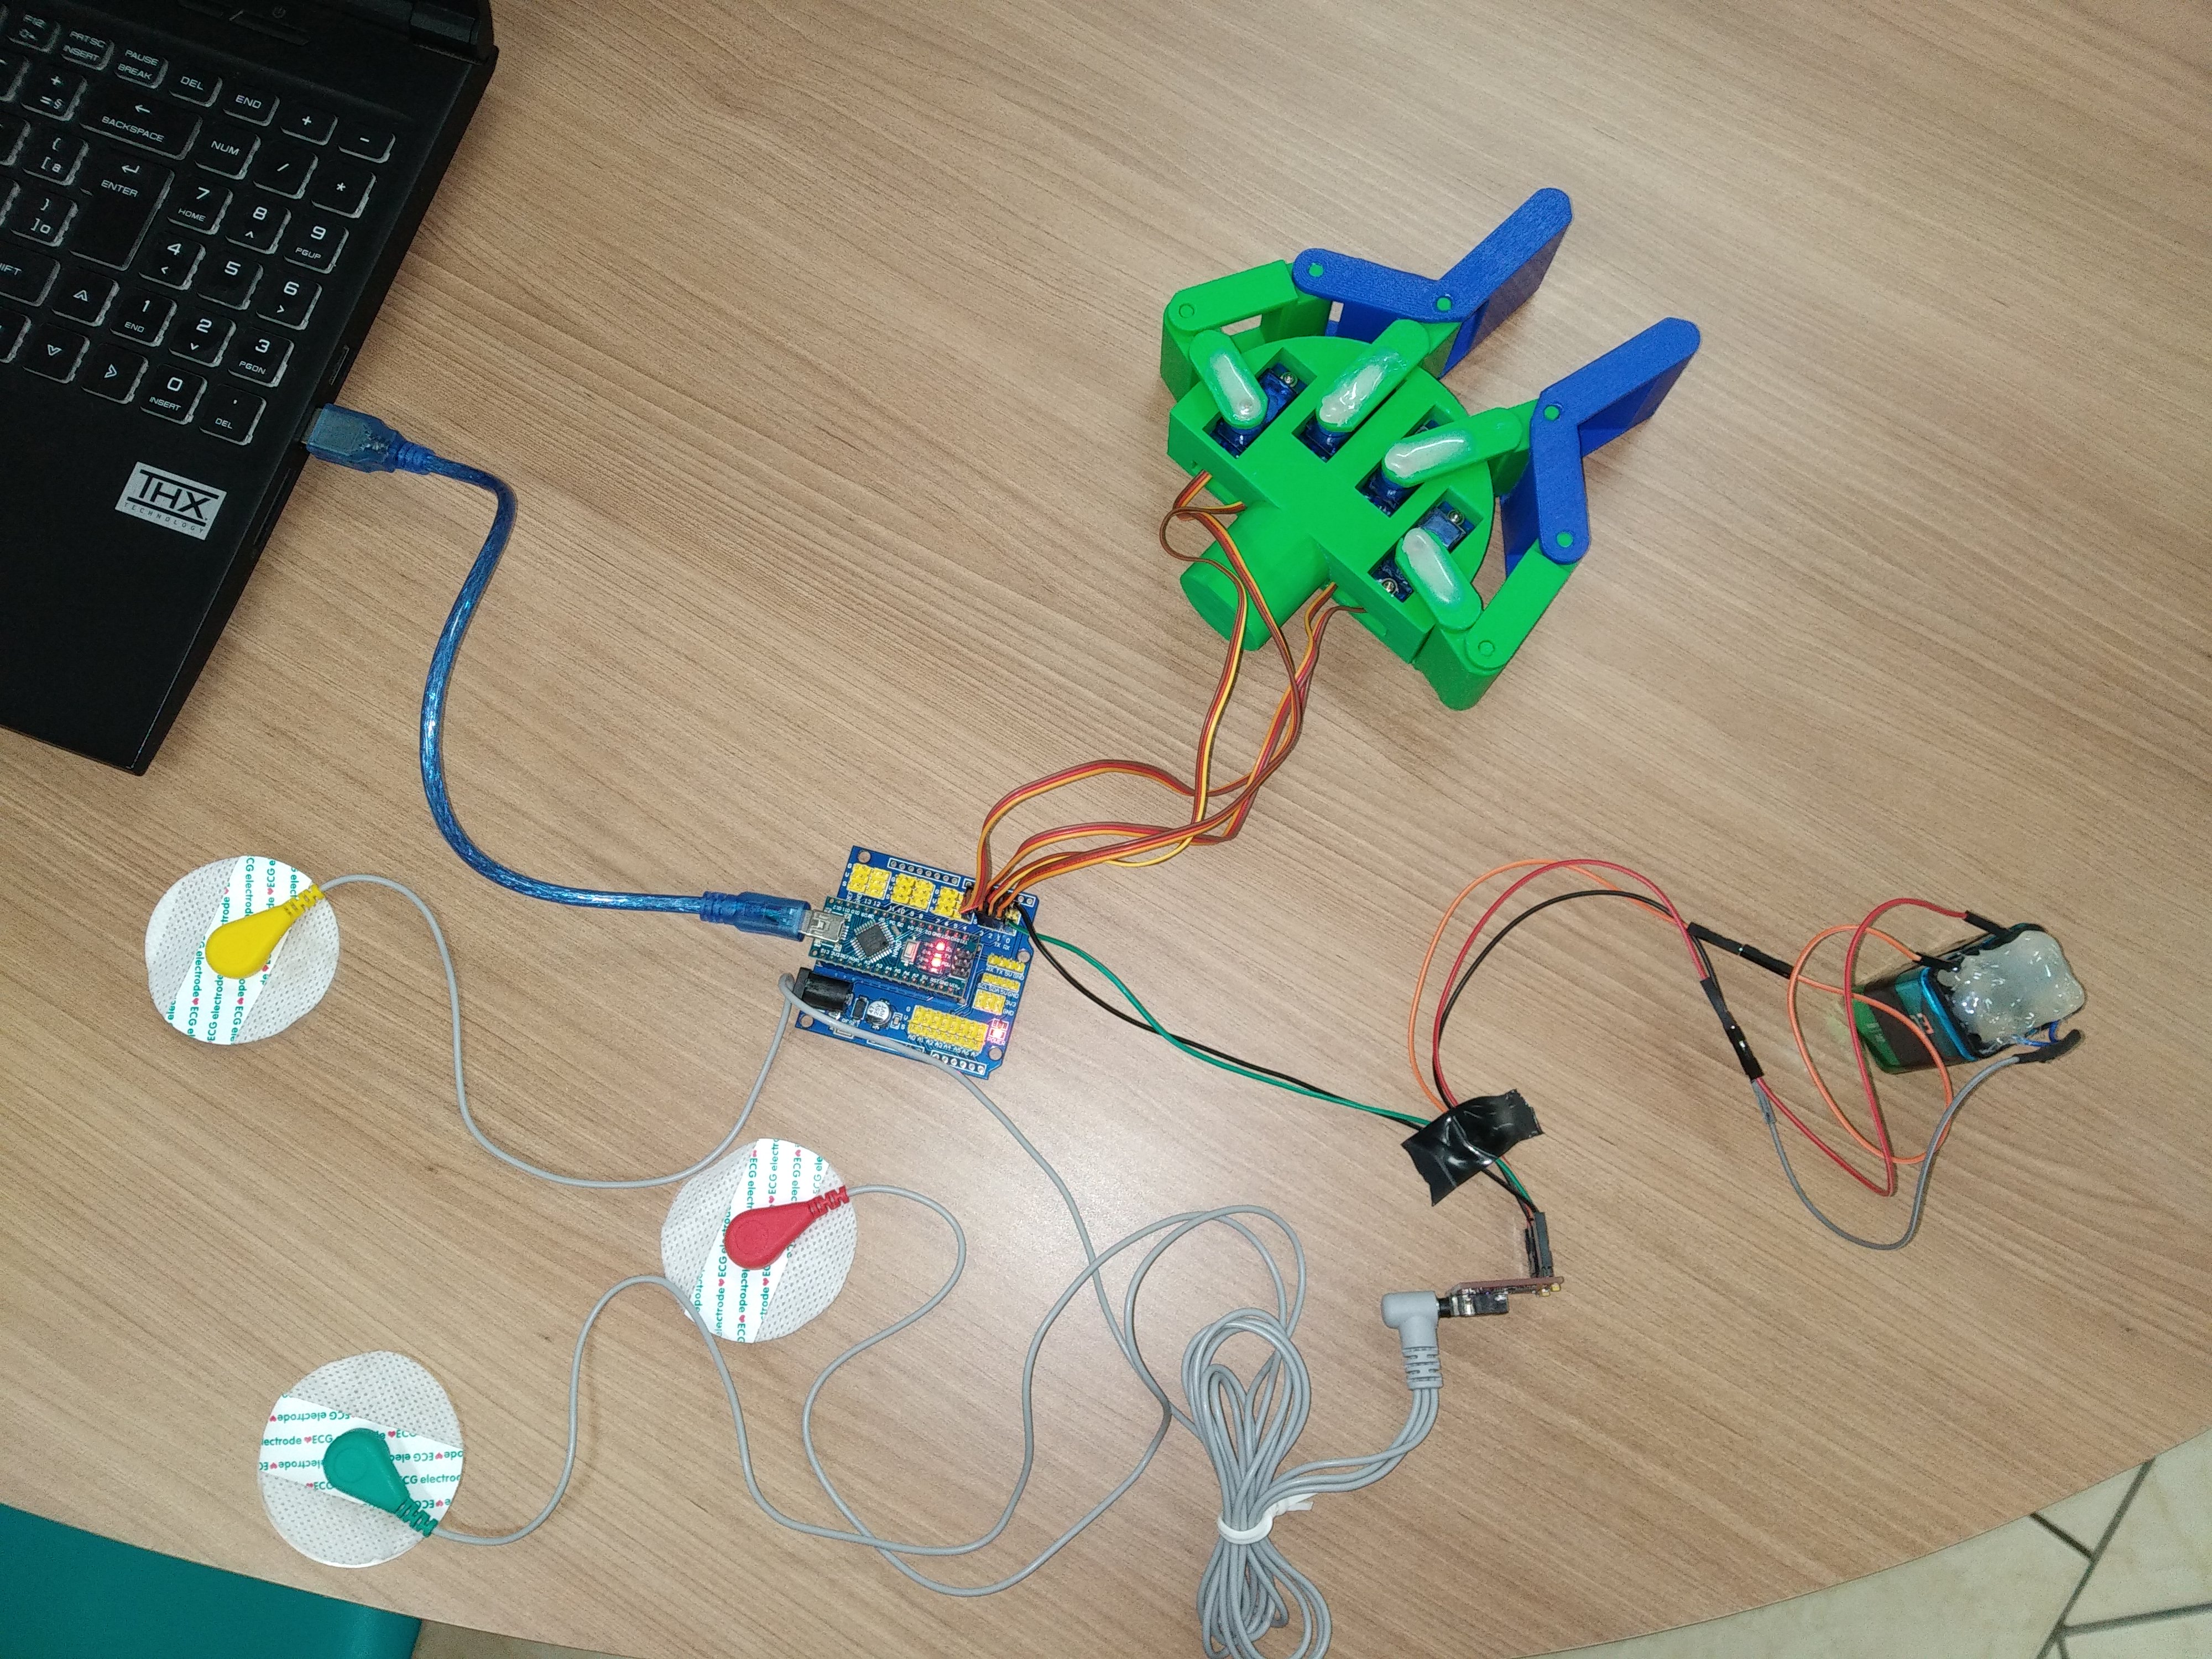
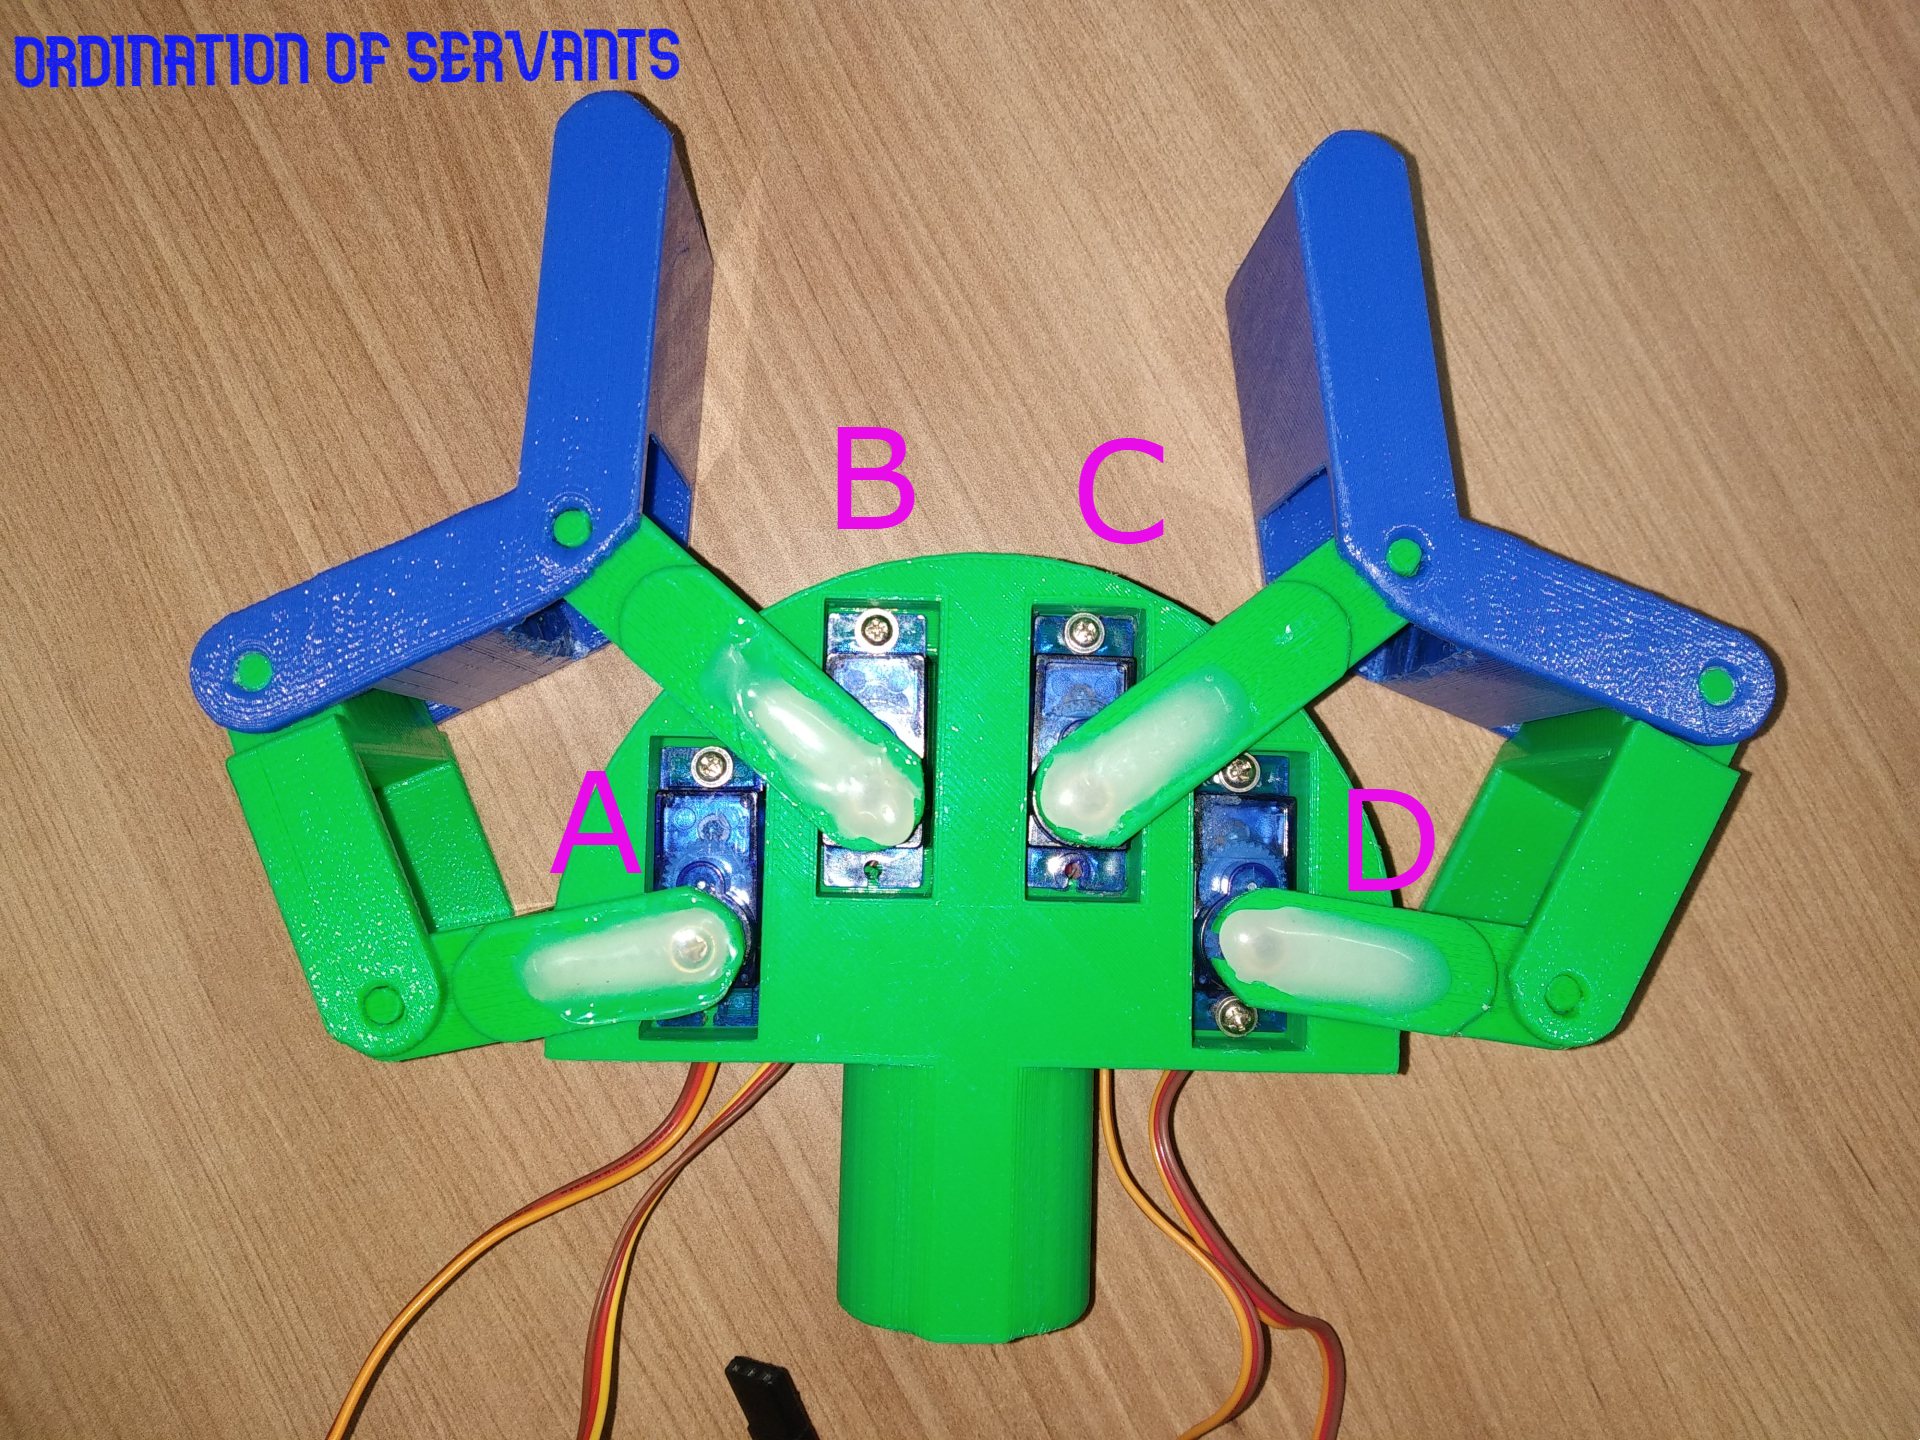
Based on the difficulty of using technologies to control prostheses, this project aims to provide the creation of a homemade robotic prosthesis capable of facilitating the daily lives of people who have suffered from upper limb aputations.


_3u05Tpwasz.png?auto=compress%2Cformat&w=40&h=40&fit=fillmax&bg=fff&dpr=2)
Comments