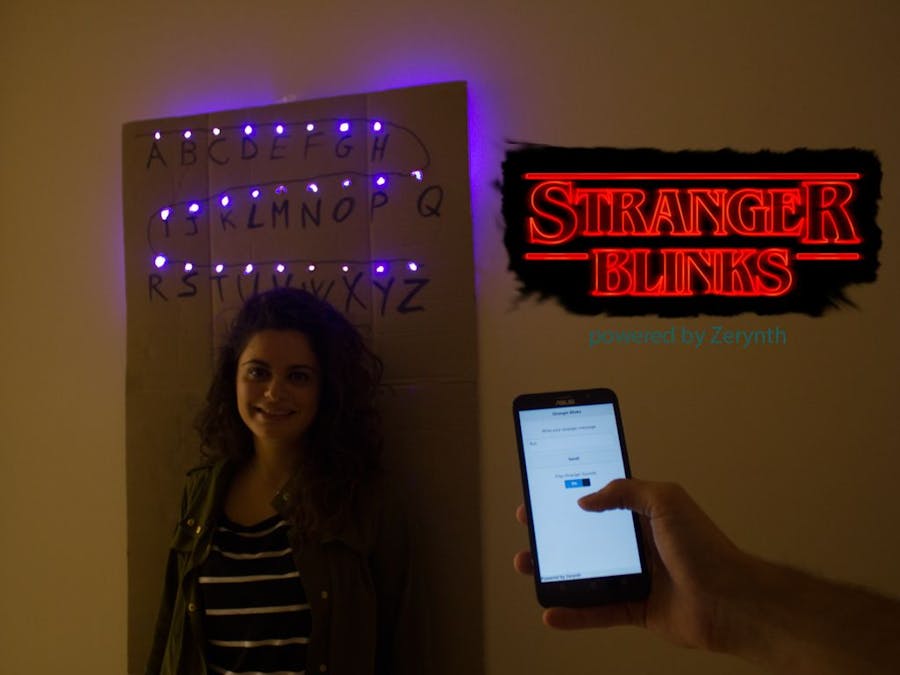
Halloween is coming up soon and probably you need something quick and easy to make. This is the project for you!
We think having a wall of LED on your shoulders, where you can spell out messages from the Upside-Down is the best way to impress your friends and to cheat the Demogorgon.
The design is very simple, as most of the dirty job is done for you by Zerynth, the programming tool used to make this project. Zerynth allows makers and professional designers to develop IoT and Embedded solutions using Python for Microcontrollers.
Step 1: Stranger Things you needThe project requires few elements:
- Zerynth Studio: a multi-platform Python development environment with cloud sync and board management features. No matter which OS you use, Zerynth runs! Just download Zerynth Studio and install it.
- Zerynth App: the Zerynth mobile interface for smart objects and IoT systems. Any mobile will become the objects display and remote controller.
- Zerynth Shield: A ready to use multi-sensors board that adds smart functions to your everyday life objects. In alternative, you can use a simple buzzer, from which you can play the Stranger Things theme song in RTTTL!
- Arduino DUE or ST Nucleo or Particle Photon or UDOO or NodeMCU(ESP8266) or Flip&Clip by Mikroelektronika. Zerynth is multi-board compatible! You can find all the supported boards here.
- If you not use Particle Photon or NodeMCU (which have a wifi module onboard), you need an element that connects the board to the Zerynth App, such as a wi-fi shield (with the CC3000 wifi chip by Texas Instruments) for Arduino DUE or the WiFi Plus Click (with the MCW1001A wifi chip by Microchip ) for the Flip&Click.
- 2 Addressable RGB 30-LED (WS2812B) Strip, 5V, 1m by Adafruit or Pololu
- a cardboard large enough where to write an alphabet.
- A portable power bank and a USB cable long enough to let you put it in your pocket.
In our case, we have chosen to make the project using a Particle Photon and a Zerynth Shield.
Step 2: Assembling- Connect the input connector of one Neopixel strip to the output connector of the other one.
- Place the new 2m NeoPixel strip on the cardboard to and mark the points where the holes will be made. We have chosen to put a letter every 2 leds.
- Paste the strip on the cardboard being careful to match the holes with the LEDs. Attention, take note of the matching between the letters and the position of the LEDs on the strip because this relation will be hard coded during the programming step.
- turns the cardboard and draw the letters.
- Paste a little box where to put the board and the Zerynth Shield (or a simple buzzer)
- Connect the input connector of the first NeoPixel strip to the related port on the Zerynth Shield. Port pins are: GND; Vin; LED.
- Connect the board to the PC to program it
Using Zerynth is very easy! All the following steps are explained in details in this getting started:
- Create a Zerynth account.
- Connect and "virtualize" your board.
- Install the necessary modules (e.g. you need RTTTL and NeoPixel modules) using the Zerynth Package Manager.
- create a new project. Attention: you need to create 3 files: main.py, template.html and project.md
- copy the attached code. You can also find it on github
- uplink the code on your board and you're done!
After turning on the board, this will automatically connect to the preset network. Then just open the Zerynth App, which will go in search of Zerynth objects connected to the network, select the object of interest, in this case that one called "Stranger Blinks", and you can interact with it! In this case, the Zerynth App shows a textarea form where to digit the message, a button to send the message and a flip-switch to enable and disable the buzzer.
The code is very simple and has a lot of comments. For any questions or suggestions please feel free to post on the Zerynth community forum.
Step 4: Run!Alright, you are ready to run and ask for trick or treat! Don't forget to take some Eggo Waffles for Eleven!
Luigi F. Cerfeda ( @L_F_Cerfeda) - Zerynth team


_xIl5PcEdnz.png?auto=compress%2Cformat&w=40&h=40&fit=fillmax&bg=fff&dpr=2)
Comments