

Hardware components | ||||||
 |
| × | 1 | |||
 |
| × | 1 | |||
_ztBMuBhMHo.jpg?auto=compress%2Cformat&w=48&h=48&fit=fill&bg=ffffff) |
| × | 1 | |||
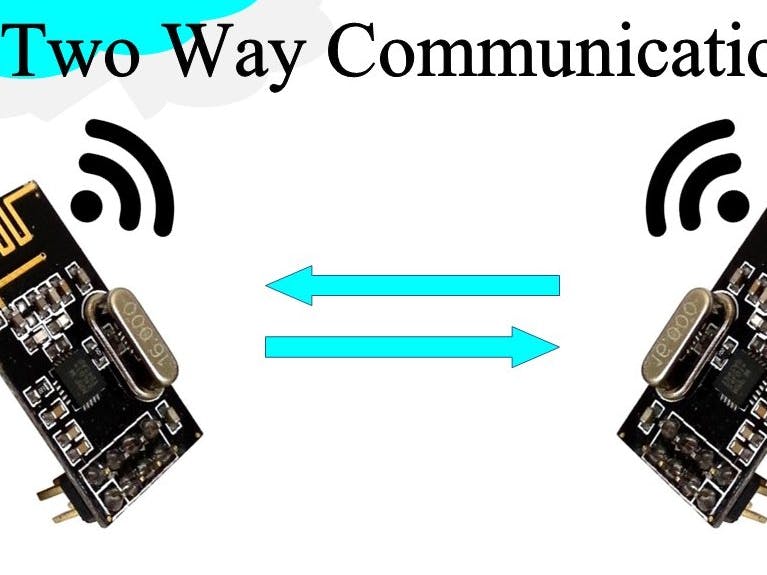
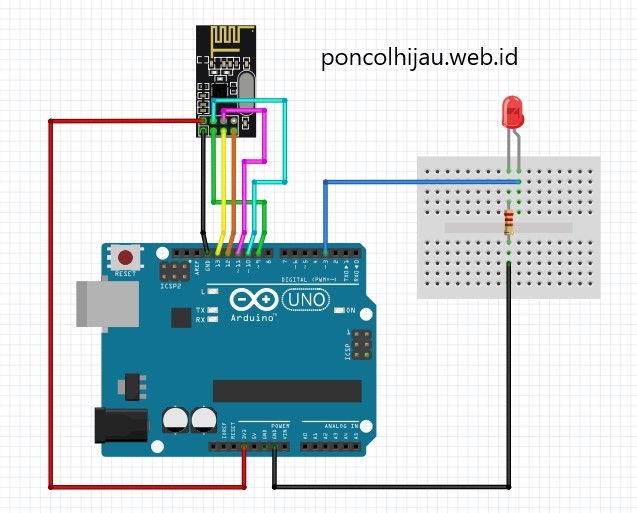
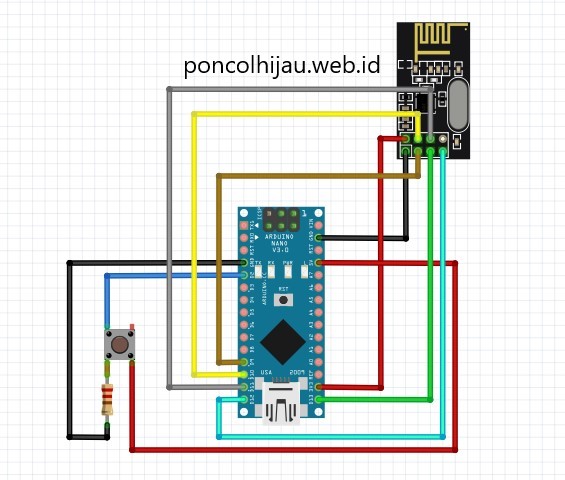
Many people wants to create a good wireless communication that is good enough so they can control anything from distance. I have made some remote controls and uploaded them on my channel for example bluetooth HC-05, remote control 4 channel, infrared remote control etc, but I am still trying to find the best wireless device/ radio that is suitable for my projects. I am still eager to know any wireless device. Then I found quite cheap wireless device and it was interested for me, the nRF24L01. So, I decided to purchase 1 pair and try to make the circuit. One reference is the one in the contributor section helps me out how to make it works and make me understand the working concept. In the next project I may apply those nRF24L01 to my wireless car and soon.
So, without any longer story, you can see below videos for how to connect nRF24L01 for 1 way communication and for 2 way communication.
Additional documentation for 7 channel remote control using nRF24L01
Later on, i want to see the distance how far i can control any device trough this wireless device. So, i try to put the nRF24L01 on my previous project DIY bluetooth car. Based on the result, the nRF24L01 can slightly can reach distance further compared to bluetooth connection. See below my documentation
Latest update 24/9/2020. Since i was very curious about this radio module, so i decided to purchase the nRF24L01 + PA + LNA (with antenna) to see the performance and the distance range of my DIY RC car above. Here i attach my documentation after doing some trial.
By the latest test, i was quite satisfied with the result. The car can be controlled from longer distance compared to the generic nRF24L01 without antenna. Next i hope can make something bigger to see the max distance can reached.


_3u05Tpwasz.png?auto=compress%2Cformat&w=40&h=40&fit=fillmax&bg=fff&dpr=2)
Comments