Kuncono Liem
Published © GPL3+

IoT Water Control and Monitor Using NodeMCU & Cayenne

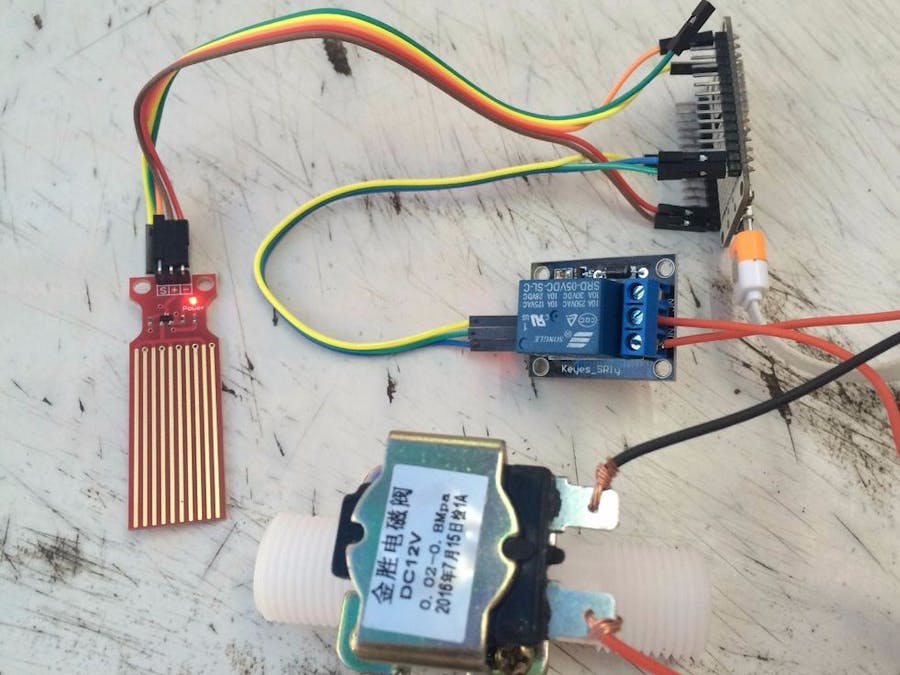
I'll try to create IoT water control and can be monitoring using Cayenne.

BeginnerShowcase (no instructions)1 hour4,849
IoT Water Control and Monitor Using NodeMCU & Cayenne

Things used in this project

Hardware components

NodeMCU ESP8266 Breakout Board
×1
Liquid Level Sensor
×1
Adafruit Plastic Water Solenoid Valve - 12V - 1/2"
×1
Relay (generic)
×1
Power Supply 12V/2A
×1

Software apps and online services

Arduino IDE
Arduino IDE
Cayenne
myDevices Cayenne

Story

Read more

Code

WATER_CONTROL.ino

C/C++
#include "CayenneDefines.h"
#include "CayenneWiFi.h"
#include "CayenneWiFiClient.h"
#define CAYENNE_PRINT Serial  // Comment this out to disable prints and save space
#define RELAY_PIN 14 // RELAY PIN

const int sensorPin= A0; //sensor pin connected to analog pin A0
float liquid_level;
int liquid_percentage;
int top_level = 512; //calibrate the top level of sensor
int bottom_level = 3; //calibrate the bottom level of sensor

// Cayenne authentication token. This should be obtained from the Cayenne Dashboard.
char token[] = ""; // Insert your token here
char ssid[] = ""; // Insert your SSID here
char pwd[] = ""; // Insert your SSID password here

void setup() {
  Serial.begin(115200);
  Cayenne.begin(token, ssid, pwd);
  pinMode(sensorPin, INPUT);
  pinMode(RELAY_PIN, OUTPUT);
}

void loop() {
  liquid_level = analogRead(sensorPin);
  liquid_percentage = ((liquid_level-bottom_level)/top_level)*100;
  Serial.println(liquid_level);
  delay(100);
  Cayenne.run();
}

CAYENNE_OUT(V10)
{
    Cayenne.virtualWrite(V10, liquid_percentage);
}

CAYENNE_IN(V1)
{
  // get value sent from dashboard
  int currentValue = getValue.asInt(); // 0 to 1

  // assuming you wire your relay as normally open
  if (currentValue == 0) {
    digitalWrite(RELAY_PIN, HIGH);
  } else {
    digitalWrite(RELAY_PIN, LOW);
  }
}

Credits

Kuncono Liem

Kuncono Liem

7 projects • 9 followers

Comments