
Hardware components | ||||||
 |
| × | 1 | |||
Software apps and online services | ||||||
| ||||||
Ngrok requires very little setup, just a few commands in the terminal, and works very reliably
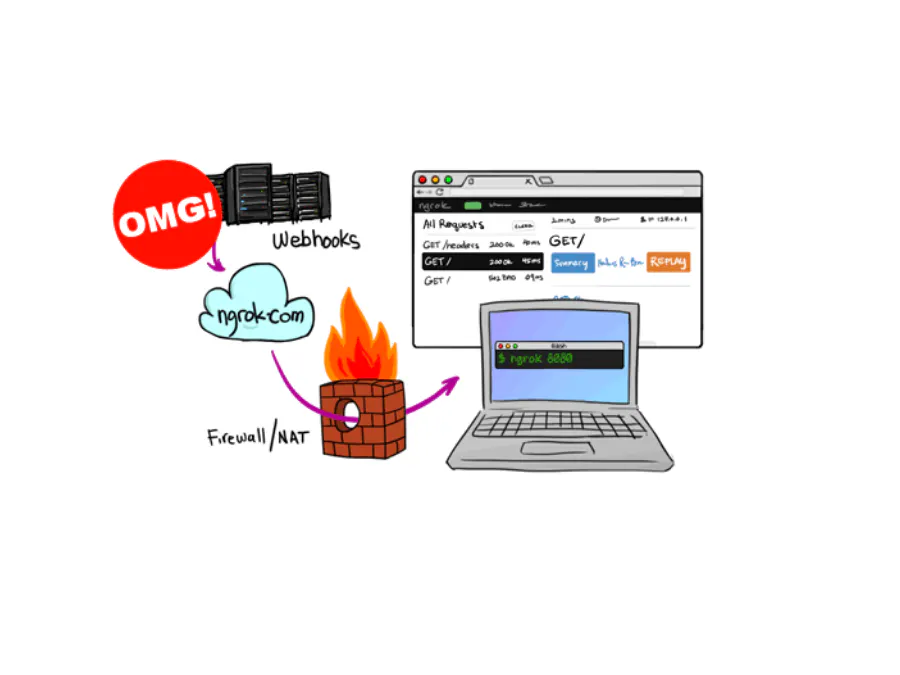
Ngrok:Ngrok is secure tunneling service that makes your device available from anywhere online. Tunneling is a way to set up a private line, over a public network like the internet, between two computers. When you set up a tunnel between two computers, it should be secure and private, and able to pass through network barriers like port blocking routers and firewalls. This is a handy service that allows you to tunnel requests from the wide open Internet to your local machine when it’s behind a secure WiFi network or firewall. With this platform, you can access your Odinub from outside your home or local network in a very simple way.
You learn more about ngrok and its features from here.
Installing Ngrok:
Step 0: Connect WIFI on Odinub boardifup wlan0
If you know more about Odinub WIFI click here more information.
Step 1: Sign up on ngrokOpen a web browser in your laptop/Odinub sign up in ngrok. you can find the link below to download the ngrok.
https://ngrok.com/download
Note: It’s better to make one folder and download ngrok in that directory.Download the ngrok client, a single binary with zero run-time dependencies for Linux.
https://dashboard.ngrok.com/get-started
OR
if you want to run using terminal then fire the command
sudo wget https://dl.ngrok.com/ngrok_2.0.19_linux_arm.zip
You can unzip ngrok from a terminal using the following command.
unzip /path/to/ngrok.zip
Running this command will add your account's auth-token to your ngrok.yml file. This will give you more features and all open tunnels will be listed here in the dashboard. Please find below how auth-token look like
./ngrok authtoken <your-auth-token>
Try it out by running it from the command line.
./ngrok help
This command will help to show your output. To start an HTTP tunnel on a given port, run this next.
./ngrok http <your-port-number>(Ex: 5000)
If your tunnel status is “online” you can open your Odinub terminal using Putty anywhere. Note the Host Address and the Port Number shown in the picture below.
I hope this tutorial will help you to install ngrok on Odinub. I hope you guys can make lots of IoT application and access your Odinub board as home or local host.I tried to implement a small application on Odinub using ngrok and node.js if you want to implement on your Odinub board then referred the link.


Comments