


Hardware components | ||||||
 |
| × | 1 | |||
 |
| × | 1 | |||
| × | 1 | ||||
| × | 1 | ||||
Software apps and online services | ||||||
 |
| |||||
Hand tools and fabrication machines | ||||||
| ||||||
| ||||||
Hello! Since I work from home and am lucky enough to have a home office, it's often hard for my family to know if I'm available for a quick chat or if they can stop by and say hello without interrupting a meeting.
I had the idea from recording studios, where there's a big light outside doors that lights up when there's recording in progress and people know not to enter when it's lit.
Well there were several issues with just buying one of those signs...
- That sign is kinda ugly.
- I didn't want to rewire or run wires through the walls for something like that.
- That's not my style.
- I'm kinda lazy and don't want to get up and click a switch every time that I need to change the color.
I turned to Particle's Internet Button for several reasons:
- It's extremely easy to get up and running! I'm not a coder by any stretch of the imagination, but with a few clicks, you can have some pretty lights shining in minutes.
- You can control the lights via the Photon, which is connected to the internet, with no soldering, wiring, or anything! It simply "clicks" into the shield and begins to control the shield like Krang controlling his android body!
- Many of my friends (who are super experienced coders) use Particle and would be able to help if I needed it.
- I can enclose the Photon in my ooze container and do any updates via WiFi, so I don't have to disassemble it!
- It's small, compact, and super bright!
Let's get started with the internet button and it's code!
- First, navigate to particle.io and create an account if you don't have one already.
- There are many ways to get your code on the device, for me, the easiest is their WebIDE called Build.
- It'll bring you to a page that looks like this:
- Once you name your project, you can click the "Libraries" button on the left panel as shown blow.
- You can see above, the top community library is the InternetButton! Go ahead and click that.
- Woah... Look at all that code you didn't have to write!
- Click the big blue "Include in Project" button and select the name of your project that you created moments ago and click confirm.
- Aww yeah! Now we can make the internet button do things! (There's some fun examples they've already created that you can add if you wanted to play around with the button... but let's get down to business!)
- If you didn't mentally think "to defeat... the huns!" after that last line, I don't know if we can be friends.
- Now comes the "hard part". If you recall, I am not a coder. Luckily, I have friends that are and whipped something up for me in a few minutes. One of my favorite features is Particle's Code Sharing feature! You can get my exact code by following this link: https://go.particle.io/shared_apps/596e6219184514217e0004f8
- Or you can see the code below, but you'll have to add the correct libraries and all that on your own.
#include "InternetButton.h"
int ledState = false;
int prevState = false;
InternetButton b = InternetButton();
void setup() {
   Particle.function("meeting", meeting);
   b.begin();
}
void loop(){
   if (prevState != ledState){
       switch (ledState){
           case 1:
               b.allLedsOn(0,255,0);
               break;
           case 0:
               b.allLedsOn(255,0,0);
               break;
           case -1:
               b.allLedsOff();
               break;
       }
       prevState = ledState;
   }
}
// send  a '1' for Green
// send  a '0' for Red
// send -a '-1' for OFF
int meeting(String command){
   ledState = command.toInt();
   return 1;
}
- If you want to adjust the brightness of them, change the "255"'s above to a lower value.
- All that's left is to flash it!
- Wait... not that kind of flash.
- Closer... but still no....
- There we go! Click that! That'll put the code on your Photon to control those shiny LED's on the Internet Button!
Now lets make an IFTTT button on our phone!
- First, go to IFTTT and create an account if you don't already have one. I'd recommend downloading their mobile app.
- Then you can navigate to their "Button Widget". I'm going to switch to mobile view from here so you can see the button!
- Once you have the IFTTT app downloaded and logged in, you can navigate to "My Applets" and click the big "+" in the top right corner. We're going to do this 3 times: 1 for red, 1 for green, 1 for off.
- Then you'll click the blue "+this" button. Search for "Button Widget" and click that!
- You'll want the internet button to trigger on the button press, so click that.
- What do you want that button press to do? Click the "+that" button and search for Particle.
- Now, since we've already written our code, we're going to call the function that we created, so click "Call a function."
- In the first drop down, if you used the code sharing link, you'll find "meeting on "the name of your photon". Select that.
- In the next drop down, delete that information and add either a -1 (for off), 1 (for green/free), or 0 (for red/in a meeting).
- Click Save!
- You now have a button! Name it whatever you want, but I called mine, Turn off, In a meeting, or I'm Free!
- You can go into that "widget setting" and toggle the "Show in Today View" or "Homescreen Icon" to add it to either. I like the Today View setting so I can just swipe down on my screen and it's there to push!
This is the reference image that I'm using!
- I started with the 2" PVC Compression Coupling. I spent too much time at Home Depot trying to find something that would fit and for the size, this worked the best. I just needed the end caps, not the center!
- I used some duct tape to run a line down the center of the clear plastic tube. You can find these online, but I got mine at the local plastic shop.
- Notice, I cut a notch for the USB cord to escape.
- Then I cut out a couple pieces of cardboard from a recent Amazon order to fit inside the caps so no light would escape!
- I just used some black tape to tape them inside the caps. It's quite snug, but that's how it should be!
- Let's dry fit everything together to make sure it all fits!
- To make it look like metal, I used this spray paint and did 2 coats.
- Put them in a box and painted!
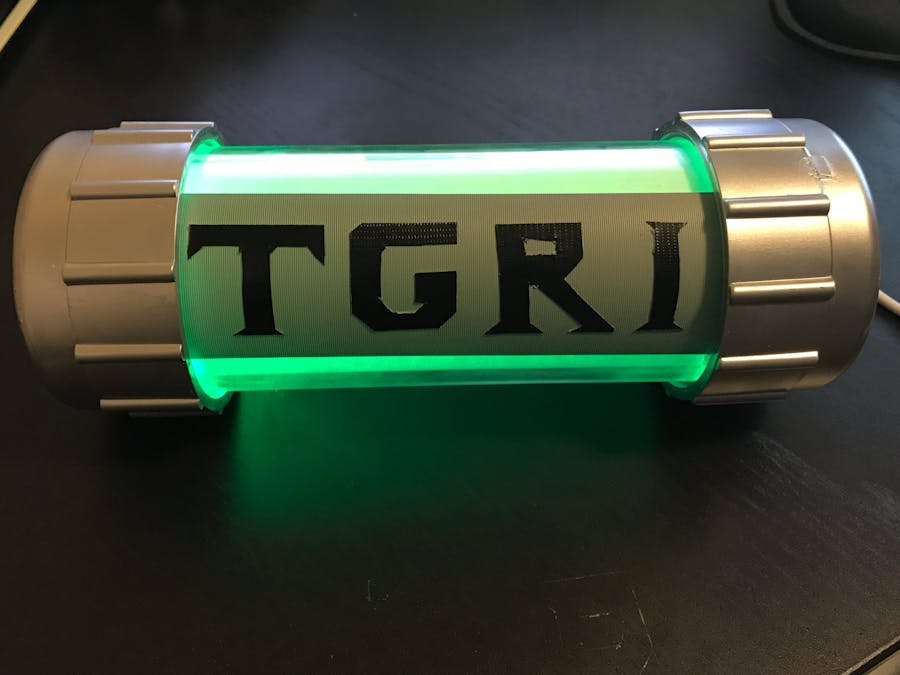
- While that drys, let's cut out some letters! I used this as a template to get the letters correct.
- Add the ends onto the tube, seal with a little hot glue and voila!
Here's the full video!
Hope you enjoyed! Feel free to reach out to me if you have any questions about this!


Comments