

Hardware components | ||||||
| × | 1 | ||||
Software apps and online services | ||||||
| ||||||
| ||||||
Hand tools and fabrication machines | ||||||
 |
| |||||
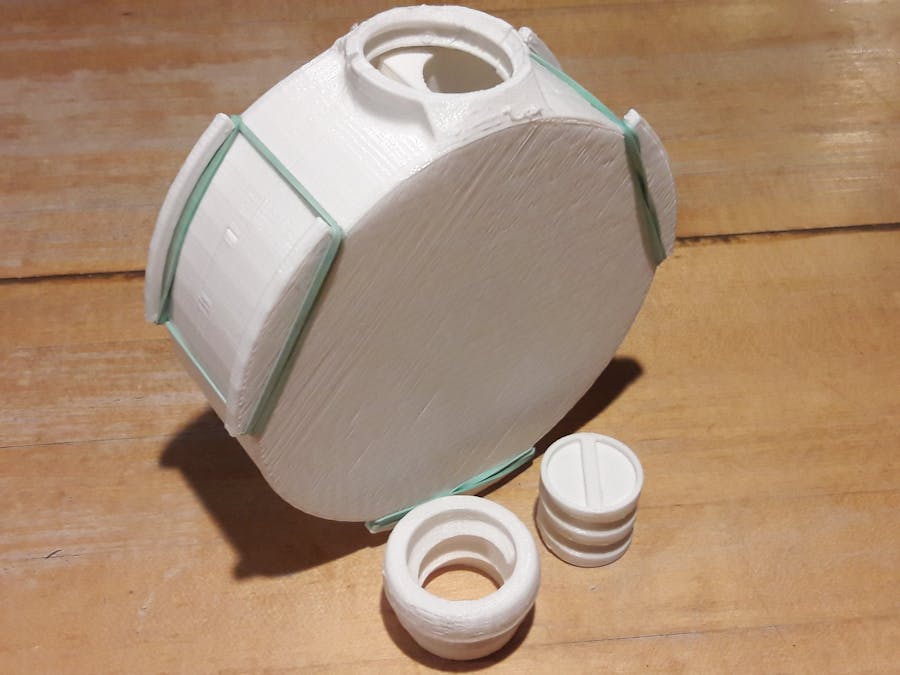
This is a trick canteen, designed to deny a person water when they tilt the container back to pour water. After see several siphons in this competition, I wanted to make a more mechanical method of deception, in this case rotation of a physically separate container, as can be seen in the picture of the fully assembled canteen. The design relies on two printed bearings, as well as weight distribution and center of gravity to tilt the inner container. The parts required are:
1. Inner Container.stl (1) (Note: Must be watertight)
2. Cap.stl (1)
3. Inner Plug.stl (1)
4. Outer Shell Half A.stl (1)
5. Outer Shell Half B.stl (1) (NOTE: Halves A and B ARE different parts. One of each is required, not two of the same)
6. Bearings (2)
7. Rubber Bands (3 or more, add to taste)
Assembly:
A) Print the parts. Only the Inner Container and the Outer Shells require supports. Clean the parts of supports well. Medium grit sandpaper may be helpful in this regard.
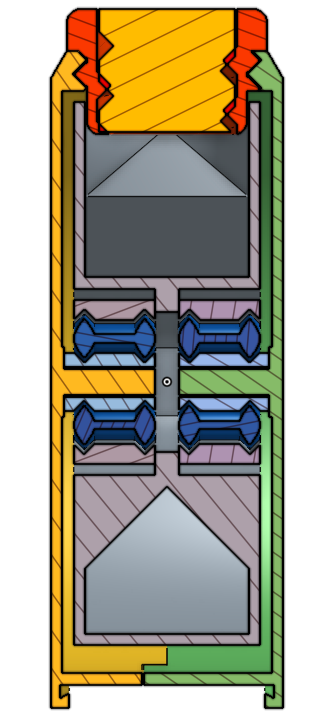
B) Thread the Inner Plug into the Cap. Slide the Bearings onto the center pegs on the Outer Shells. NOTE: The Bearings have an extra protrusion on one side in the center roller. This extra margin should be touching the large face of the Outer Shell, holding the majority of the Bearing away from the face to prevent excess friction.
C) Slide the Inner Container onto one of the two Bearings. It should rotate freely, concentric to the Outer Shell.
D) Slide the other Bearing and Outer Shell into the Inner Container, mirroring the assembly. Be sure that the tabs slide together, assuring alignment.
E) Rubber band the protruding tabs from the Outer Shells together, binding the assembly together. Screw the cap into the top, making sure it slides into the top of the container, and your Canteen of Denial is done!
When someone tries to drink from this normally, the inner container will remain vertical, preventing any water from being drunk.
In order to drink from the canteen, one must know the secret. The cap, when screwed in fully, extends downwards just enough to prevent the inner container from tilting. The cap, however, is actually tubular. A threaded insert can be removed from the cap, unscrewing clockwise. This will produce a convenient drinking channel, with the inner container held in place by the cap.
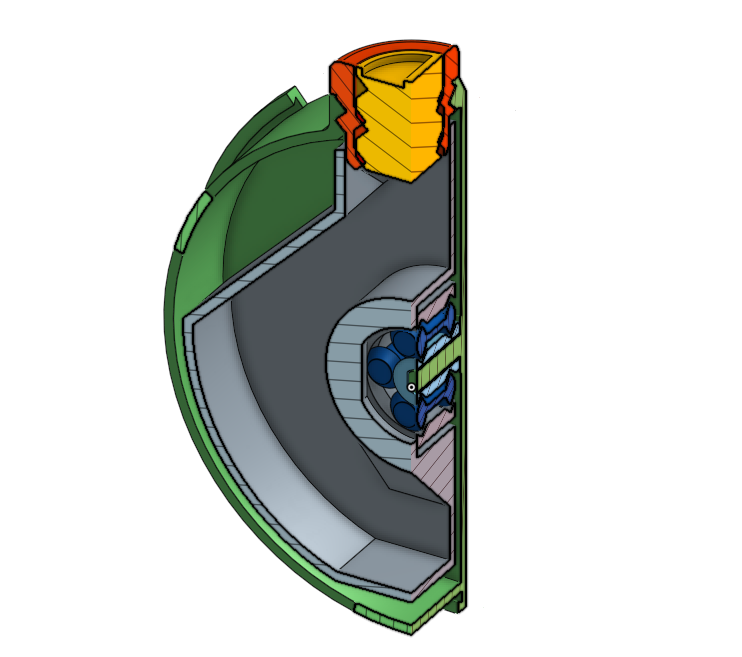
Double Section View - Assembly


Comments