


Step by Step Introduction
About this project
I don't know if this kind of thing happened to any of you or not, sometimes my WiFi network just become terribly slow, so I have to waste my time checking on the router, and it turns out that someone is sneakily using it without my permission, which makes my really mad especially when I am watching movies.
I want to keep monitoring the devices that are connected to my network router to avoid this happen again. So I made this DIY router and share this project to you. If this project is useful to you, don’t forget to share on SNS.
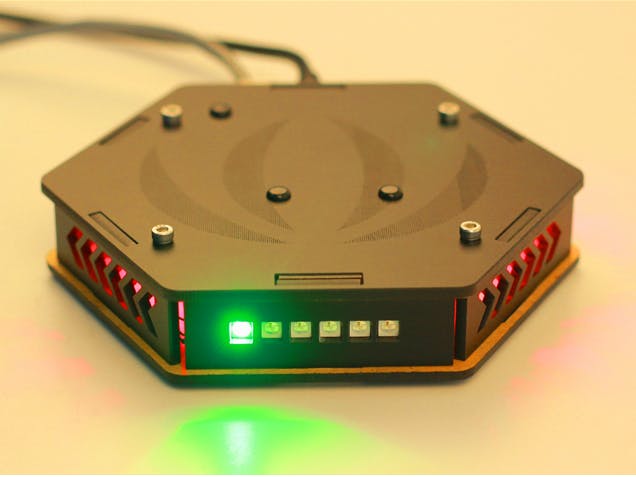
I used some a RGB LED Strips to indicate the network status. For example, the led color as the picture below shows represent net speed.
The number of green led as the picture
shows indicates how many devices has connected to the router.
Well, Let’s start now and enjoy the journey
of making.
What do we need
- LinkIt Smart 7688 Duo
- Arduino Breakout for LinkIt Smart 7688 Duo
- Digital RGB LED Flexi-Strip
- Some nuts and screws
Hardware Work
Download the Drawings
I did some work on structures just as the
picture below shows. It’s made up of 3mm matte black acrylic board. My friend
Xu from seeed help me cutting the board. I guess you don’t have a laser cutting
at home, you can find some in the hacker space near from you easily. If there's
no hacker space nearby, you can try the Laser Cutting
Service supply by Seeed.
You can download my drawing shown as below by click here.
Laser cutting
Now, you’ll need one piece of matte black acrylic (3mm 40cm*60cm), and cut the acrylic according by the drawing that you have already downloaded.
Modules Connect
Prepare the cutting acrylic sheet and the circuit modules as the picture below shows.
Connect Arduino Breakout for LinkIt Smart 7688 Duo board to the acrylic board using screws and nuts. The Grove Led Strip is connected to the D6 port on the breakout board.
Then, insert LinkIt Smart 7688 Duo board to the Arduino Breakout board. And as
shown in the following picture, assemble the router box.
At last, you can
fix the last piece of acrylic sheets. And now the hardware work is done.
Software Work
Now, we should do some software work, if this is your first time to use MT7688, please put hand on http://www.seeedstudio.com/wiki/LinkIt_Smart_7688_Duo to get started.
Set up MT7688
I assume you have been familiar with LinkIt Smart 7688, go to the MT7688 terminal by SSH or Serial.
- Modify the configure file to change MT7688 Duo into router mode.
vi /etc/config/networkconfig interface 'lan'  option
proto 'static'  option
netmask '255.255.255.0'  option
ipaddr '192.168.100.1'

config interface 'wan'  option
ifname 'eth0'  option
proto 'dhcp'- Enable yunbridge
> uci set yunbridge.config.disabled='0'
> uci commit- set startup script
> chmod +x script/netDetermineBox
> cp script/netDetermineBox /etc/init.d/
> /etc/init.d/netDetermineBox enable
> /etc/init.d/netDetermineBox start &
> reboot
Using Arduino IDE to upload Arduino sketch
- Download demo code at https://github.com/Lee-Kevin/MT7688_Demo/tree/master/mt7688routerBox
- Click “Download zip” button on right side of webpage to download all codes.
- Decompress the downloaded zip files to“C:\Users\Administrator\Documents\Arduino\” and remove “-master” in decompressed file name.
- Launch Arduino IDE.
- Click Sketch>Add file to add routerBox_Arduino.ino file from“C:\Users\Administrator\Documents\Arduino\MT7688_Demo\mt7688routerBox\”
- Press CTRL +U to upload codes to your board. Wait a while, there will be prompt like following figure:
The result
Now,Power up the router, and access it to the network. Let your device connect to the “LinkIt_Smart _7688_xxxxxx”, and you’ll find the Green LED is light up
Make. Invent. Do.
This project is made as an Open Source Project. It's a starting point. Let your creativity go wild with the mechanical, electrical and software design. Make the demo your own. Decorate it. Improve the work. No matter what, write a recipe about it.
To share and progress together.

Comments