


Software apps and online services | ||||||
| ||||||
Hand tools and fabrication machines | ||||||
 |
| |||||
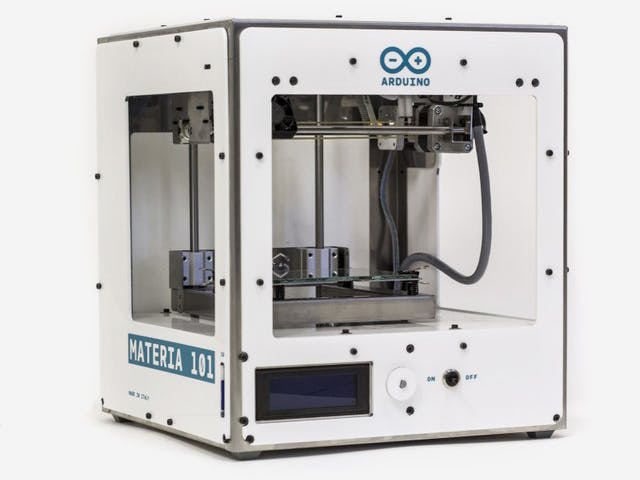
- Remove the glass surface from the printer.
- Spray a thin layer of hair spray evenly over the surface. Just make sure to cover the glass evenly with hairspray. It is best to use a hairspray which is made for a strong hold.
NOTE: You can also use a glue stick; the kind you use for paper. When using a glue stick you do not need to remove the glass plate. I should be noted that different kinds of hairspray and glue sticks give different results. The brand "Uhu" with "magic" written on the tube is a good option.
The main idea with setting a minimum distance between the bed and the nozzle, is to make sure the first layer sticks to the print surface. This adhesion can be controlled by 3 factors: Nozzle travel speed, filament extrusion speed, and the distance between nozzle and bed. If you experiment with all three parameters you can achieve desired results. The best results would be the ability to have object adhere to the bed without flattening the first layer too much.
My experience is that the gap between the bed and the nozzle should be equal or less than 2/3 of the set layer height. Measuring this distance is easy with a feeler gauge or a piece of office paper. A piece of paper might not be the most precise of measuring instruments but in most cases it will do just fine. First of all we are going to focus on getting the print bed level:
- Set distance by running the bed leveling gcode. Download it here.
- The nozzle will start to heat up and then it will wait for your input. Push the knob next to the screen to start the process.
- You will get instructions on the printer's screen, follow them. Insert the strip of paper or feeler gauge. If it gets through roughly, it is okay, but if it gets through very easily, you need to reduce the gap and measure again.
- Do this by adjusting the screws on the four corners of the print bed. Be careful not to push down the print bed while measuring.
- Go to the menu “prepare” and press the option that says “change filament”. The printer will heat up the hot-end and try and expel old filament that might be loaded. It will chime when it ready to receive the new filament.
- Cut the end of the filament before you insert it, so you get a flush surface. When the hot end starts to extrude plastic you can press the knob again and the machine is ready to extrude.
- Place this file (link) on an SD-card. Don't forget to eject the SD-card in a correct manner.
- Insert the SD-card in the printer's card-slot on the left side of the printers screen.
- Turn on the printer and click on the knob on the right side of the screen to access the main menu. Scroll down and click on the menu option “Print from SD”. There you should see the file called octocat.gcode.
- Press the knob to while highlighting the octocat file and now the printer will start to print the file.
NOTE: This is the source for the Octocat and these are the setting files for Slic3r. Slic3r is a slicer, a post processing program that makes your 3D print into a printable file. The settings files can be loaded with the "Load config" option in Slic3r.
kengdahl
 Arduino_Scuola


Comments