

Hardware components | ||||||
 |
| × | 1 | |||
| × | 1 | ||||
| × | 1 | ||||
 |
| × | 1 | |||
| × | 1 | ||||
Software apps and online services | ||||||
 |
| |||||
Hand tools and fabrication machines | ||||||
 |
| |||||
 |
| |||||
 |
| |||||
 |
| |||||
 |
| |||||
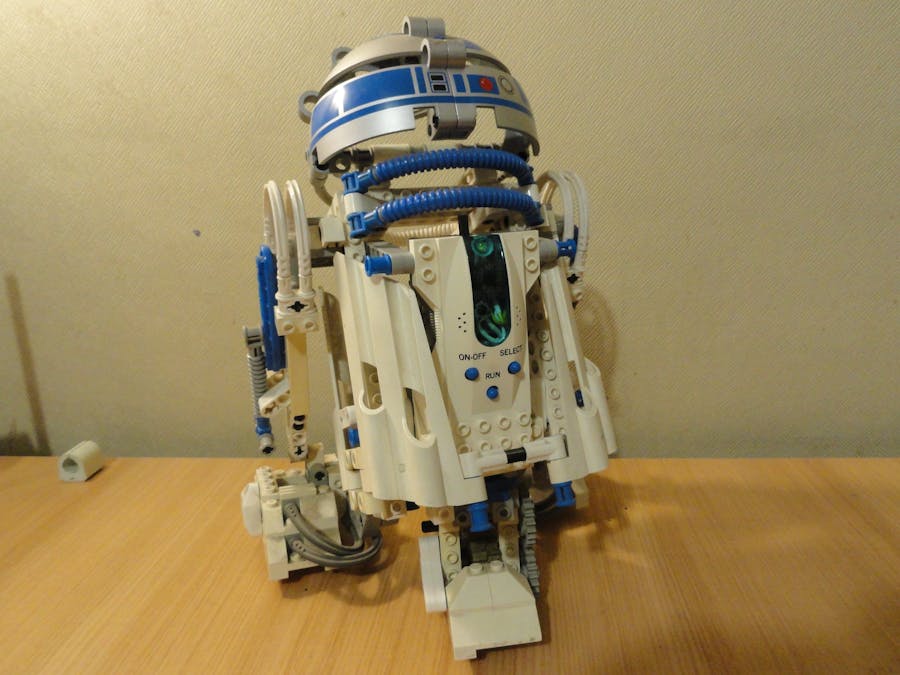
Based on Lego's Droid Developer KIT
I have been playing with software programming, firmware, hardware, internet of things and domotic for a long time now. I wanted this project to be a motivational proof of concept to see if my daughter will be interested in programming and/or robotics.
So far, she is not ;-)
The COVID19 pandemia gave as some precious time to catch up with some things we had/wanted to do, so one weekend I decided to just do the project myself and also do the dry run first publication here on Hackster.
This Lego R2D2 was one of the toy droids you can construct as part of the Mindstorms series on the Star Wars Droid developer kit (Released in 1999). It came with a Central Processing Unit powered by a MicroScout (Actually a Toshiba 87C808LM MCU) and several pieces to make droids come to life. The MicroScout came with seven programs and a also sort of light programming that I never used.
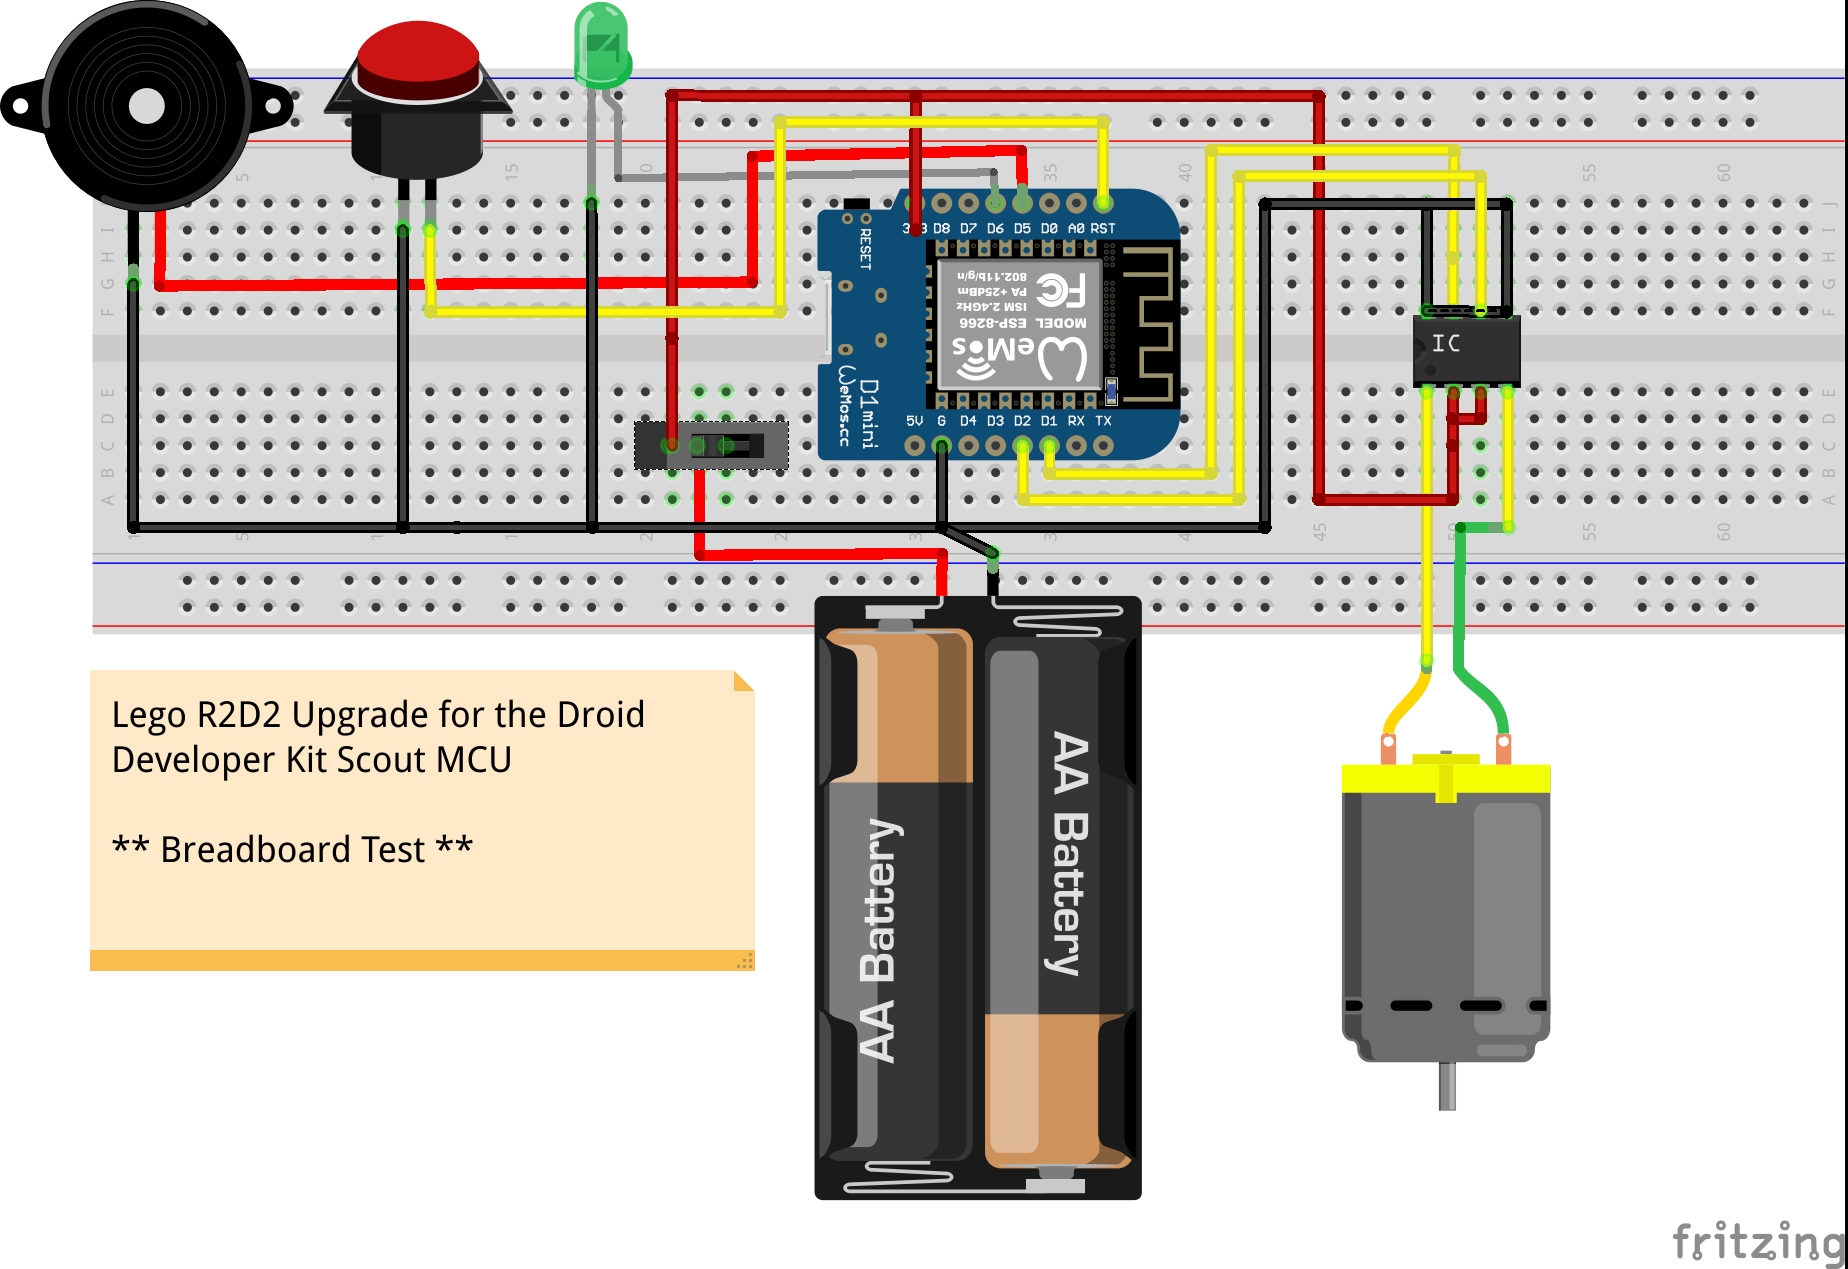
The circuit has the MCU, a seven segment LCD, a motor driver, three soft buttons and a buzzer.
In this new version I have replaced the board with a Wemos D1 Mini (you can do awesome things with it). I did not find use for an 7 segment LCD, I did use a green led (for feedback), a buzzer (to make sounds) and small switch to turn it off (I also used a small push button to reuse one of the soft rubber button but that did not help because I really needed to switch the power off to save power when not using it).
I wanted to keep it simple as it is powered by two AA batteries and, to make it functional, you need to save power.
A larger and better project will be to introduce/replace the batteries/power source with a LIPo 3.7Volt battery a voltage regulator and also include a servo motor and other sensor stuff to avoid obstacles.
The parts involvedSo I am using three main components here and sosofwaresofwareme basic other stuff such as leds and switches.
Wemos D1 Mini: It is base on the ESP8266 ans is am all in one system with WIFI capabilities it includes 4MB of ROM and it is compatible with Arduino.
The L9110H is a motor driver that allows you to drive a motor back and forth without having to switch cables (you know + and - for direction).
The Buzzer allows you to make sounds (monophonic tunes).
I am assuming that you have the droid built. ;-)
The project was broke down in 3 initial episodes :-)
What skills you will need:
- Basic soldering skills
- Arduino IDE programming with ESP8266 support
- Some C Knowledge
- Some HTML Knowledge
- Some Micro electronics understanding
So, Let's begin.
Episode I: The hardware HackPart One: Taking it apart
So, if you have the droid already built, you will need some deconstruction to do.
Then, you are ready to open and remove the CPU/Motor.
Part Two: The new beginning.... The circuit..
(I kept the push button in the circuit but is not functional. Just did not want to open it again)
How this actually look in the droid.......
You will find some little challenges when putting it all together but it will fit. Put same isolating tape around the circuits to avoid "shorts". Also, keep cables short as they will use space when closing the cover and everything.
When is finished should look like this.
Now, in this photo you will see that I am not longer using the push button. That's right, First run on batteries went out too fast so I decided to put a physical switch.
I had to break a little bit the plastic but again everything went into place just good
After this, I made some test and just put back all.
Episode II: The Basic Software (WEB based)Part Three: The Planning
In planning the software, I wanted to have some features I have already been exploring to make things easier. so, I considered some basic capabilities for the first step:
- WIFI Controllable without the need of an app using a web page
- To be able to update the software without taking it apart again
- Deep Sleep to save batteries if I forget to turn it off
- Led and Buzzer to make signals and sound.
A more advanced step will be developed on Episode III, where code will be expanded to accept call from an android app.
Part Four: The code
Code is separated in 4 files. the Main sketch and three include files to make it easier to maintain. Full zipfile is attached to the project.
I am pasting some pieces of the code just to explain (this is not the actual code, cut and paste will not work, Please download the zip file).
Main Sketch: Here you set pin modes, initialize WIFI, setup the webserver
Config: Here I put Pin Configurations, Global Variables and other files includes.
Please remember to configure your WIFI parameter so you can update the firmware from a desktop computer.
// default WIFI params
static char host[] = "R2D2";
static char ssid[] = "XXXXXXXXXXXX";
static char password[] = "XXXXXXXXXXXX";Based on LEGO Droid Developer KIT
static char update_username[] = "admin";
static char update_password[] = "admin";
static char switchtoken[] = "action";
Functions: Here there is all support functions including hardware access (Motor, Led, Buzzer). There are some function or code no in use. It is left for debug purposes.
// protos
// General functions
String addresstostring(IPAddress myIp);
char*  floatoascii(double temp);
String hora();
String uptime();

// Hardware functions
void led(int i); // Turn leds on/Off
void motor();  // Motor Driver L91110H
void makesound(int tune);
void r2sound1();  // R2D2 Tone Generator 1
void r2sound2();  // R2D2 Tone Generator 2
Web Server: Then all served pages and includes (html, CSS, Javascript) are here to do easy maintenance and separate things. Now, there are several way to do this. I did it module based so it can be reusable. On the web server pages, every html page has three main sections: header, body, footer. So, headers are standard, footers to and the body changes for each handle.
This is the example on the handles configuration.Based on LEGO Droid Developer KIT
server.on ( "/", handleRoot );
  server.on ( "/index.html", handleRoot );
  server.on ( "/1", handleon );
  server.on ( "/0", handleoff );
  server.on ( "/info", handleinfo );
  server.on ( "/F", handleForward );
  server.on ( "/R", handleReverse );
  server.on ( "/S", handleStop );
  server.on ( "/music", handleMusic );
  server.onNotFound ( handleRoot );
Part Five: The test Run
For the test you need to connect your phone wifi to the droid looking for an R2D2_* (Mac follows). Once you are connected, point your browser to http://192.168.4.1/ that is the default IP for the ESP8266.
You will then see a web page like this.
Based on LEGO Droid Developer KIT
a result like this. This is a little video of what I got so far.
What's Next....
Episode III: Making an Android App to control the DroidPart Six: To be developed.....
With a simple android app you can call directly each handle, so this should not be so hard. Now if you want to work on security and extra stuff, it will take longer. I will post the app a soon as I make it and write what I have learned from that.
Final words ;-)If you got until here, I Hope you like it.
This was fun.
Stay healthy, JP.


Comments