


The RT-Spark Board has a microcontroller with different built in components like LEDs, Buzzers, Control Buttons, Display, Light and more. In this project, the LED follows a loop where the first Built in LED toggles on and the second follows, then the Built in LED toggles off and the second LED also follows which loops to make a blinking effect, on and off.
The project uses the following:
- RT‐Spark (STM32F407ZGT6)
- USB cable
- Windows PC
- software STM32CubeIDES
Step 1 - install
Search STM32CubeIDE and STM32CubeMX and sign up for an account on the site if needed. Then install them with the default settings.
Step 2 – Create the Project:
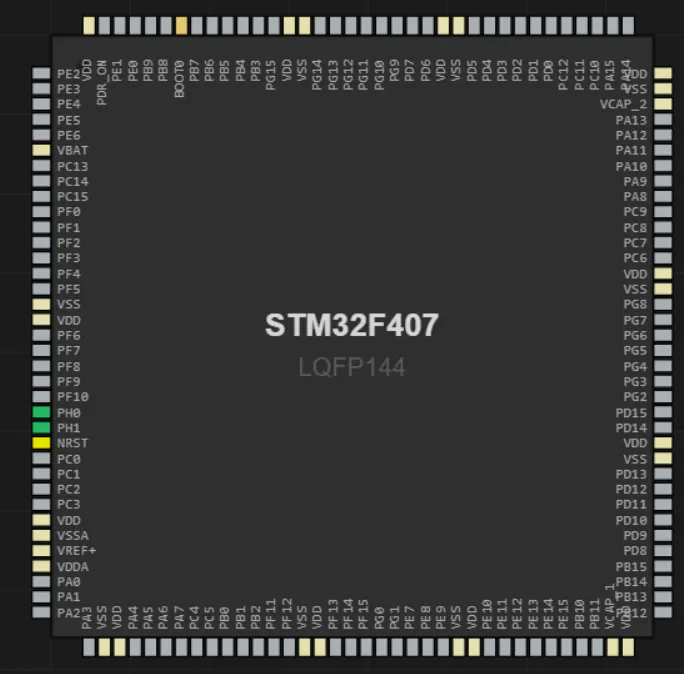
- In STM32CubeMX, create a new project. Enter the Commercial Part Number STM32F407ZGT6, select it from the list on the right, and click Start Project. You will be taken to the Pinout & Configuration tab.
- At the bottom of the screen, use the search bar to find PF11 and PF12. Click each pin and set them as GPIO_Output.
- On the left side, use the search bar to find GPIO. In the configuration list, select PF11 and PF12, then scroll down and set Maximum Output Speed to Medium for both pins.
- Next, open the Project Manager tab and enter a Project Name of your choice. Select the Project Location where you want the project to be saved and set the Toolchain to STM32CubeIDE.
- After that, click Generate Code at the top of the window. Wait until the code generation finishes and the Open Project button appears, then click Open Project.
- That should get you to the IDE with your project which shows Project Explorer on the left. Expand this and go to Core -> Src -> main.c.
- Finally, look for the part of the code which says:
while (1)
{
/* USER CODE END WHILE */
/* USER CODE BEGIN 3 */
}
and turn it to this:
while (1)
{
/* USER CODE END WHILE */
HAL_GPIO_TogglePin(GPIOF, GPIO_PIN_11);
HAL_Delay(500);
HAL_GPIO_TogglePin(GPIOF, GPIO_PIN_12);
HAL_Delay(500);
/* USER CODE BEGIN 3 */
}
After this connect the USB from your Computer to the USB-DBG input to your RT-Spark microcontroller. Then on the STM32CubeIDE click the hammer button above and then press the green play button to send the data to the Microcontroller you should see a green and red LED blink.
HOW TO UPLOAD TO GITHUB:
- Create a new Github account or log in to your Github account and then create a new repository, go with the default options set by Github, you may set the name to your liking for example "rt-spark-blink-led".
- Download & Install Git: Git - Install for Windows
- From your Github Repository, you should see repository URL that looks like "https://github.com/yourname/rt-spark-blink-led.git" copy that for later.
- Go to the folder where you put your STM32CubeMX project in from earlier, example: "C:\Users\User\Documents\Sample_Name_STM32_Blink_LED"
- Copy that path for the next step
- Open CMD and put this command in with what I made you copy like this:
cd C:\Users\User\Documents\Sample_Name_STM32_Blink_LED- Input these in the CMD too:
git init
git add .
git commit -m "Initial commit: STM32F407ZGT6 Blink LED"- Then input this too with the Github Repository I made you copy earlier:
git remote add origin https://github.com/yourname/rt-spark-blink-led.git
git branch -M main
git push -u origin main- After that, you'll be asked to log-in, you can login using browser to connect the Github.
- Finally, refresh your Github and it should updated there like this:
RESULTS:


Comments