

Hardware components | ||||||
 |
| × | 1 | |||
 |
| × | 4 | |||
| × | 1 | ||||
 |
| × | 1 | |||
 |
| × | 1 | |||
Software apps and online services | ||||||
| ||||||
Hi again!
This time I'm here to present you a very simple project, however a very funny one.
Two years ago when I have bought my first Raspberry Pi, I had done an Internet PiRadio where I could listen to some foreign radios.
Today I had done a little more! I had removed my LCD showing what radio station I was listening, and the navigation buttons, and added an IoT dashboard named Cayenne. With Cayenne I'm able to toggle the radio On and Off, increase and decrease volume, and cycle through my radio playlist.
With this configuration you can also add triggers to it, for example to wake you up at a certain time. (However I don't recommend that you use it for work or school since I haven't tested it deeply),
The following steps will describe how you should proceed to implement one like me.
Step 1: Have a fresh Raspbian imgage running on your Pi with SSH and VNC enabled.This is the first thing that you need to have before continue further. You will need to install Raspbian on your Raspberry Pi.
Don't forget to:
sudo apt-get update
sudo apt-get dist-upgrade
I also recommend that you enable SSH and VNC, since the goal is to have an headless Pi.
Step 2: Install MPC and MPD, and add radio stations to your playlist.Install MPD (Music Player Daemon)and MPC (Client):
sudo apt-get install mpc mpd
Add some radio station to your playlist:
mpc add http://bbcmedia.ic.llnwd.net/stream/bbcmedia_radio1_mf_p
Play it.
mpc play 1
If you don't listen anything check if you have your audio output connected. Remember that the "mpc add" command is the one that lets you add radios/musics to your playlist. To clear your playlist just type "mpc clear" and add them again.
You can also tweek mpd but since I don't have much experience I recommend that you google it.
Step 3: Install Cayenne on your Raspberry PiI will not describe here the procedure of installing Cayenne on your Raspberry, since the Cayenne team has already done a great job describing it.
You can check everything you need at https://cayenne.mydevices.com
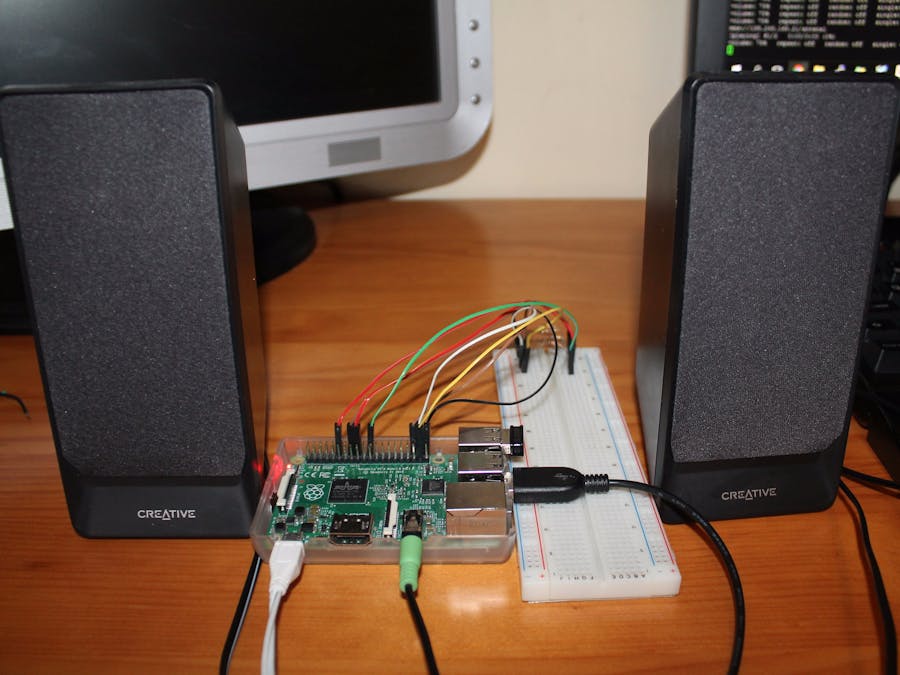
Step 4: Wire the Resistors between GPIO pins.As you can see, this project only use 10K resistors to connect some of your Raspberry GPIO pins.
The purpose of this setup is to set 4 pins of your Raspberry as Inputs and 4 as Outputs, that will be used by Cayenne and a Python Script.
The mapping of outputs and inputs are:
OUT IN
- 18 ----->> 21
- 23 ----->> 16
- 24 ----->> 20
- 25 ----->> 26
This project uses a Python script, that will check the status of your input pins. There are 4 inputs that will do the following functions:
- Cycle through your radio stations
- On/Off button
- Volume +
- Volume -
The script is very simple. It uses an infinite While loop, and some If statements that will listen to when a change of your input state occurs.
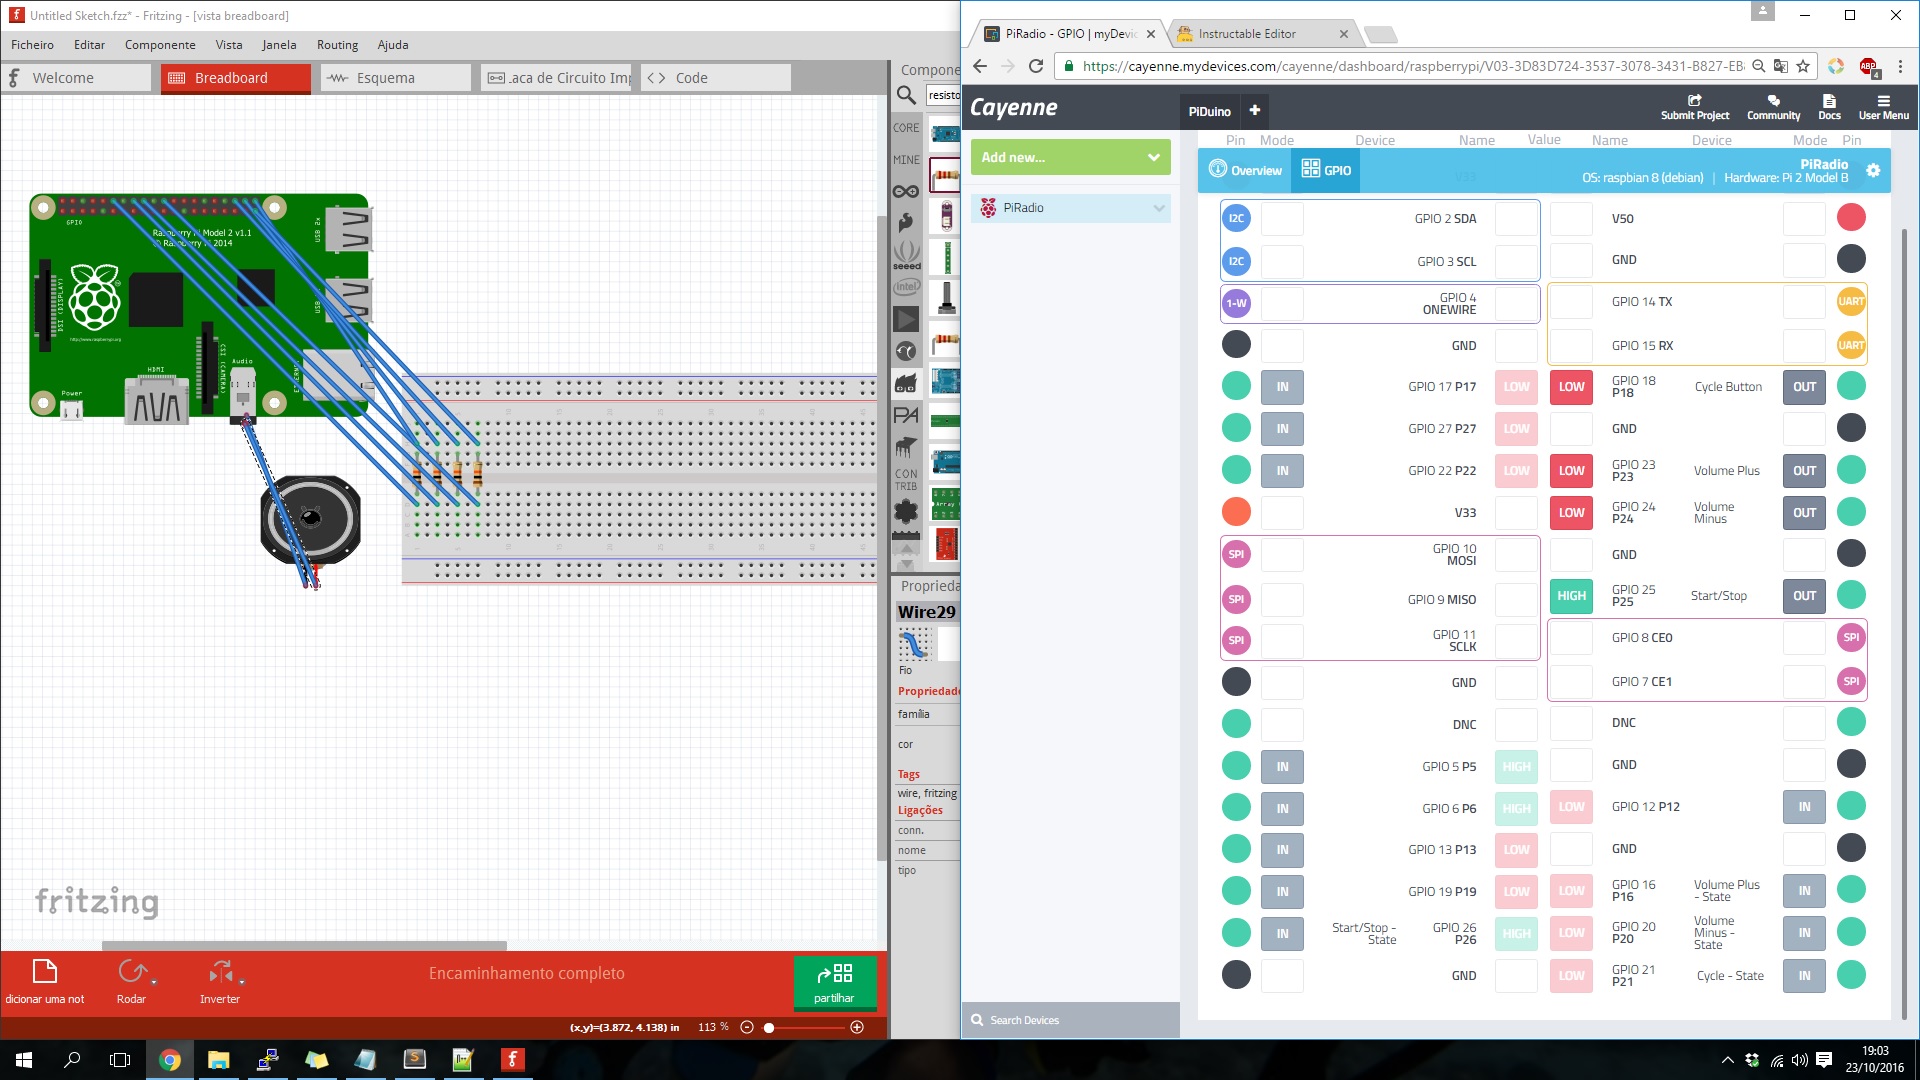
Step 6: Setup your Cayenne DashboardNow it is time to setup your Cayenne.
Here you will need to do 3 major steps.
- Set Outputs
- Set Inputs
- Set Triggers
All the inputs and outputs are the Generic Type.
If you have any questions or doubts regarding how to set them, please read the Cayenne Docs.
Check the Wire the Resistors between GPIO pins step and the picture to see which button does what.
Create the following Outputs:
- Cycle Button
- Volume +
- Volume -
- Start / Stop
And the Inputs:
- Cycle Button State
- Volume + State
- Volume - State
- Start / Stop
After you will need to use triggers in order to "fool" Cayenne. The purpose is to set an Output to low every time you click to set it to High.
I need to used this for Cycle and Volumes since Cayenne doesn't have yet the option to set a like a Pulse Button.
Remeber that you can also add Events for example to turn the radio On or Off at a certain time, or any other action that you need.
Step 7: Listen to Radioooo!So now that everything is done in order to listen to your radio, you just need to run your Python script and press your Start Button on Cayenne.
Here is a short video showing this version of PiRadio working!
Please let me know if you have any questions so I can help you doing this simple but very nice project.


Comments