
Hardware components | ||||||
 |
| × | 1 | |||
| × | 1 | ||||
| × | 1 | ||||
Software apps and online services | ||||||
| ||||||
Hand tools and fabrication machines | ||||||
 |
| |||||
The Next Wave of Innovation
We're approaching the pinnacle of innovation where physical processes can control or be controlled by THINGS of the INTERNET! Er, I mean INTERNET of THINGS.
When Particle came out with the Photon and gave developers the magical keys to the wonders of the web, my mind began to race. What kind of technology could I use to bring an extra dimension to modern web applications? How can users benefit from this new method of "online presence"? But most importantly, what kind of problems could I solve by applying IoT technology? Then I arrived at Wave.
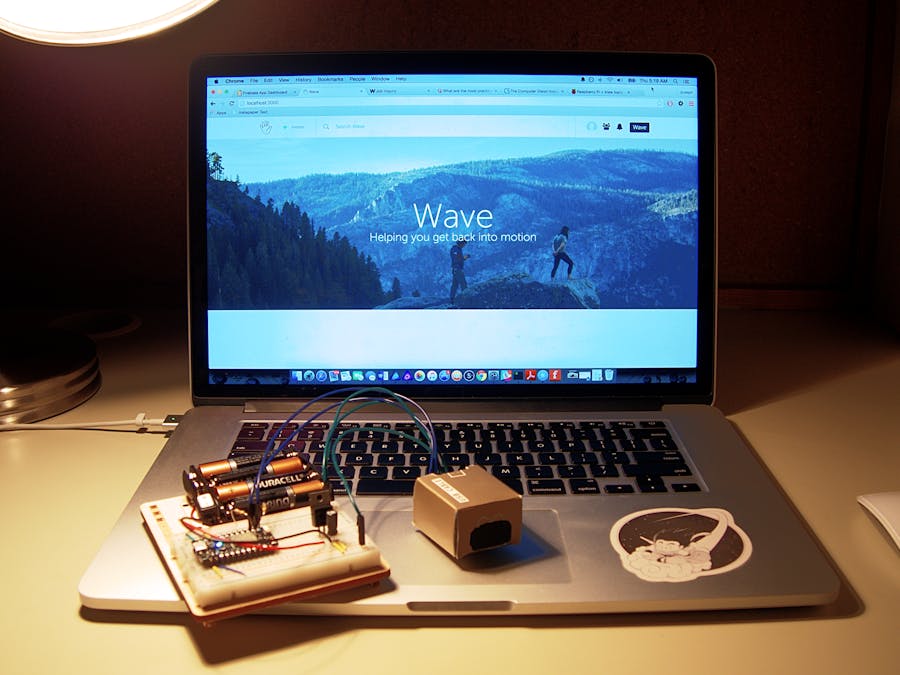
Wave is a biotech application that helps people with poor motor control rehabilitate and improve their fine motor skills through a gamified approach. An IoT motion tracker called a "Wave Motion" connects users to the application where they can undergo two different user experiences. First, in the shoes of an independent user, Wave provides me with a test that randomly generates targets (using D3.js), enabling me to respond physically by moving my hand. After multiple trials, the test calculates my average response time and accuracy then graphs them so that I can check on my progress later on. Second, in the shoes of multiple users, Wave also provides a mode where one user can generate targets for another user in real-time (using Firebase) then continues on to calculate the rest of the data.
The application is simple, light, and hopefully a worthy addition to the biotech industry.
But this is a tutorial on how to make a Wave Motion, right?
Yes, yes it is! And without further ado, into the details of the motion tracker...
The IR Sensor
Acquiring the IR sensor to track infrared LEDs was very bittersweet. When I was younger, I used to watch videos of a guy named Johnny Chung Lee who specialized in human-computer interaction and showcased a project using a Wii Remote. In his project, he was able to track head movement using a camera inside the controller and I was amazed thinking that was the future! And here we are. When I finally got around to hack open my very first Wii Remote, which I've been using for almost six years, it became a little hard for me but I was able to pull through in the very end.
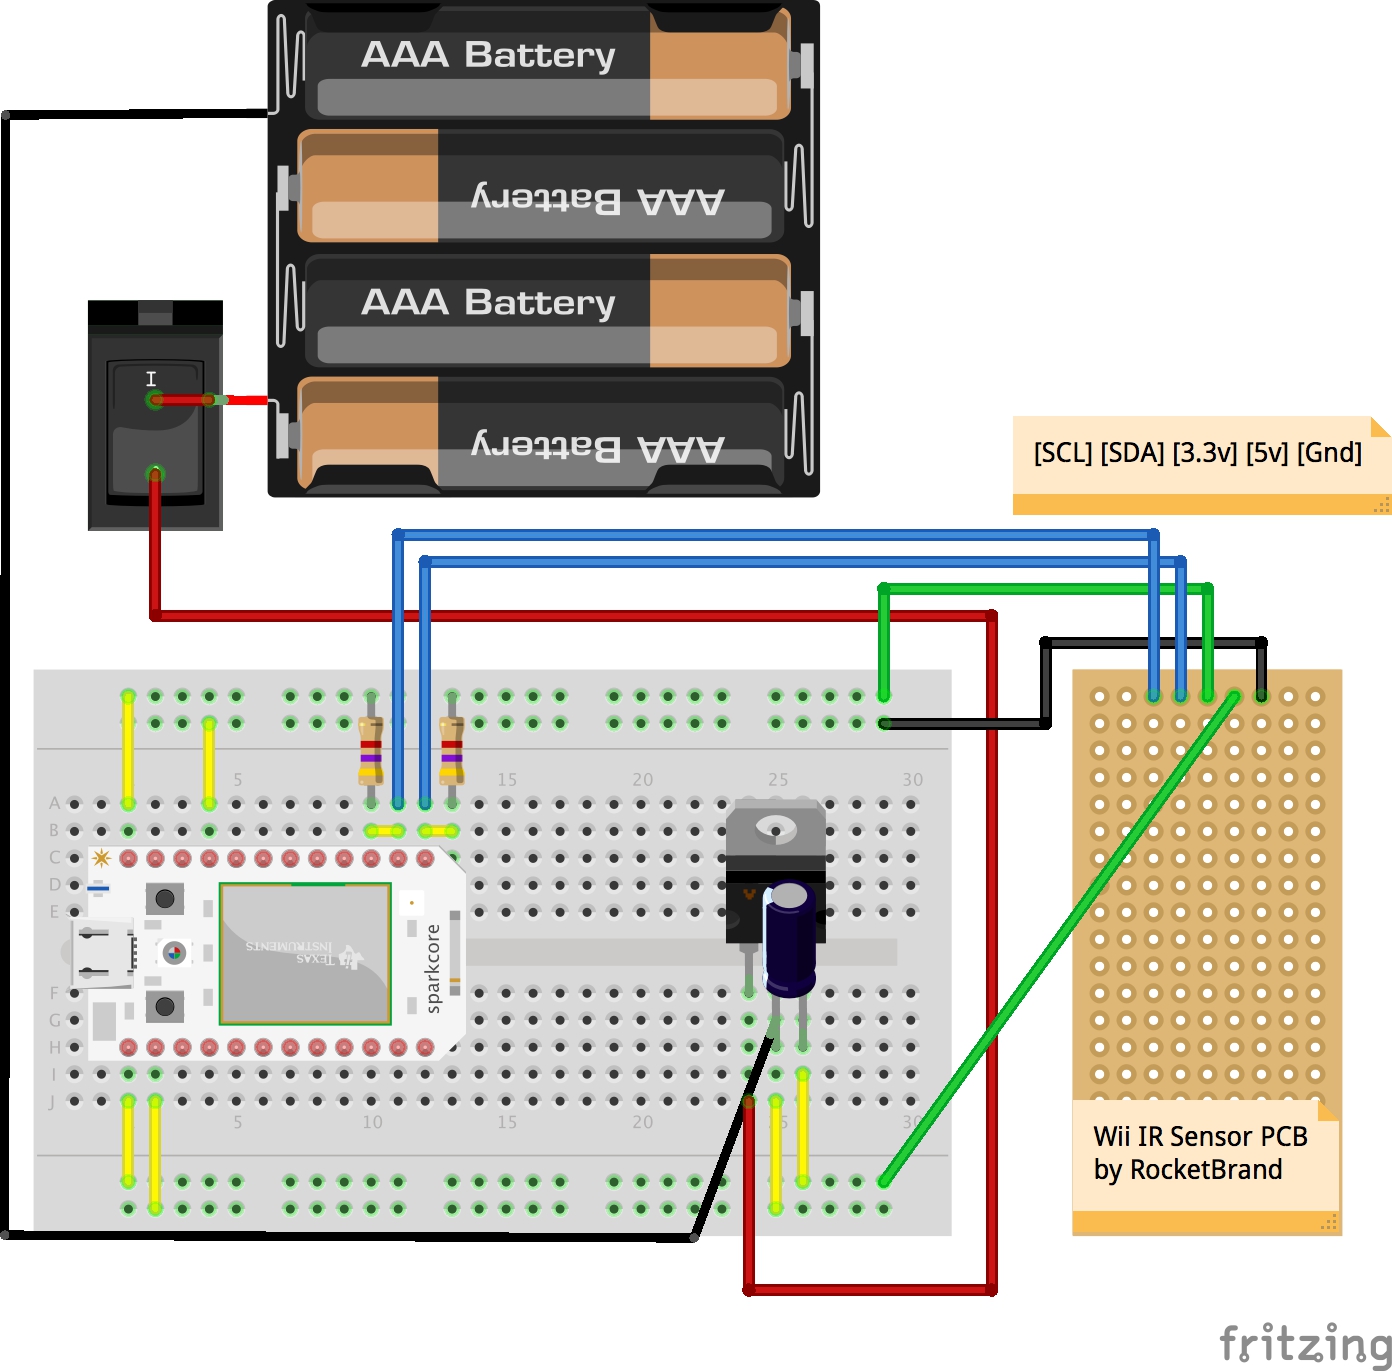
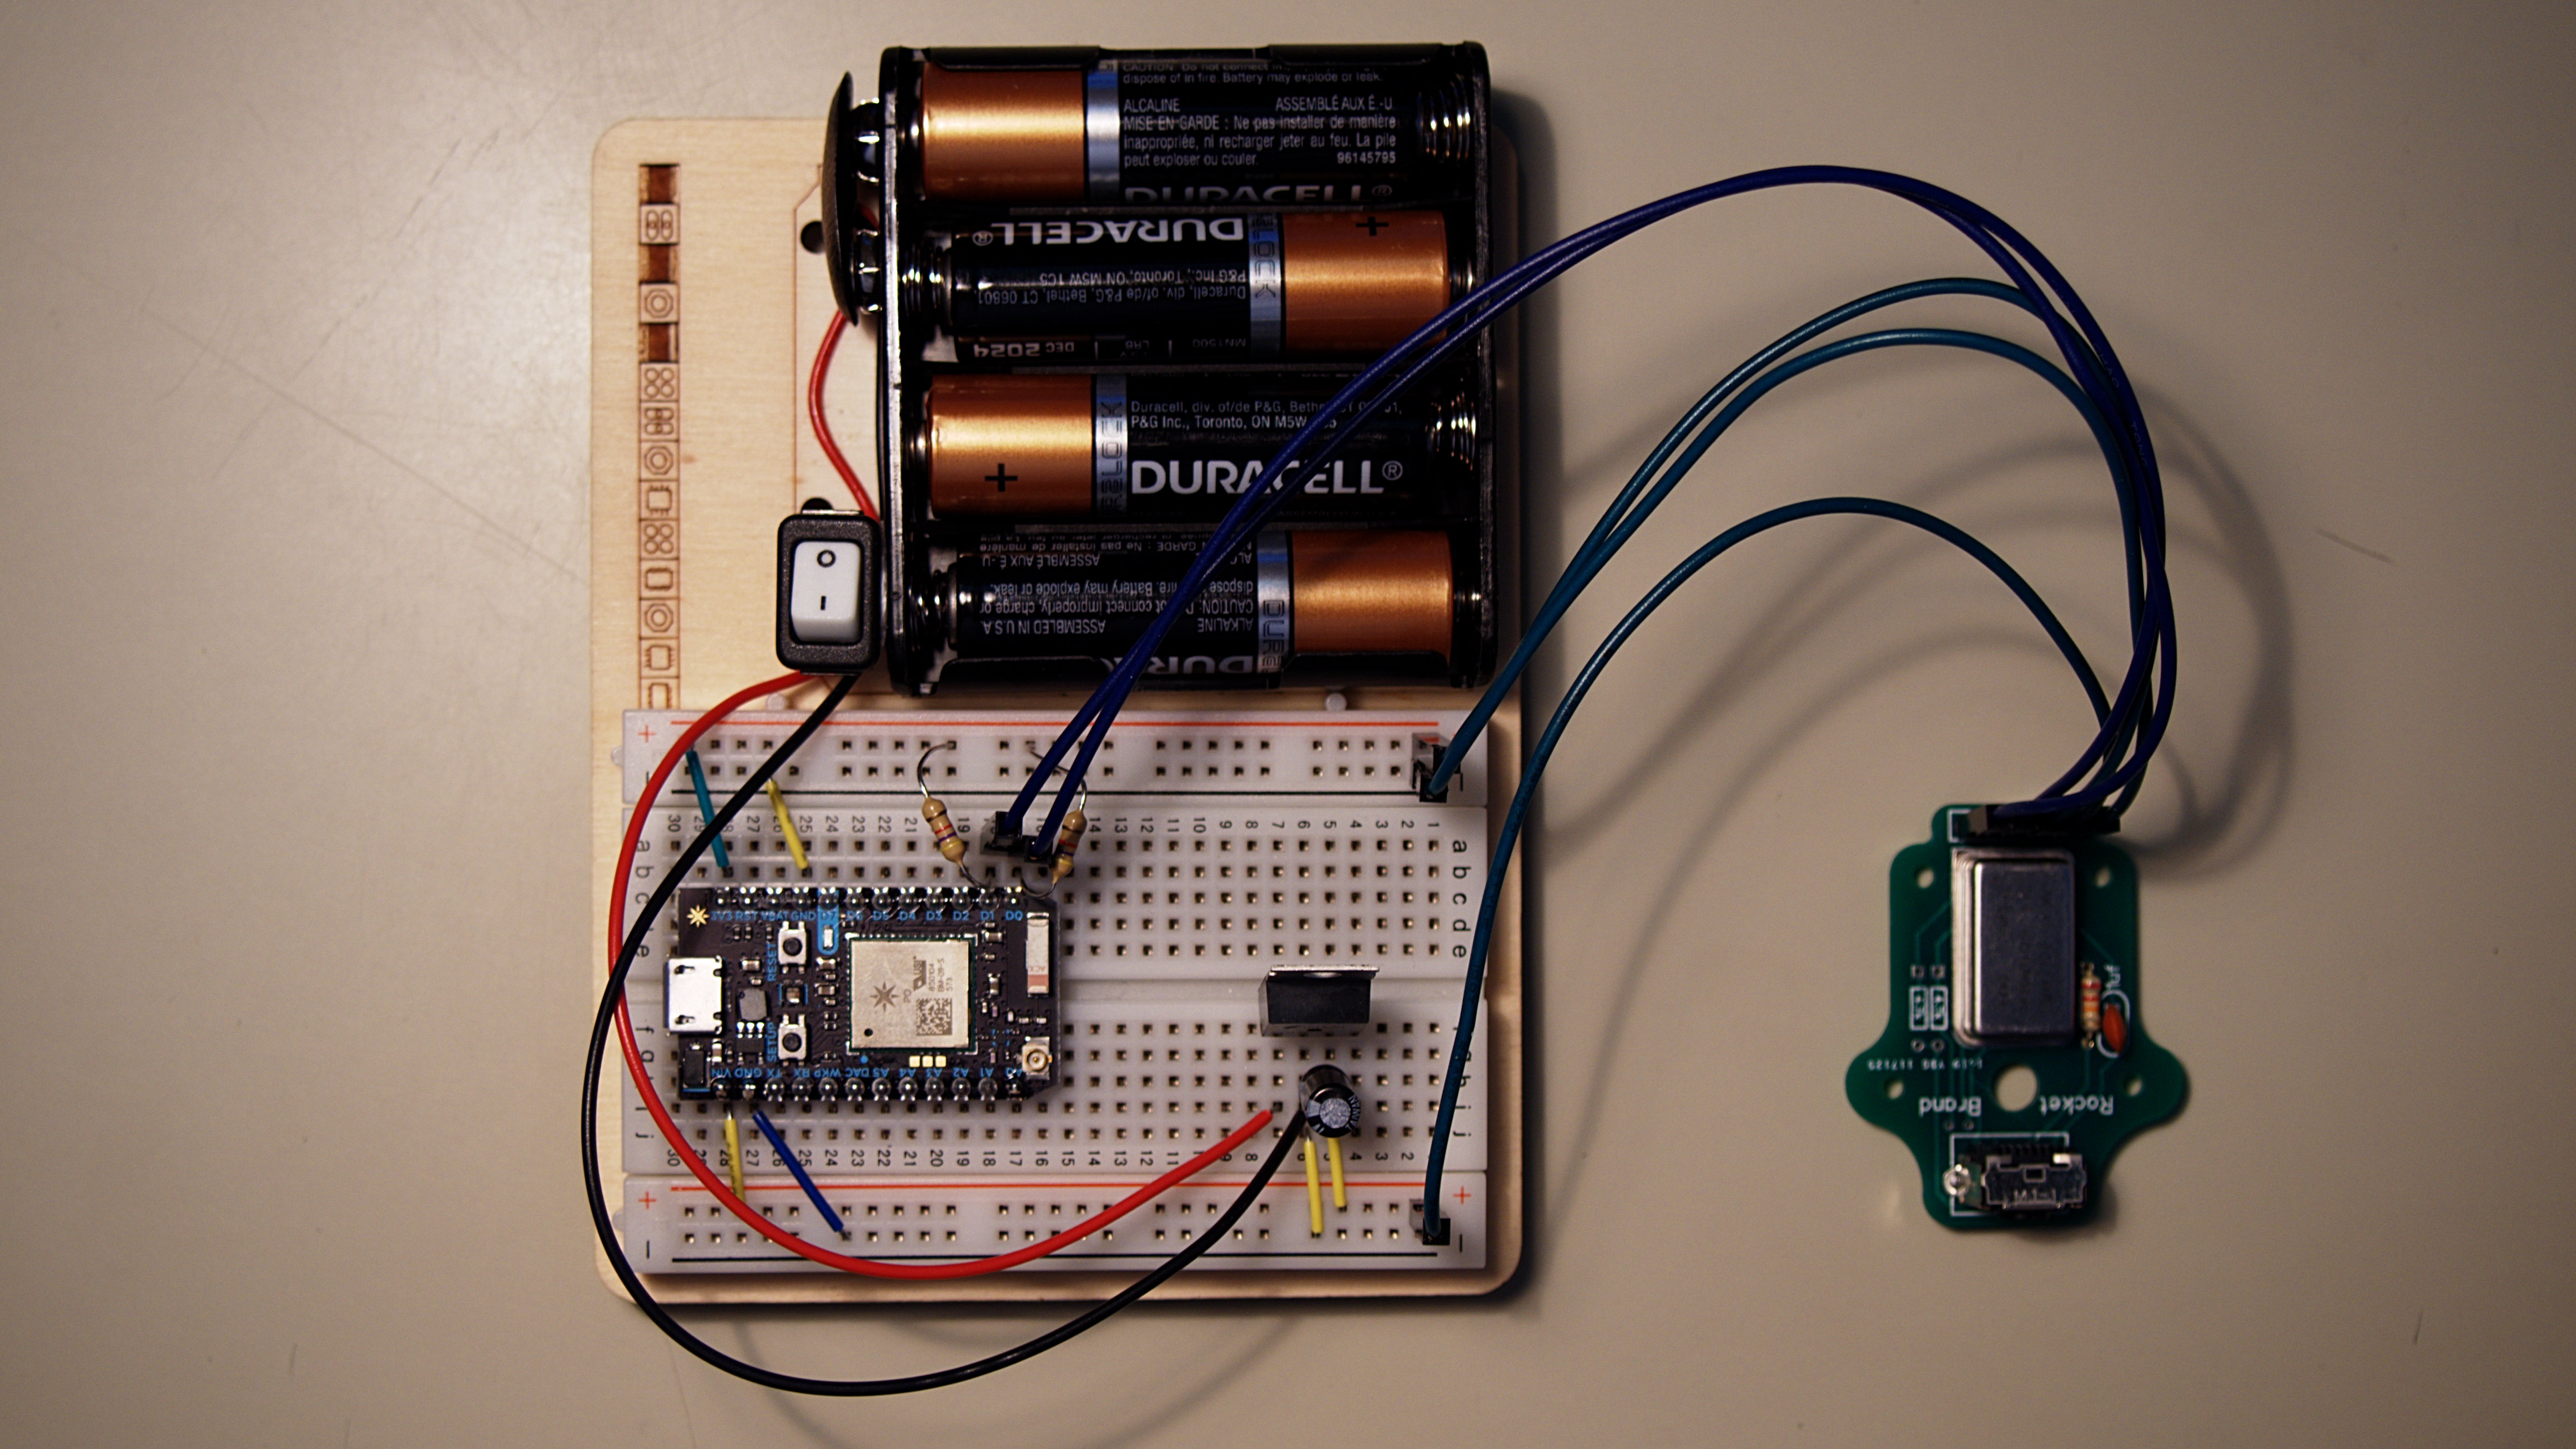
The PCB that I used to interface the camera as an IR sensor came from Rocket Brand Studios (don't let their website trick you; they've got some nice tech). The instructions were simple to follow and doable for anyone with a little soldering experience.
One thing I've noticed though was that without an IR screen, the sensor would also detect natural IR light from the sun so to avoid that issue, I cut out a small match-box and attached the Wii Remote IR screen and made a little enclosure for the sensor.
And since we're talking about I2C here, the Photon (and Spark Core) have dedicated clock and data lines on pin D0 and D1, which both require pull-up resistors of at least 4.7k Ω.
The Power Supply
The IR sensor requires both 3.3v and 5.0v so I just tacked on a 6.0v battery pack and used a 5.0v LM7805 regulator with a 10 µF capacitor (helps stabilize the current) to drop it down to a 5.0v power supply on the lower gutter of the breadboard. From there, I fed 5.0v into the sensor and the Photon, which can accept between 3.6v - 5.5v, and used its 3.3v pin to give the remaining power to the sensor.
Communicating between Wave and Wave Motion
The Wave Motion, once it detects an IR blob, sends the x-y coordinates and size of the blob to the application via Server-Sent Events (SSE). Unlike web sockets, which provide a two-way communication channel between a webpage and server, think of SSE's as an open one-way street that can send data to the webpage anytime, anywhere (though we know that it can only go one place).
On the other side, the application is attached to a handler that updates the pointer every time new coordinates are sent and the testing algorithm becomes more complex from there.
If you enjoyed the tutorial, check out Wave! See you next time and thanks!
Demo
Wave Motion Breadboard View


Comments