


Hardware components | ||||||
_ztBMuBhMHo.jpg?auto=compress%2Cformat&w=48&h=48&fit=fill&bg=ffffff) |
| × | 1 | |||
 |
| × | 1 | |||
 |
| × | 1 | |||
| × | 1 | ||||
https://github.com/jimmyhuang92129/HW2_jimmyhuang_joystickTextEntry
What text entry technique you chose and why?I decided to create a joystick text entry device because it reminded me of my childhood playing old arcade video games. This type of text entry was very common for entering your name into the high scores display and it always brings me back to that feeling of accomplishment. Growing up, I've always wondered the underlying mechanism for this specific text entry device .
How you implemented character recognition (i.e., how your code works)I first started by creating a data structure containing the English lower case alphabet and space. I found the easiest way to implement this was to create a char array. I also initialized a text array for the user inputted text. Finally I initialized an "alphabet Counter" and a "textCounter" integer to help keep track where along the two arrays I was currently located.
char alphabet[] = {' ','a', 'b', 'c','d','e','f','g','h','i','j','k','l','m','n','o','p','q','r','s','t','u','v','w','x','y','z'};
char text[50] = {'-', '-', '>'};
int alphabetCounter = 0;
int textCounter = 3;
Next, I initialized initialize serial communication at 9600 bits per second and printed the initialied data structures above in the "setup" partition.
Serial.begin(9600);
Serial.print(text);
Serial.println(alphabet[alphabetCounter]);
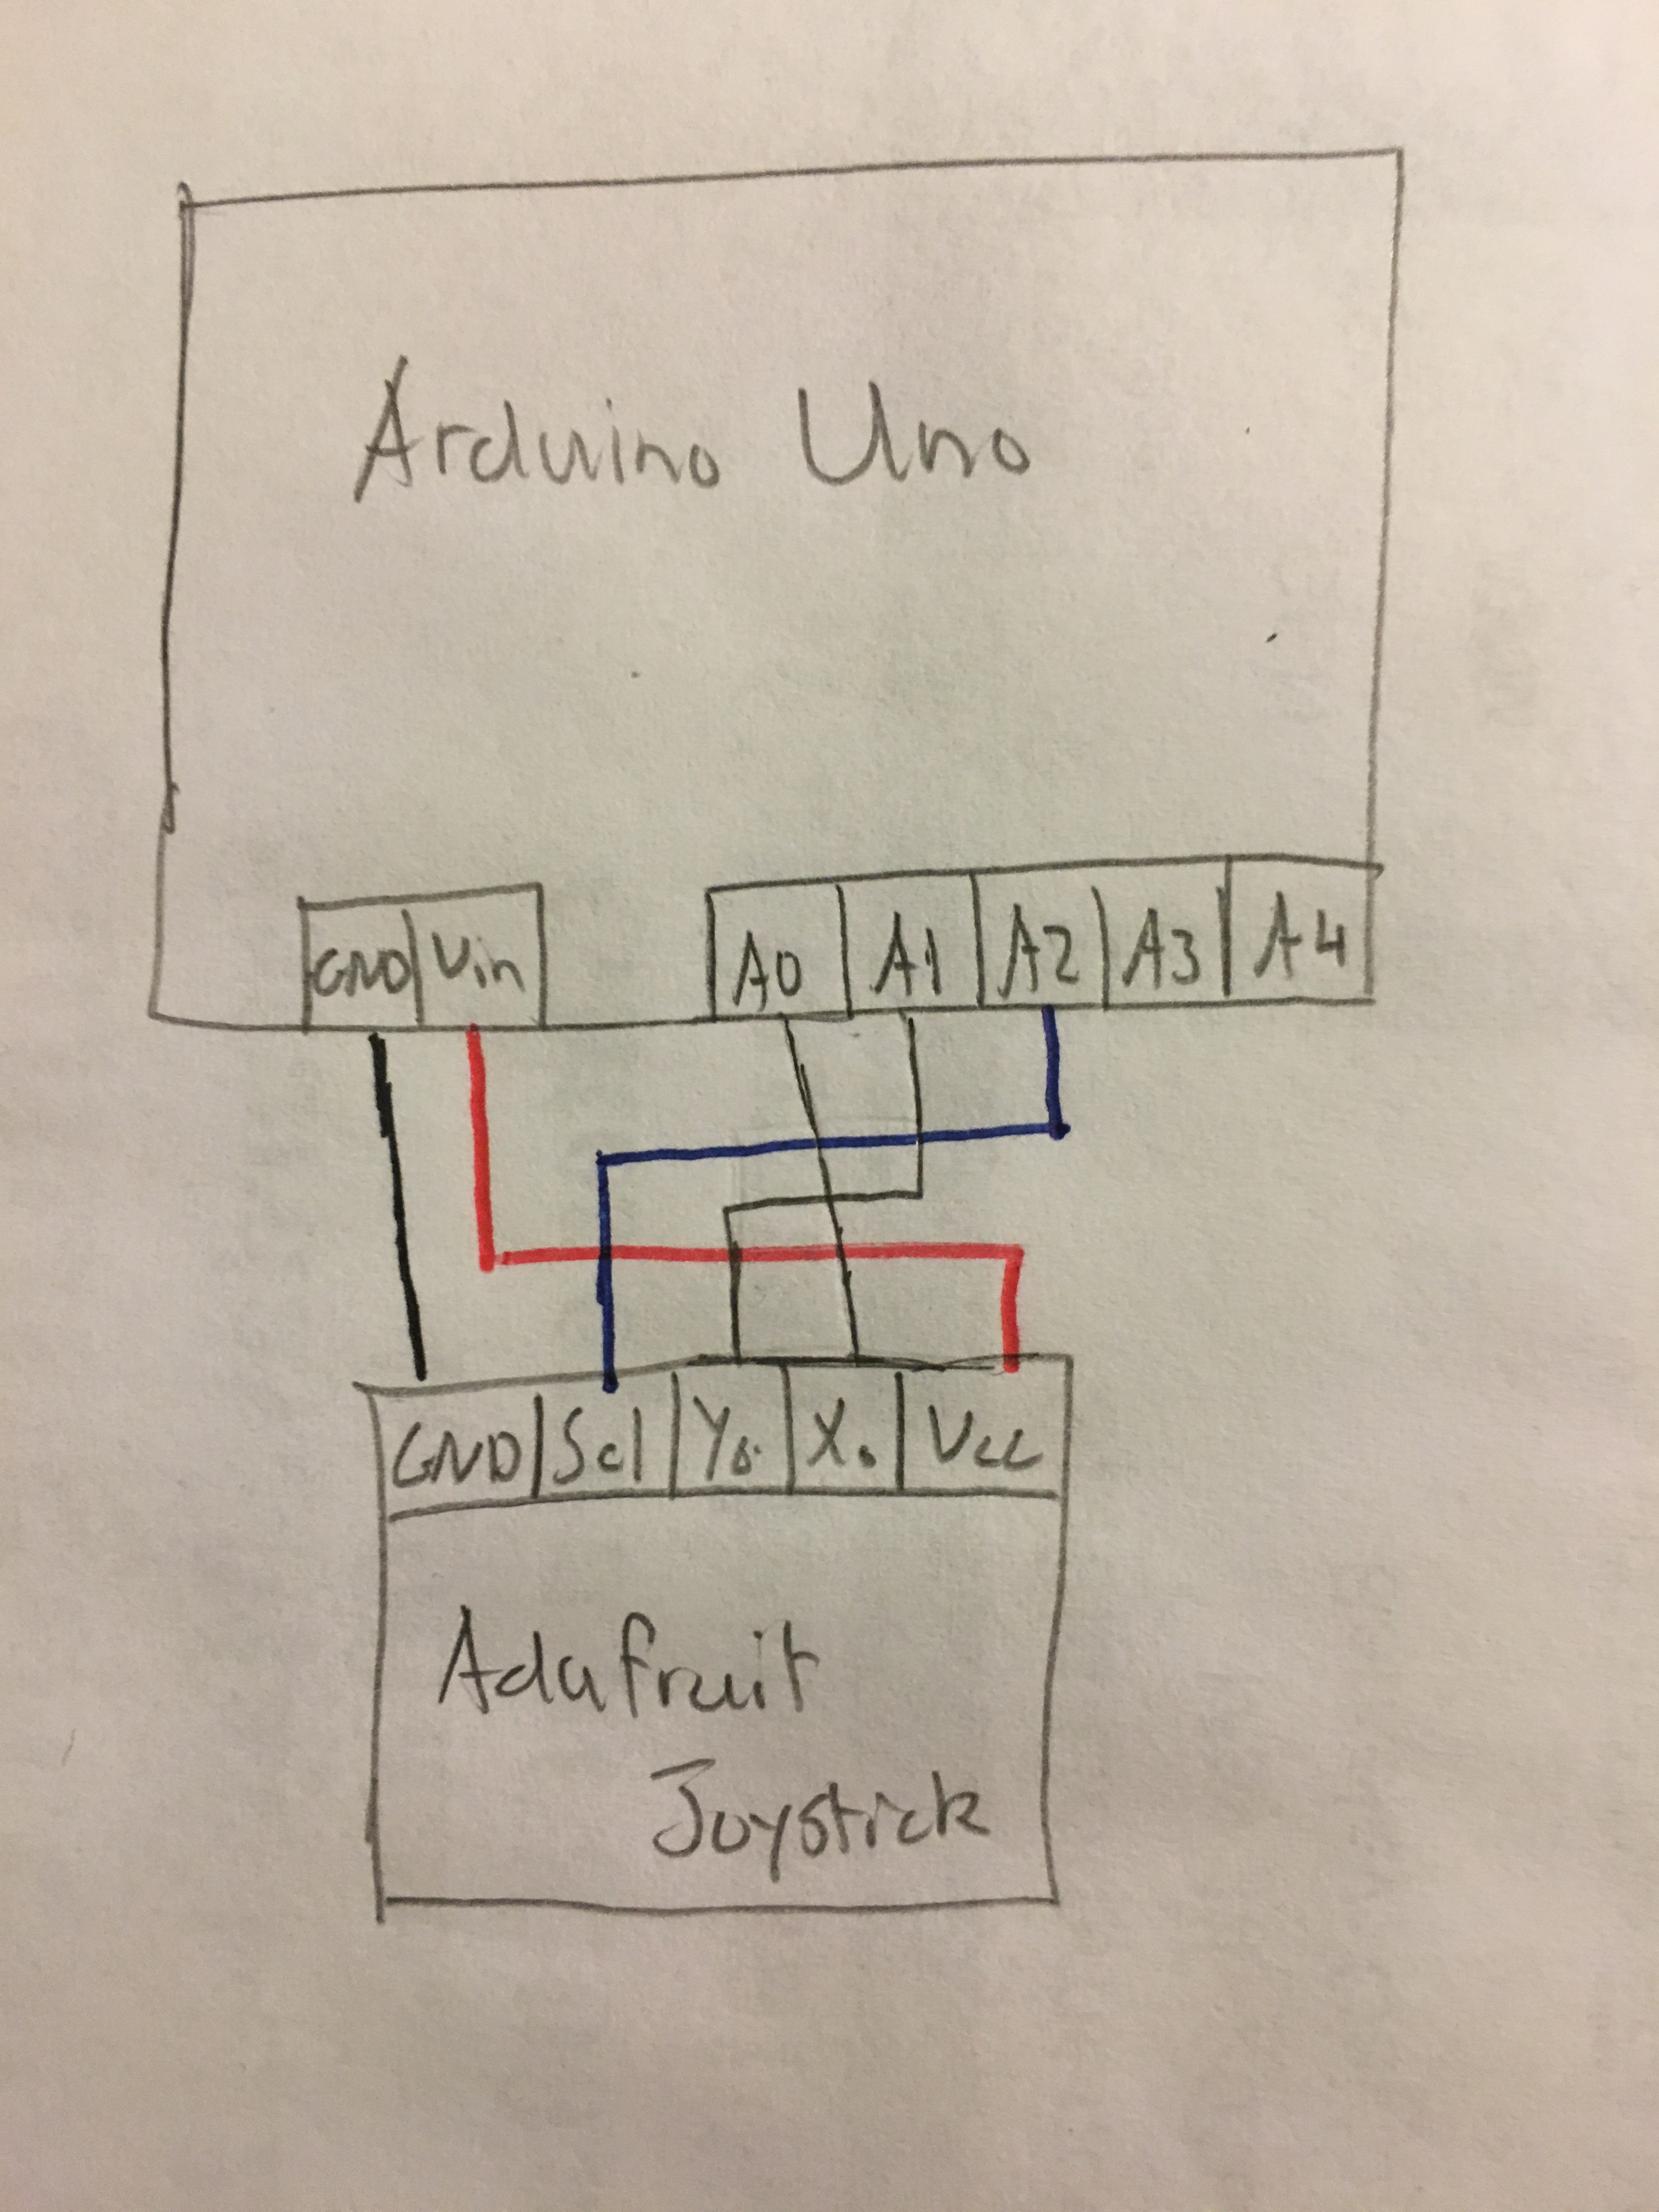
In the "loop" partition, I first stored all the sensor readings from my joystick into their respective X, Y, and Z variables.
sensorValueX = analogRead(A0);
sensorValueY = analogRead(A1);
sensorValueZ = analogRead(A2);
Here, I didn't want the program to do anything until it received user input so I let the program continue collecting sensor data via the loop and placed an if statement. Inside this initial if statement, I placed more conditionals depending on what the user wants to do.
if (sensorValueY > 750){
alphabetCounter++;
delay(500);
}
if (sensorValueY < 150){
alphabetCounter--;
delay(500);
}
If the user wants to scroll through the alphabet by togging the joystick right or left, I would increase or decrease alphabetCounter and then delay 500ms for stability.
If the user wants to select a character by pressing on the joystick, then I would set the next empty cell in my text array to the character currently denoted by alphabetCounter.
if (sensorValueZ < 10){
text[textCounter] = alphabet[alphabetCounter];
textCounter++;
delay(500);
}
Finally, once one of the above actions was completed, the program would first print the text already entered and then the character currently denoted by alphabetCounter, and the process would repeat.
How you constructed the physical dev Controller Joystick User InterfaceI initially constructed the device out of switches, but wanted a more professional look and really get an arcade and joystick feel.
I therefore purchased an additional mini-breadboard and Adafruit Joystick. I then laser cut 4 identical game-controller shaped like mounting device for my joystick to create the finished product.
Wire management was simple, but something I definitely kept in mind. For this I simply bundled all my wires together and zip tied them for a more clean and professional look.
I learned very quickly that unlike software problems, hardware errors are a lot harder to resolve. I had a lot of trouble with the RedBear Duo microcontroller on this project. For some reason it would not recognize my COM port and was unresponsive to both my laptop and 2 other individuals computers. The only feedback it gave me was a blinking red light. After hours of troubleshooting, and failing to get it back up and running, I was forced to use my old Arduino microcontroller to finish the project.
In terms for difficult, this project was just right. It allowed me to build upon my previous knowledge, but also pushed me to explore things that I normally would not have.


Comments