
This page is a summary of a work programme that explores designs for ultra low-cost microreactors for temperature control of biological reactions. These underpin modern molecular diagnostics and synthetic biology approaches that are important for health, agriculture, education and research. However, these instruments are often expensive ($1000's), and these prices are a barrier to wider adoption and equitable access to advanced biological technologies that can otherwise be implemented cheaply.
Early attempts to exploit polymerase chain reaction in the 1990's resulted in a number of designs for thermal cycling systems - this resulted in commercialisation of a number of efficient but expensive designs for the research and medical diagnostics communities. As time has passed, we have seen ever-lowering cost of DNA synthesis, and advent of new molecular tools, which are democratising access to engineering of biological systems. It is now time to bring these together with the low-cost electronics, optics and manufacturing techniques that have been developed by open source technologists and DIY communities, and canvassed on the Hackster site.
The programme was initiated after the COVID19 lockdown, and is an attenpt to explore different approaches to the design of microreactors. The one common theme is that heated air flow is used for temperature control. This avoids the need for a machined metal block and complementary heated lid - common but relatively expensive items. A number of early successful designs for PCR machines (e.g. Corbett Rotorgene, Roche Lightcycler) used directed flow of hot and cool air, but the approach has fallen away, as Peltier device heated/cooled block-based designs have proliferated. It may be time to re-visit this, armed with new advances in electronic control and 3D printing technologies...and with modest intermediate goals, such as low-cost incubators for isothermal diagnostics, like LAMP assays (used for viral diagnosis).
The ongoing experimental programme is described in a number of individual project pages, and this is a summary of its progress and scope. More details can be found on the relevant project pages.
1. Building a programmable rig for testing prototype instruments.https://www.hackster.io/jim-haseloff/programmable-test-rig-d7df62
This Hackster project descibes the design and assembly of test rigs based on Totem construction components and their Arduino-based Mini-Lab and Micro-Lab kits. These were customised with different frames and the addition of 4D Systems touchscreen displays. The test rigs were programmed using XOD, a no-code graphical dataflow programming environment that allows rapid construction and reconfiguration of control routines and touchscreen display. The underpinning rapid prototyping tools are described on this project page, along with XOD code and screen interface design code - all visually programmed.
More information and tutorials for using the tools can be found at https://www.biomaker.org and in the Biomaker group on Hackster (https://www.hackster.io/biomaker).
DIY digital temperature sensorsInstructions are provided for building compact temperature probes based in the DS18B20, which provides pre-calibrated digital outputs that can be read and used easily in XOD code, for control and display.
A compact control unit was constructed, using modular Totem chassis struts and brackets, which provides a useful Arduino-based control system with prototyping board fro interface electronics - and uses the Totem breakout strips for easy connection to microcontroller I/O, 4D Systems 3.2" touchscreen, and all is compatible with XOD programming for rapid no-code prototyping.
This project aimed to explore different components, designs and practical assembly of low-cost microtube incubators - which would make accessible a new generation of isothermal reactions - for home testing, field applications and international educational efforts. Some of the design parameters were:
- For a microtube reactor, the chamber size can be smaller. An 8-tube strip will fit into a space approximately 80x30x10mm - with some allowance needed for possible integration of optical sensors or cheap plastic fibre optics.
- The geometry of the tube strip is elongated, so an asymmetric chamber might be required if the volumes need to be minimised, to reduce power requirements for battery use.
- There are a number of options for heat source - PTC heater + heatsink with integrated fan, or PTC + fan assemblies used for car air heaters (~£10), thermoelectric heater-cooler, etc.
- What's the best geometry for even heating and air flow? Place the heat source centrally below, or above the chamber, as part of a recirculating air flow?
- Place the heat source laterally, and use switched fans for injection (heating) and exhaust (cooling) of the chamber. A similar principle is used for air-driven PCR machines, like the Corbett/Qiagen RotorGene instrument.
https://www.hackster.io/jim-haseloff/airloop-i-5d2a72
The fan is mounted to push air through the fins of two heatsinks mounted directly on the resistive heater element. Heated air is directed in a recirculating loop through the chamber - exhaust from the reaction chamber is directed back to the intake of the blower fans for recirculation. (i) The outer and middle walls of the housing are 5mm thick, with the usual triangulated infill that creates air cells - to minimise heat loss and direct radiation for sample tubes nearest the heater, (ii) The fan is positioned behind the heater, blowing into the heater heatsink, hoping to minimise overheating. (iii) Air flow through the heating circuit is intended to be turbulent at the main points of heat exchange, i.e. around the heatsink fins, and around the sample tube strip, and aerodynamically smoothed between these. (iv) I have introduced baffles around the sample tubes to create turbulent flows - the sample tubes themselves play a role in this. (v) The reaction chamber is designed so that heated air can run along and over the top of the sample tubes - in an attempt to minimise condensation in the tubes.
The vessel was printed in PLA, which provides thermal resistance up to 60-70ºC. and heating was provided by a small 120ºC, 12V, 5-10W PTC heater sandwiched between two finned heatsinks.
The assembled microreactor was driven by a PID controller programmed in XOD, along with displays for readout of multiple temperature sensors and control switches. Even with cursory optimisation of parameters, the PID controller provided relatively accurate (+/- ~1ºC) and robust temperature control for isothermal incubations - with an effective maximum of 65ºC, due to the use of PLA 3D printed vessel materials.
Infrared imaging was used to visualise heat distribution in the reactor and emitted from the outside. The 3D printed housing acted to absorb and radiate heat - giving a ceiling of ~80 degrees C with the 120 degree PTC heater that I was using. There were also signs of uneven heating.
The next stage of the project was to investigate the use of insulated housing, and improved methods for heat exchange with air.
3. Radial Airflow Incubatorhttps://www.hackster.io/jim-haseloff/radial-airflow-incubator-2ce5e0
Design of a low cost incubator with heated radial airflow. This part of the project employed a kinetic heatsink for heat exchange - a spin-off of a research program at Sandia National Labs, now commercialised for CPU cooling - and potentially suitable for efficient air heating. A 3D printed housing was designed to accommodate the heater and coupled heatsink, and to provide a radial recirculating airflow. The reactor was housed in a cheap, repurposed vacuum-walled vessel for thermal insulation.
The prototype was heated to various setpoint temperatures, including 60ºC. The thermal mass of the kinetic heatsink and the stainless steel vacuum-insulated container contributed to a relatively slow rate of heating. It takes 10-15 minutes for this incubator to reach 60 degrees from ambient temperature. The temperature control is steady and the incubator holds temperature accurately - and can hold this for a period of hours. This is great for isothermal reactions, but is limiting for any reactions that require temperature shifts. We next explored more efficient heat exchange, insulation of 3D printed vessels and higher powered heating elements.
4. Testing heatsinks for microreactor air temperature controlhttps://www.hackster.io/jim-haseloff/heatsinks-for-microreactor-temperature-control-65ecfa
A wide variety different heatsinks were tested for temperature control by forced air convection in 3D printed microreactors. First, double-walled vessels were 3D printed in PLA to test for thermal insulation. No 3D printed vessel matched the insulating properties of the vacuum insulated stainless steel jacket (sold cheaply as an insulated lunch container - and worth revisiting).
A customised routine was programmed into the controller, and used to test a range of heatsinks - all attached to a standard PTC heater, run to a setpoint temperature of 60ºC, and then allowed to maintain the temperature witn a simple bang-bang controller - where temperature plots allow one to see rates and times of heating-cooling cycles.
.The StarTech 60x10mm copper heatsink was the outstanding performer, with the fastest heating time and at reasonable cost (£13). The heatsink assembly is also very compact.
2. The StarTech 60x65mm aluminium heatsink was even cheaper, available locally for £5, and also performed well.
3. Both StarTech heatsinks provide large flat surfaces to mount a resistive heater or thermo-electric cooler.
4. Both StarTech heatsinks allow easy replacement or upgrading of their 60mm fans, which have standard mounts. This is potentially useful for reengineering the airflow, or dealing with fan failures when experiemnting with higher vessel temperatures (e.g. it would be useful to run at 95ºC for short periods of time in biological experiments).
5. Both StarTech heatsinks are designed with fins that allow bilateral, rather than radial distribution of the heated exhaust. This opens a different approach to vessel design - with a vertical loop geometry.
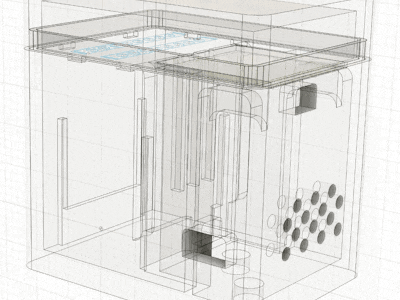
5. Building modular microreactorshttps://www.hackster.io/jim-haseloff/modular-microreactors-5becf0
The next steps in the project were to:
1. Design reactor vessels that are modular and slot together, with minimal air gaps. The reactor systems were designed with three potentially interchangeable sections (i) heater vessel, (ii) holder for the reaction tubes, and (iii) lid, as part of a combined system for air heating and recirculation. A modular design allows the mixing and matching of different subsystems.
2. 3D printing allows flexible design of prototypes, to tackle optimisation of airflow through the vessel, for minimal volume and heat loss, and rapid heat exchange.
3. The use of printed thermoplastics has inherent limitations, and problems with heat-softening and thermal loss. One aim is to look at internal coatings and different plastics that might minimise these issues.
The set of prototypes was initially based on the use of the StarTech 60x60x10mm copper heatsink (FAN3701U) - which had proved an efficient device for air heating, when attached to 12V PTC heater, and relatively inexpensive (currently available for £13 on Amazon UK, and £10 on Ebay).
A series of small cup-like open-ended cylinders were 3D printed from Ultimaker Tough PLA material. These were 40mm in diameter, and 50mm tall - with 10mm thick walls and floor. The images below were taken during printing, to capture the arrangements of infill patterns inside the objects.
The 3D printed cups were arranged in a similar way to the diagram above. 15% density infill to the left, 30% infill (centre) and 50% infill (right) - 2D triangles pattern (back), 3D octet patterns (middle) and 3D cubic patterns (front). The cups were filled with boiling water at the start of the observation period, and infrared images were taken at 1, 3, 10 and 20 minutes after the start.
There were only marginal differences in the overall level of heat emission seen between the vessels with different infill types. However, printing with the higher density 3D infill pattern removed the "patchwork" effect due to underlying infill structure. The higher density models took longer to print, but were noticeably more solid and stronger.
1. A simple tongue and groove interface works well as a physical interface between 3D printed reactor components. This allows independent testing and improvement of modular reactor components.
2. A 3D printed tray provides part-manifold, part-tube support for reactions in the incubator. This can be easily adapted to hold different types of microtubes or strips.
3. The StarTech copper heatsink (FAN3701U) worked well as a heat exchange element. The longevity of the fan may be an issue when the heatsink is working at temperatures above its rating - temperatures on the attached heating element can reach 80-100ºC. However, the fan has standard 60mm mounting points, and can be replaced with a wide variety of substitutes if necessary. It may be feasible to test the performance of a high velocity, high power fan (sometimes used for heatsink cooling, where there can be a high static load, e.g. https://www.titan-cd.com/en/product/12V-DC-High-Static-Pressure-CoolingFan-60mm/TED-T6038-Series.html. In addition, it may be worth testing reversal of the air flow through the vessel - as this would direct heated air directly into the sample space, and could minimise lag.
4. Surface coatings, either thermal paint additives or chrome finish made little difference to the heating properties of early prototype plastic vessels.
5. The type of 3D print infill density and pattern made a considerable difference to the insulating properties of the thick-wall design used for the reactor. 15% infill patterns possessed less efficient insulation properties, when tested with hot water and IR imaging. The shift from a 15% density and 2D infill pattern to 50% density and 3D octet pattern produced a more even heat loss that could be measured at the vessel surface. (This may be worth pursuing with other 3D infill patterns, like cubic - to optimise the balance between density. heating and insulation properties and printing time.
6. Irregularities in outer wall thickness made perhaps larger contributions to uneven heat loss, particularly at points exposed to internal flows of heated air. (i) Simplification, smoothing and thickening of the outer wall shape, and (ii) the introduction of more headroom for airflow within the vessel - improved the properties of the reactor.
7. The combination of design improvements to airflow, wall thickness and 3D closed-cell infill patterns produced the Mk III prototype, with cooler surface and stable internal temperatures.
8. With these improvements, is it now feasible to consider higher capacity heating and cooling elements, larger microplate holders, higher speed fan-forced airflow.
9. Poly lactic acid (PLA) is suitable for printing vessels that survive up to 70-80ºC, but some softening and sagging of the prints will be seen as the temperature climbs, and I have observed this, especially as the heater struggles to heat poorly insulated vessels. One next objective is to switch to nylon filament, to produce more thermally-stable prints.
6. Faster heating and airflow circuitshttps://www.hackster.io/jim-haseloff/microreactor-heating-and-airflow-circuits-1cc90b
The next set of aims were to improve Mk III air heated microreactor.
(i) Test reversed air flow through PTC heater- StarTech heatsink combination by reversing orientation of the standard Evercool fan - to drag air through the heatsink, and blow heated air directly over reaction tubes.
(ii) Test replacement of standard 10mm thick Evercool fan with up to 25mm thick higher power fans, to improve air flow. This requires the modifcation of the vessel base.
(iii) Test reactor with higher power heater element
The StarTech heatsink has a simple (M3 thread) mounting for a standard 60x60x10mm fan. This allows easy testing of different fans, and reversal of the airflow - for example to drag air through the heatsink fins, and blow the heated air directly onto the samples, rather than vice versa.
As well as having a taller base unit (to accommodate the larger fan units), the redesigned reactors were adjusted to have (i) a larger headspace. to allow options for less impeded airflow and/or space for redesigned reaction blocks (shown in green), and (ii) the bases of the side channels, inside the reactor, were made more aerodynamic, with smoothed profiles.
A prototype was printed in Ultimaker Tough PLA with a setting of 30% infill density, and a 3D cubic pattern.
Ceramic PTC heaters are used for warming small volumes like car interiors, and integrated fan heater devices are available on Amazon, Ebay, AliExpress, etc. For example, 12V, 100-120W fan heaters are available for as low as less than £10. These use 60mm fans to drive heat exchange, and fit neatly into the new, taller Mk IV microreactor prototype. This is a cost effective way of obtaining a fan and heat source. The power output of these devices is considerably higher than the PTC elements I have used so far.
The use of the higher power car heater device results in much faster heating times. Temperatures in the reactor reach 60ºC from room temperature in less than 2 min, with very short heating pulses (5-10 sec) seen at steady state. The compact air heater (60x60x42mm) was mounted in both downward and upward pointing directions.
https://www.hackster.io/jim-haseloff/thermal-cycling-airflow-reactor-i-6c72cd
The higher power air heater provides much faster - around 10x shorter heating times to reaction temperatures suitable for biological diagnostic reactions. The component will be incorporated into the next generation of micro reactors - with the following developments:
(i) Reaction vessels were printed with GreenTEC Pro nylon to provide higher heat resistance, to allow reaction temperatures up to 95ºC (required for DNA denaturation during PCR amplification.
(ii) The car heater unit contains an integrated 60mm axial fan with standard mounts. This can be upgraded to a higher power fan to allow faster airflow through the micro reactor, and most efficient and even heat transfer.
(iii) The use of a faster, higher power heater necessitates the adjustment of the software controller, to allow faster reading of temperatures, to allow more accurate control of the heater (using PID logic).
(iv) Intake and exhaust fans were incorporated with suitable control software - in addition to the the heat recycling system, to allow thermal cycling reactions. This allows the prospect of construction of simple instruments of the type required for PCR and RT-PCR diagnostics and Type IIS DNA assembly - for ultra low cost.
https://www.hackster.io/jim-haseloff/thermal-cycling-airflow-reactor-ii-a25c8e
Previous microreactor prototypes showed the promise of using fan heater components for cycling temperature control. Car fan heaters are low cost, and contain 12V, 100W PTC elements which allow rapid air heating, which can be directed and switched using simple fans. The elements have a high heating capacity in small reactor volumes, and manifolds were designed to harness heated airflows, to minimise temperature differences across multi-tube samples, and maximise heating/cooling rates.
Photo of the test rig screen that shows about an hour of thermal cycling. The red trace shows the temperature reading at the periphery of the airflow manifold, which lags the temperature changes seen at the sample tubes (blue and white traces) - which are close in value. The yellow trace shows the regulated activity of the heater.
In this prototype, the output of the fan heater is directed upwards into the circular entry port of the airflow manifold - then distributed to each of the eight tubes placed at the manifold outlets. While heating is driven by the 100W 12V PTC resistive heating element, cooling is initiated by (i) switching off the heater element (the associated fan stays on to maintain air circulation past the sample tubes), and (ii) activating both the intake and exhaust blower fans, which are positioned outside the heating chamber, and which introduce ambient temperature air into the chamber. The 50mm blower fans produce a high rate of airflow from outside the chamber - but the chamber and heater retain heat, and the result is a useful and easy to regulate shift in temperature.
The speed of heating and cooling is acceptable, compared to laboratory instruments used for routine PCR experiments - a 4 minute cycle (95ºC for 1 min; 55ºC for 1 min; 72ºC for 2 min) took about 7 min per cycle - and the cost is difficult to beat - about £40 of print filament, heater and fans, along with DIY Arduino controller with customisable touchscreen.
9. Refactored design of the Airflow ReactorI have taken the components and ideas from earlier prototypes, and want to implement these in a 3D printed hosing that will provide a platform for development of an open production model.
More details at: https://www.hackster.io/jim-haseloff/refactoring-the-airflow-reactor-design-part-9-b64e2a
The main fuctional components of the heating and cooling circuits are shown below. These include a 12V 150W PTC heater with integrated 60mm axial fan (red) - mass produced for car heating systems. The heated air from this device is directed into a 3D printed manifold (yellow) that provides a housing for one or more racks of micro tubes. The reactor vessel needs to allow recirculation and re-heating of the closed airflow. In order to cool the samples, two 50mm blower fans are used to drive external air into the system, and at the same time exhaust heated air from the vessel. Temperature monitoring and control of the electrical devices is managed by an Arduino micro controller with user interface through a touchscreen.
The adoption of airflow manifolds means that the reactor has adopted a taller form, and in order to accommodate this, a box-like 3D printed housing was designed to provide supports for simple assembly of the reactor. The compact box-like form allows relatively simple redesign for different components, if required, and is visually consistent with other scientific instruments, for better or worse. A critical design constraint was to arrange paths for both closed heating and open cooling airflows. In this implementation, the flow of heated air is upwards throught he fan heater and manifold. The top surface of the instrument deck (under the lid) is flat, showing the top of the tube manifold and exhaust fan intake (green/black) - and two vents are positioned either side of the exhaust fan that return air to a mixing chamber beneath the fan heater. This allows a simple split path for airflow recirculation during the heating cycle. When cooling is required, both blower fans are turned on, to introduce fresh air into the chamber, and exhaust heated air.
During tests of the instrument, a small increase in temperature was noticed when the cooling fans kicked in. It was reasoned that this might be due to strong flow rates driven by the twin blower fans - and that this might contribute to: disturbance of dead air, to be pushed back through the heater and manifold?and/or, reverse air flow, due to built up of pressure in the mixing chamber, and flow up the return channels.
A few adjustments were made to the design of the vessel:
(i) to remove dead space between the fan heater and the vessel walls by adding new horizontal partitions to close amd minimise the size of the mixing chamber located under (and at the entrance of) the fan heater.
(ii) to add baffles to separate the airflows from the two intake sources within the mixing chamber, the return flow and intake vent for ambient temperature air.
(iii) include an extra cable slot for the heater fan leads.
The Mk II vessel showed a clear improvement in temperature control - with less evident oscillation when the cooling fan was activated. Experiments with the Mk I vessel showed a transient rise in sample temperatures after the cooling fans were activated - presumed due to either flushing of additional heated air from the vessel, or due to altered flow patterns around the air recirculation system. The adjustments made for the Mk II vessel greatly reduced these. As a result of these observations, the design of the lower cooling fan holder was redesigned to minimise any airflow leakage from the mixing chamber.
10. Improved manifold designsThis project tackles the design of airflow manifolds, designed to support microtubes, and direct airflow across their surfaces for efficient heating and cooling. In future designs, optical sensors will be integrated into the manifolds in order to provide real-time monitoring of reactions.
Manifolds were 3D printed in heat resistant material, and designed to drop into the reactor vessel as a modular unit, sitting over the exhaust outlet for the fan heater component. Heated air was directed through the manifold, and over the surface of microtubes, or other samples, mounted on the top of the manifold. The short distance allowed for efficiency of heat transfer, but even, precise and predictable heating was also required.
Several different manifolds were designed and tested in the Mk II airflow reactor - several design constraints were adopted. (i) 8-tube (200µL) strips were assumed for the sample format. (ii) The geometry of the fan heater exhaust and the tube strip dimensions were different (55mm diameter circle vs. 80mm x 10mm strip) - so air channels needed to be fashioned for even heating. The approach was to fit the sample tubes into a column of heated air, experiment with different size and arrangement of channels, and test the prototypes.
The characterisation of a number of trial designs lead to the development of a standardised prototype, that was then sytematically modified and tested to see how individual elements of the design contributed to overall efficiency of the manifold. The "control" manifold shared (ii) internal baffle, (ii) conical inlet port, and (iii) 11x20mm elliptical outlets around the sample tubes, and these features were systematically modified.
The control manifold performed consistently. Inner and outer tube positions showed very similar temperatures through the different heating and cooling steps, which is an important feature for the reaction vessel. The removal of the internal baffle resulted in the appearance of marked temperature difference between inner and outer tube positions. especially under rapid and high heating, and cooling - which were not evident when the baffle was present. This confirmed the important role of the baffle in promoting air mixing, and avoiding uneven heating due to direct airflow from the heater through the central tubes of the sample holder. The use of the conical inlet port to direct incoming heated air onto the baffle was beneficial. Expansion of the outlet ports adjacent to the sample tubes made little difference to the performace of the unmodified manifold - suggesting that the aperture of the outlet ports is not rate limiting.

Comments