

Hardware components | ||||||
 |
| × | 1 | |||
| × | 1 | ||||
| × | 1 | ||||
| × | 1 | ||||
| × | 1 | ||||
| × | 1 | ||||
| × | 1 | ||||
Software apps and online services | ||||||
 |
| |||||
This project will monitor a backup generator that utilizes the Generac Evolution or Nexus Controllers over a WiFi or wired connection. Generac, Eaton, Honeywell and Siemens Home Backup Generators use these Generac controllers. Honeywell and Eaton call the controllers Sync 1.0 (Nexus) and Sync 2.0 (Evolution) in their documentation however all of these companies sell generators that use the controllers supported by this project. The project is written mostly in python and has been tested with a Raspberry Pi 3. Ideally you would need to create a physical enclosure for your raspberry pi and possibly make a cable to connect the raspberry pi to the Evolution or Nexus controller. If you are comfortable doing these things and you have a backup generator that has an Generac Evolution or Nexus controller then this project may be of interest to you.
FunctionalityThe software supports the following features:
Monitoring of the generator to to detect and report the following:
    - Maintenance, Start / Stop and Alarm Logs (Nexus only supports Start / Stop Log)
    - Display Generator Serial Number
    - Generator warnings and faults (Wiring Error, High Temp on air cooled models, Low Oil Pressure,
            low coolant on liquid cooled models)
    - Generator Status:
        - Engine State
            - Generator Switch State (Auto, On, Off)
            - Generator Engine State (Stopped, Starting, Exercising, Running Manual,
                Running Utility Loss, Stopped due to Alarm, Cooling Down)
            - Battery Voltage and Charging Status
            - Relay Output State: (Starter, Fuel Relay, Battery Charger, others for liquid cooled models)
            - Engine RPM, Hz and Voltage Output
            - Generator Controller Time
        - Line State
            - Utility Voltage Level
            - Transfer Switch State
    - Outage Information
        - Time since last outage
        - Current Utility Voltage
        - Min and Max Utility Voltage since program started
    - Maintenance Information
        - Weekly Exercise time, day and duration
        - Hours till next scheduled service
        - Total Run Hours
        - Firmware and Hardware versions
    - Various statics from the generator monitor including time since program launched,
          MODBUS / serial communications health and program health.
Email notification of :
    - Engine state change
    - Switch state change
    - Critical or Warning messages from the generator
Web based application for viewing status of the generator
Command Line application (all the functionality of email commands)
Ability to set exercise time
Ability to set generator time
Ability to start, stop, exercise and start / active the transfer switch
     (i.e. power your house off the generator) remotely.
This software was written by one person with full time access to one generator. The primary model used for testing and development is a liquid cooled model with an evolution controller. The software was written with every intention of working on liquid and air-cooled models with the Evolution or Nexus controller however the author has not tested all scenarios. Some testing has been done with an air cooled Nexus controller, however not all firmware versions and models have been tested.
In an effort to expand compatibility and functionality, from time to time I may use the issue tracker of this project to request input from people using the software. This input will will allow greater compatibility and new features to be added.
Known Issues:The ability to determine the hours the generator has run is enabled in the code, however the ability to read the backup vs exercise time (backup + exercise = total run hours) is not implemented.
The Evolution Controller contains a register that should hold details about the model of the generator. I believe I have decoded this register however I need additional data points to fully validate. My controller was replaced and as a result, the register on my system has not been properly initialized. Please see the project issue tracker issue on this topic.
Nexus Controllers are currently supported however the functionality is reduced due to the Nexus Controller supporting fewer features. On Nexus Controllers the ability to detect battery charging, transfer switch state, read the alarm log, and set the quiet mode is not functional. All other functionality support by the genmon.py and the Nexus controller should work as expected.
When testing, at times, I have seen CRC or other errors in the serial communications when the generator starts or is running. The software will detect these errors, log them and continue. Since the software continuously polls the generator the registers are updated around once or twice per seconds. These errors are likely caused by poor shielding on the cable I created, the fact that I have a large generator (48kw), and the placement of my cable, however the errors do not appear to hamper the operation of the program since a more robust error detection and recovery method was implemented. A properly shielded cable should remedy these errors.
If the legacy method of setting the exercise time is used (it is used on all Nexus controllers) then you can only set a future time on the current day of the week. You can set the exercise time to any day and time, except earlier in the day on the current day of the week.
While a large amount of functionality is included in this software, some items may be missing. For example, the Evolution Controller has the concept of alarm log entries and alarm codes. Alarm log entries are the collection of the time, date and a description of a give alarm along with an alarm code. Alarm codes are a 4 digit number that corresponds to a specific alarm condition. The alarm codes and the alarm log may not display every alarm log entry properly in the user interface. I have attempted to decode these values and according to the documentation I have decoded many, if not most, of them. If you run into a situation where the one of the logs entries or values returned reports and unknown value feel free to let me know (via opening a project issue). Generally this can be easily resolved by sending the decoded log values supplied in the email or web interface and a picture of the corresponding log entry (match the time and date and alarm code) from the Controller display. This really comes down to a list of numbers that correspond to displayed strings in the Evolution Controller firmware. My generator only has a finite set of alarm log entries so not every string displayed may be decoded my genmon.py. The alarm conditions and alarm codes are in the file ALARMS.txt. The list of alarm codes was taken from the Generac documentation so this list is likely close to complete however the short description of the alarm contained in the alarm log may need input from others to complete.
To summarize, if you see any unknown or things are not working as expected, please open an issue on the project.
ConnectivityThis application was written to be agnostic of the underlying network media (i.e. WiFi, Ethernet, etc). Testing and development was performed with WiFi. WiFi access points were connected to an uninterruptible power supply (UPS) so connectivity is not lost power is transferred from the utility to the generator.
Setting Up Your Raspberry Pi (Serial Port)Since there are several version of the raspberry Pi out and also several options regarding the operating system, I will leave this section somewhat minimal. I used a Raspberry Pi 3 with Raspbian Jessie Lite. There are many resources on the web for setting up a Raspberry Pi so I will only include links for setting up the serial port. The Linux device name of the serial port changed or at least the symbolic link changed starting with the Raspberry Pi 3 from /dev/ttyAMA0 to /dev/serial0 so if you are using the on board serial port you will want to validate the device name and make sure genmon.conf reflects the serial device name of your Raspberry Pi and Linux distribution. The following two links are helpful in setting up the serial port on the Raspberry Pi:
General Setup of the serial port for a Raspberry Pi
An updated serial port setup instructions based on the Raspberry Pi 3
One important step is to validate your serial port is working properly. You can validate the serial port is working properly by using the Linux program minicom (see minicom man page for full reference). minicom is a console based terminal program. To validate you serial port connect RS-232 transmit to RS-232 receive, start minicom and select the serial port you will be using to communicate with the generator controller. Then type on the keyboard. If you serial port is working properly you should see what you typed on the screen. Also, you can validate your cable by connecting your cable to your serial port and connecting transmit to receive at the far end of the cable so you will be looping back through your cable, then repeat the minicom test described above.
The project wiki also has a description of setting up the Pi with genmon.py.
Software
genmon.py (required)genmon.py is a python program to communicate with the Generac Evolution or Nexus Controller used in some liquid and air cooled standby generators. The program is written using python 2.7, earlier versions have not been tested. Python 3.x has not been tested. This program will communicate with the Evolution or Nexus Controller over the serial port using the MODBUS protocol. The application will allow the display and monitoring of the generator much like the Generac Mobile Link product.
Once setup the genmon.py program will send an email when your generator does interesting things (power goes out, alarm on the generator, weekly exercise, etc). The program will also allow emails to be sent to an IMAP email folder. The program monitors the IMAP folder and takes commands from the email subject. The format of the subject of the email should have "generator:" followed by one or more of the following commands:
 Commands:
      status      - display engine and line information
      maint       - display maintenance and service information
      outage      - display current and last outage (since program launched)
                   info, also shows utility min and max values
      monitor     - display communication statistics and monitor health
      logs        - display all alarm, on/off, and maintenance logs
      registers   - display contents of registers being monitored
      settime     - set generator time to system time
      setexercise - set the exercise time of the generator.
                      i.e. setexercise=Monday,13:30
      setquiet    - enable or disable exercise quiet mode,
                      i.e.  setquiet=on or setquiet=off
      setremote   - issue remote command. format is setremote=command,
                     where command is start, stop, starttransfer,
                     startexercise. i.e. setremote=start
      help        - Display help on commands
     Example subject:
        generator: status maint
        generator: setexercise=Tuesday,23:45 setquiet=on
A few notes about commands:
The setremote command issues commands directly to the controller. Start and stop commands should be back to back, i.e. is is not recommended to issue start followed by starttransfer, you should have a stop after each start command. Also, when the starttransfer command is used, once a stop command is issued the controller will set the transfer switch back to "utility" but the generator will continue to run in "cool down" mode for few minutes. This is normal and the behavior is controlled by the controller.
The setexercise command can not set an exercise time that is within a few minutes of the current generator time. This is a limitation of the controller.
The settime command will set the generator time to the time of the Raspberry Pi. If you Raspberry Pi is setup to your correct time zone and your Linux distribution (e.i. Raspbian ) uses network time protocol (NTP) then this will set your generator time to the accurate time. Since the register interface to the generator controller does not expose seconds, genmon.py will wait until the Raspberry Pi time seconds are zero before setting the command. This allow the time to be accurate within a minute and the seconds that are off from the exact time are consistent. For this reason the time may not be update for one minute when this command is used.
The program uses the file genmon.conf to for configuration data. Edit this file place it in the /etc directory before running the program. genmon.py uses the following modules so they are external dependencies of the program and they will need to be install before running the program:
 crcmod - https://pypi.python.org/pypi/crcmod, used for MODBUS CRC calculation
    pyserial - https://pypi.python.org/pypi/pyserial/2.7, used for serial. Download
        the source and follow the instructions at https://github.com/gsutil-mirrors/crcmod
        communication. This can be installed via the following command:
            sudo apt-get install python-serial
In addition the the external dependencies there are additional python modules included in this project that are used:
 mymail.py - This module provides support for sending email and monitoring an IMAP
    email folder for incoming mail. The mail module can be configured by modifying the
    mymail.conf file and placing it in the /etc directory.
    mylog.py - This modules provides logging support to the other modules.
    ALARMS.txt - This text file contains generator error codes with descriptions and
        potential solutions. It is used by the program to supply additional details when
        error conditions are detected by the generator monitor.
Log files for errors are generated by genmon.py, mymail.py and for serial communications. These files are written to /var/log and named genmon.log, mymail.log and myserial.log.
A note about email and security: The genmon.py app monitors folder on an IMAP email account for emails with a subject containing "generator:". If this is found, the remaining characters of the subject filed are parsed for commands for the monitor program. Since commands are sent to genmon.py via the subject line of an email, is is suggested that some level of email filtering occur on the receiving email account. For example, gmail supports email filters that if emails arrive from specific people with specific words in the subject, move them to specific folders. You could then have genmon.py monitor the specific folder used in your filter to only allow specific emails to send commands to genmon.py. If this approach is used then genmon.py can be configured (via mymail.com) to monitor a specific IMAP folder.
Gmail IMAP has been tested with this application. It should be easy to test this other email providers. All mail processing is contained in mymail.py and mymail.conf.
Due to the location of log files and conf files, root privileges are needed to execute the program. Other than these files, there are no requirements of root privileges.
Installation of genmon.py is simple. All python source files (.py) can be put in a single directory, all config files (.conf) go in /etc. Edit the *.conf files so they are specific to your installation (email user name and password, etc). You can launch the program as a background application if needed, i.e. "python genmon.py &". Also I use crontab to load the application as a background process on boot by launching a bash script via crontab. The script loads the app via the "python genmon.py &" command.
To run genmon.py as a foreground application:
sudo python genmon.py
To run as a background app:
sudo python genmon.py &
To stop genmon.py as a foreground application type Ctrl+C. The following command will stop the running instance of genmon.py:
sudo pkill -f genmon.py
The configuration file genmon.conf is used to set options for the genmon.py program. If you do not know what type of controller you have on your generator there are pictures in Diagrams folder in this repository of both Evolution and Nexus controller front panels. The genmon.py will auto-detect your controller type but you can override that in genmon.conf.
Evolution Controller Front Panel
Also, if you generator has as radiator then it is liquid cooled, otherwise it is air cooled. These options are used for configuration and enabling debugging. genmon.conf has the following options:
[GenMon]
# name of the site, used in the web interface and email output (required)
sitename = SiteName
# the serial device name of your serial port. Normally  /dev/serial0 or
# /dev/ttyAMA0 for onboard Raspberry Pi Serial ports (required)
port = /dev/serial0
# the name of the folder in the mailbox for searching for incoming email
# commands (required)
incoming_mail_folder = Generator
# once an email command has been processed by genmon.py the email is moved to
# this mailbox folder (required)
processed_mail_folder = Generator/Processed
# The TCP port used for communicating with the other apps like ClientInterface.py
# and the web interface (required)
server_port = 9082
# the Modbus slave address. This *should* not need to be changed from 9d (required)
address = 9d
# True if monitoring a liquid cooled generator, False if air cooled. This option
# is for monitoring active relays in the controller, which are different for
# liquid vs air cooled generators (required)
liquidcooled = True
# location of log files (required)
loglocation = /var/log/
# location of the text file containing descriptions of alarm codes (required)
alarmfile = /home/pi/ALARMS.txt
# enable genmon.py to output to the console if True. If this is false the other
# display* commands below are ignored (optional, default False)
displayoutput = False
# display information about genmon.py to the console (optional, default False)
displaymonitor = False
# display controller register contents to the console (optional, default False)
displayregisters = False
# display generator status to the console (optional, default False)
displaystatus = False
# display maintenance information to the console (optional, default False)
displaymaintenance = False
# enable enable code to support reverse engineering of registers. This option,
# when True creates a thread that will monitor registers in the controller and
# send notifications of changed registers. Not used in normal operation (optional,
# default False)
enabledebug = False
# This option will display the contents of additional registers that appear to be
# associated with sensors of some type, for example one register outputs almost
# half of the frequency. I assume this is used internally by the controller. (optional,
# default False)
displayunknown = False
# (optional) This option enables (when True) using and alternate method for writing
# the exercise time. Some version of the Evolution firmware only support the legacy
# method of writing the exercise time. The legacy method is a bit more convoluted
# and the current implementation may result in the exercise time being off by one
# or two minutes from the request set value. (optional, default False).  Note
# this option is forced True if a Nexus controller is detected or selected.
# (e.g. use legacy exercise write if using a Nexus controller). When using this
# method the exercise time must be at least three minutes or more from the current
# generator time.
#uselegacysetexercise = False
# (optional). The software will auto-detect the controller type. The auto-detect
# can be overridden with this setting. True for Evolution controller, False for
# Nexus Controller.
#evolutioncontroller = True
The following is a description of the options contained in mymail.conf, which is used to configure the mail support in mymail.py.
[MyMail]
email_pw = password
  # The password for the email account used for sending and receiving email
email_account = myaccunt@gmail.com
  # the email account email address (sender email address)
email_recipient = recipient@gmail.com
  # address that email are sent to
smtp_server = smtp.gmail.com
  # the SMTP mail server used for sending email
imap_server = imap.gmail.com
  # the IMAP server address used for receiving email
smtp_port = 587
  # the SMTP port used on the SMTP server for sending email
The program ClientInterface.py is a test application for communicating with genmon.py via sockets. The ClientInterface.py program uses the supplied python module mylog.py and myclient.py so this the three files (mylog.py, myclient.py and ClientInterface.py must be in the same directory of you are opting to usie ClientInterface.py. The ClientInterface.py app takes one command line argument, the IP address of the computer running genmon.py (the default is localhost). To issues commands to an instance genmon.py on a system at IP address of 192.168.11.100 you would do the following:
python ClientInterface.py 192.168.11.100
Once the app is executed you should be faced with a prompt ">". From this prompt you can send commands to genmon.py. Commands are prefaced with "generator:". For example to issue the command "status" you would enter the "generator: status" at the ">" prompt when running ClientInterface.py. The commands accepted are listed in the genmon.py section and they match the email based commands.
gengpio.pyThe program gengpio.py is a console python application that will communicate with genmon.py and set or reset GPIO pins on the Raspberry Pi.The application requires the supplied python module mylog.py and myclient.py so these files will need to be in the same directory as gengpio.py. The program takes one command line argument of the IP address of the system that genmon.py is running (localhost is default). If the generator is ready then GPIO 23 (pin 16) will be high, if the generator is in alarm then GPIO 24 (pin 18) will be high, and if service is due on the generator then GPIO 25 (pin 22) will be high. Example of LED circuit connected to Raspberry Pi GPIO. To execute gengpio.py type:
python gengpio.py <IP Address of your Pi running genmon.py or omit for localhost>
In addition the the above mentioned ClientInterface.py application, genmon.py supports communicating via the socket interface so the application and generator can be monitored by network monitoring tools like Nagios. The program check_monitor_system.py can be used with as a Nagios Plugin to monitor genmon.py. See https://www.nagios.org/ for Nagios details. check_monitor_system.py is the name of the supplied nagios plug-in.
server/genserv.py (optional)genserv.py is a python application that uses the Flask library/framework (http://flask.pocoo.org/). This approach allows a quick and simple python socket interface to be translated to a javascript based web interface. The genserv.py app, when executed, will serve up a simple web page that will display the status of the generator. Both the genserv.py app and the genmon.py app can be hosted on a single Raspberry Pi although you should be able to move the genserv.py program to another system with little modification. The web application provides all most of the information supplied by genmon.py. The "registers" command is not supported by the web interface (decided to keep it simple). The setup for flask is detailed at http://flask.pocoo.org/. I did not used a virtual environment since this is a single purpose and low traffic web app (i.e. I do not expose the web app to the internet, only my local network). If you want expose the web app to the internet I would recommend adding authentication, using virtual environment and possibly a full web server to actually serve up the web pages since security concerns would be heightened on a public web server.
The genserv.py program uses the mylog.py and myclient.py modules so they must be in the same directory as genserv.py when it is executed. Genserv.py also uses the same configuration file /etc/genmon.py. The file /var/log/genserv.log is used for logging errors. The program genserv.py has one optional command line argument of the IP address of the system genserv.py is hosted. The default value is localhost, so if no command line argument is supplied the program assumes that genmon.py and genserv.py are on the same system. The flask library serve up static HTML, CSS and javascript files which are stored in a directory below the genserv.py app named static. Below are files and locations for genserv.py:
 ./genserv.py                        - main app
    ./template/command_template.html    - used for error processing in flask
    ./static/index.html                 - main site page
    ./static/genmon.css                 - main site style sheet
    ./static/genmon.js                  - main site javascript
    ./static/favicon.ico                - icon for html file
    The default settings provide for hosting the web app on port 8000:
      Example: http://YourIPAddressGoesHere:8000
Internally, the javascript, calls to the genserv.py app, which communicates with genmon.py via private socket calls.
To execute genserv.py as a background process type:
sudo python genserv.py &
The highlight colors in the web interface will change color based on the generator status (running, ready, exercise).
Hardware
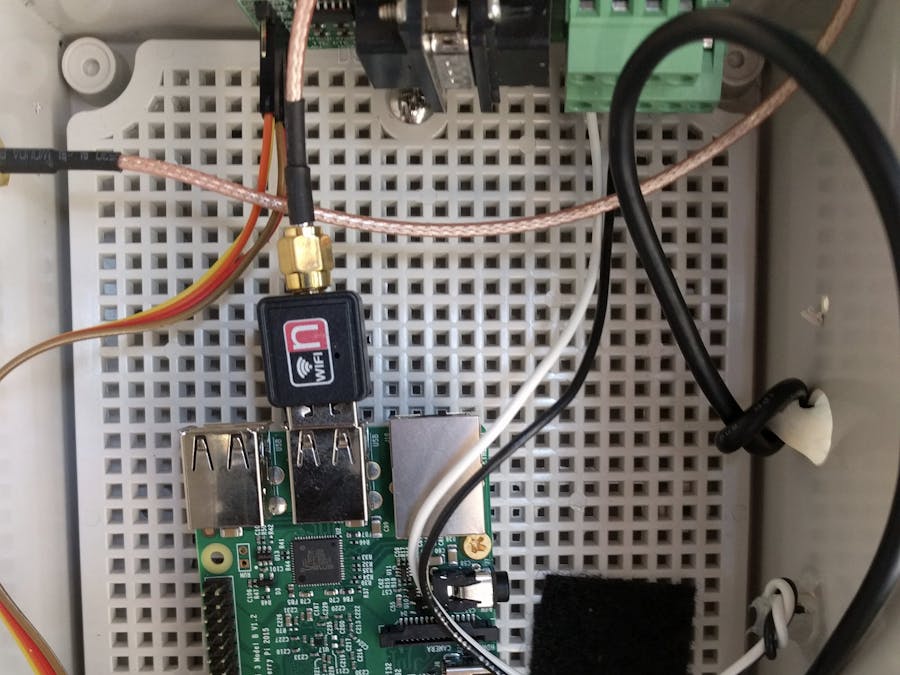
This project has been developed and tested with a Raspberry Pi 3 as the base platform. Since the serial port and network are the only external ports used, the program could be used on other platforms with minor modifications and testing.
In development and testing I used the Raspberry Pi3 with built in WiFi. Depending on your WiFi signal and your generator proximity to the access point your results may vary.
Below is a list of hardware that I used. Since your generator may be different and your network will be different you will need to validate these for your setup.
Raspberry PI 3 and SD Card
Power supply for the Raspberry Pi is attached to battery on the generator. Note, this is needed to ensure the raspberry Pi and the generator controller share a common ground. If you use a two prong wall adapter to power your pi you will likely see CRC errors since the controller cable does not include a ground wire for the serial device.This is the power supply I used, which allows the Pi to be powered from the generator battery:
This is the enclosure that is used. This may be to large for some smaller air-cooled generators:
Internal Panel for Enclosure This may be to large for some smaller air-cooled generators.
Adhesive Magnets from Hobby Lobby (used to attach enclosure to generator). I attached the enclosure to the inside of my generator housing but your generator may be different.
Tubing for cable (not recommended, possibly use a smaller diameter tube)
The cable I used connects the Molex connector on the Evolution /Nexus Controller to a DB-9 break-outconnector. The DB-9 break-out connector is then attached to the RS-232 to TTL converter for theRaspberry Pi. Below are the links for the items used in cabling:
Break out db-9 (male or female, depending on the above level converter you use)
I used the following Digi-key part numbers for the molex connectors for the cable. The evolution controller uses a molex type receptacle:
Plug = WM3603-ND
Male pin = WM2500CT-ND
Receptacle = WM3703-DN
Female pin = WM3279CT-DN
Evolution / Nexus Controller has Receptacle.
I used a molex connector on my enclosure and routed the two wires to a break-out box thata DB-9 (see link above)
Creating a CableThe above links include part numbers for the Molex connector and a link for the Molex crimp tool which are both needed to create a cable to interface to the Evolution /Nexus Controller. If you are new to using crimp tools to create cable connectors, I would suggest YouTube.com as a resource. There are many "How To" videos that should help with any learning curve. I searched on "Molex Crimping Tool" and found a few.


Comments