

Hardware components | ||||||
_ztBMuBhMHo.jpg?auto=compress%2Cformat&w=48&h=48&fit=fill&bg=ffffff) |
| × | 1 | |||
 |
| × | 40 | |||
 |
| × | 1 | |||
| × | 4 | ||||
| × | 2 | ||||
| × | 10 | ||||
 |
| × | 1 | |||
Hand tools and fabrication machines | ||||||
 |
| |||||
 |
| |||||
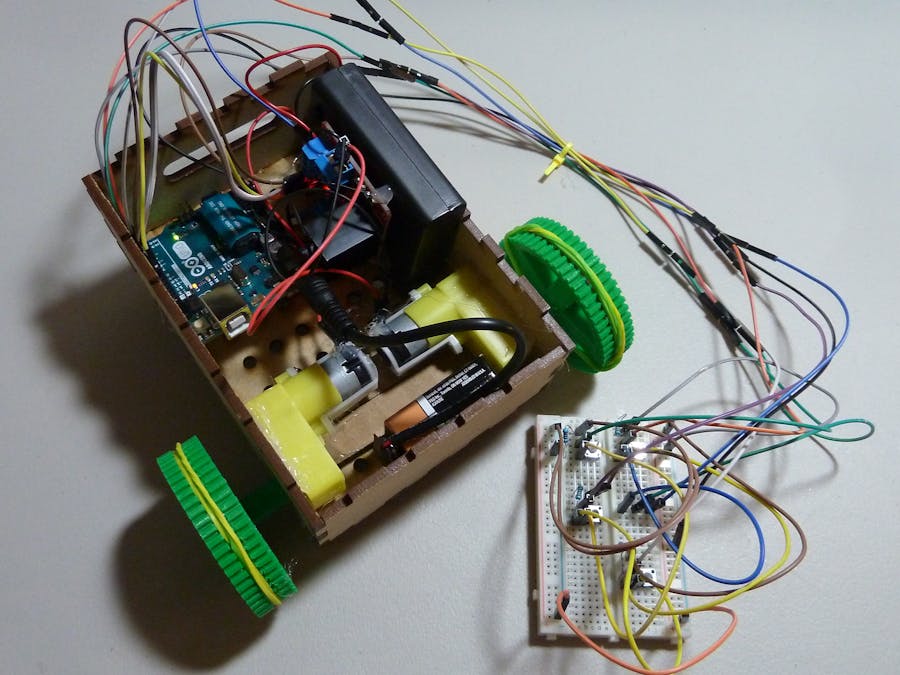
Upgraded Chassis
Building off of last week's cardboard prototype chassis, I laser cut my vehicle using a finger-joint box generator ((http://www.makercase.com).
Using the box generator, I specified the box dimensions and then exported the generated files to Adobe Illustrator. From there, I customized the design by adding holes for the wheels, a ventilation opening in the back, and holes on the bottom plate for zip-ties.
The box fit together really well!
Building the Circuit
My circuit is controlled by four switches. Each switch controls a specific motion of a wheel.
Switch 1 - Forward Left Wheel
Switch 2 - Backwards Left Wheel
Switch 3 - Forwards Right Wheel
Switch 4 - Backwards Right Wheel
At the time, the switch functions listed above seemed like the most intuitive way to me for controlling the vehicle. However, the switches can also be programmed to control the forwards, backwards, turning left, and turning right motions of the vehicle.
I attached the switches to my solderless breadboard, which is connected to my Arduino. The resistors in the schematic are 10KΩ resistors.
The Arduino is also connected to a L298 Motor Controller, which supports my two DC motors. The DC motors are powered by 4 AA batteries (6V) and the Arduino is powered by a 9V battery. Using a battery to power the Arduino is extremely important if the Arduino will be residing on the vehicle, since powering it through USB connected to your laptop makes it difficult to drive the vehicle far (laptops are very heavy cargo).
Jumper wires are attached to the DC motors and secured using a hot glue gun.
Wheels
I 3D modeled my wheels in Autodesk Fusion360. Rather than buying a set of standard wheels, I chose to design my own set to guarantee that the wheels will fit the DC motor. I also wanted to lengthen the shaft of the wheels so that they would be able to securely attach to my DC motors (taking into account the thickness of the laser cut wood).
In designing my wheels, I also left a groove along the circumference of the wheel to attach rubber bands for extra traction.
The 3D printed wheels turned out great! After attaching everything together and securing everything with zip-ties and hot-glue, I was finally ready to take it for a spin.
Success! My vehicle is able to go forwards, backwards, turn left, and turn right.
After a few test drives, I noticed that my Arduino would sporadically turn off, even though the battery pack was switched on. Opening up the battery pack, I discovered that not only did the manufactured wiring have bad connection, but the red stranded wire had been essentially from the battery!

Comments