

Hardware components | ||||||
_ztBMuBhMHo.jpg?auto=compress%2Cformat&w=48&h=48&fit=fill&bg=ffffff) |
| × | 1 | |||
Hand tools and fabrication machines | ||||||
 |
| |||||
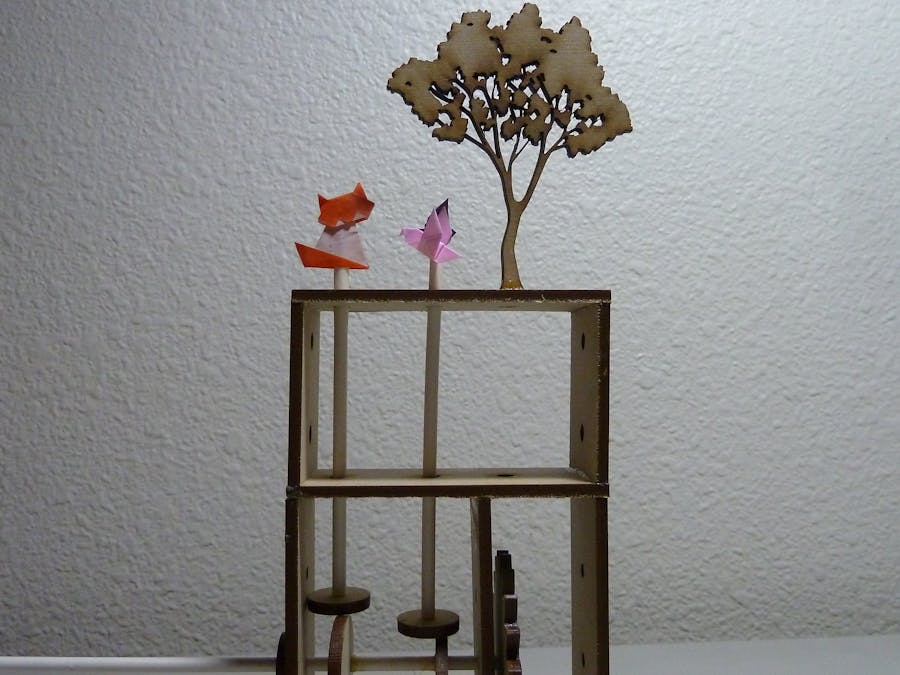
The goal was to create a Cabaret Mechanical Theater type automata that used a combination of linkages and/or gears to perform a set of movements. The automata could be hand powered or servo driven and must be humorous or cause wonder. It should be laser cut using any type of material (cardboard, matboard, acrylic or wood).
Learning from my classmate's projects and my experience laser cutting a set of gears last week (similar to the cabaret mechanical theater style), I made sure to provide a guide for my cams and laser cut a lot of extra holes. The additional holes gave me the flexibility to explore my idea without having to print extra parts.
Design evolution
I am happy with the way my project turned out, since the cat and birds both rotate on their own as well as moving up and down. The tree provided a nice backdrop and the cam guides worked very well.
I would like to attach a string to the additional unused gear. In a future iteration, I would like to use the string to power something that interacts with the tree.
The following are the Arduino examples which use a button to control the LED.
As seen in the video, example 1 worked as expected.
The button is meant to toggle the light on and off (if the light is on, the button should turn it off and vice versa). However, in the example pressing the button produces random results. The button does not control the LED as expected since the Arduino code cycles through many iterations of on and offs during the short time that we hold down the button.
This time the LED and button work as expected!
The code for example 3 is an improvement from before since it stores the state of the button and checks whether a transition occurred.
I had a hard time figuring out how to wire the breadboard to make it work. In the end I found that I had a few loose connections, and making sure that everything is secure solved most of my problems. The great thing is that the wiring can be used for all three examples, which reduces the amount of possible errors in the later examples.

Comments