jdale18
Published

Magnetic Stirrer

Develop a strong magnetic stirrer for the price of an entry level magnetic stirrer.

BeginnerShowcase (no instructions)9,008
Magnetic Stirrer

Things used in this project

Hardware components

Arduino Mega 2560
Arduino Mega 2560
×1
General Purpose Transistor NPN
I used Tip 31A NPN. This is used to turn on the PC fan using a PWM signal.
×1
Rotary potentiometer (generic)
I used a 5k Ohm pot. This is used as the speed control signal being read by arduino ADC A0
×1
120 AC to 12 Vdc 2amp wall converter
This is to power the 12 Vdc PC fan.
×1
12 Vdc PC fan size: 80mm
I bought cheap Chinese ones from amazon.com. they are crap. Buy a nice fan.
×1
Neodymium Rare-Earth Magnets (size: about the size of dime and about 0.25 in thick
this is part of what makes the stirrer stronger. The stronger the magnets the less likely stirrer will throw stir bar. The stronger the magnets the more load will be placed on the motor. I used 2 and I was very impressed.
×2

Software apps and online services

Arduino Web Editor
Arduino Web Editor
I combined the "fade" and "ReadAnalogVoltage" example programs to make the code. Hence the code is really simple.

Hand tools and fabrication machines
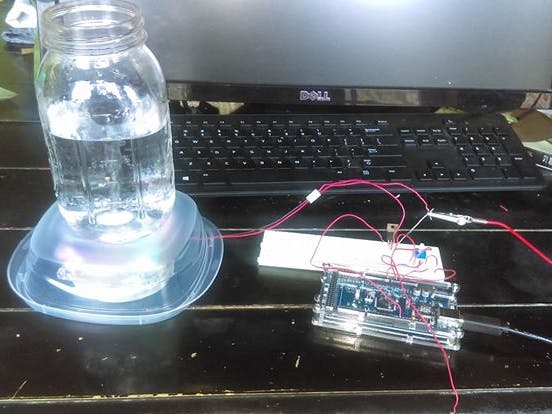
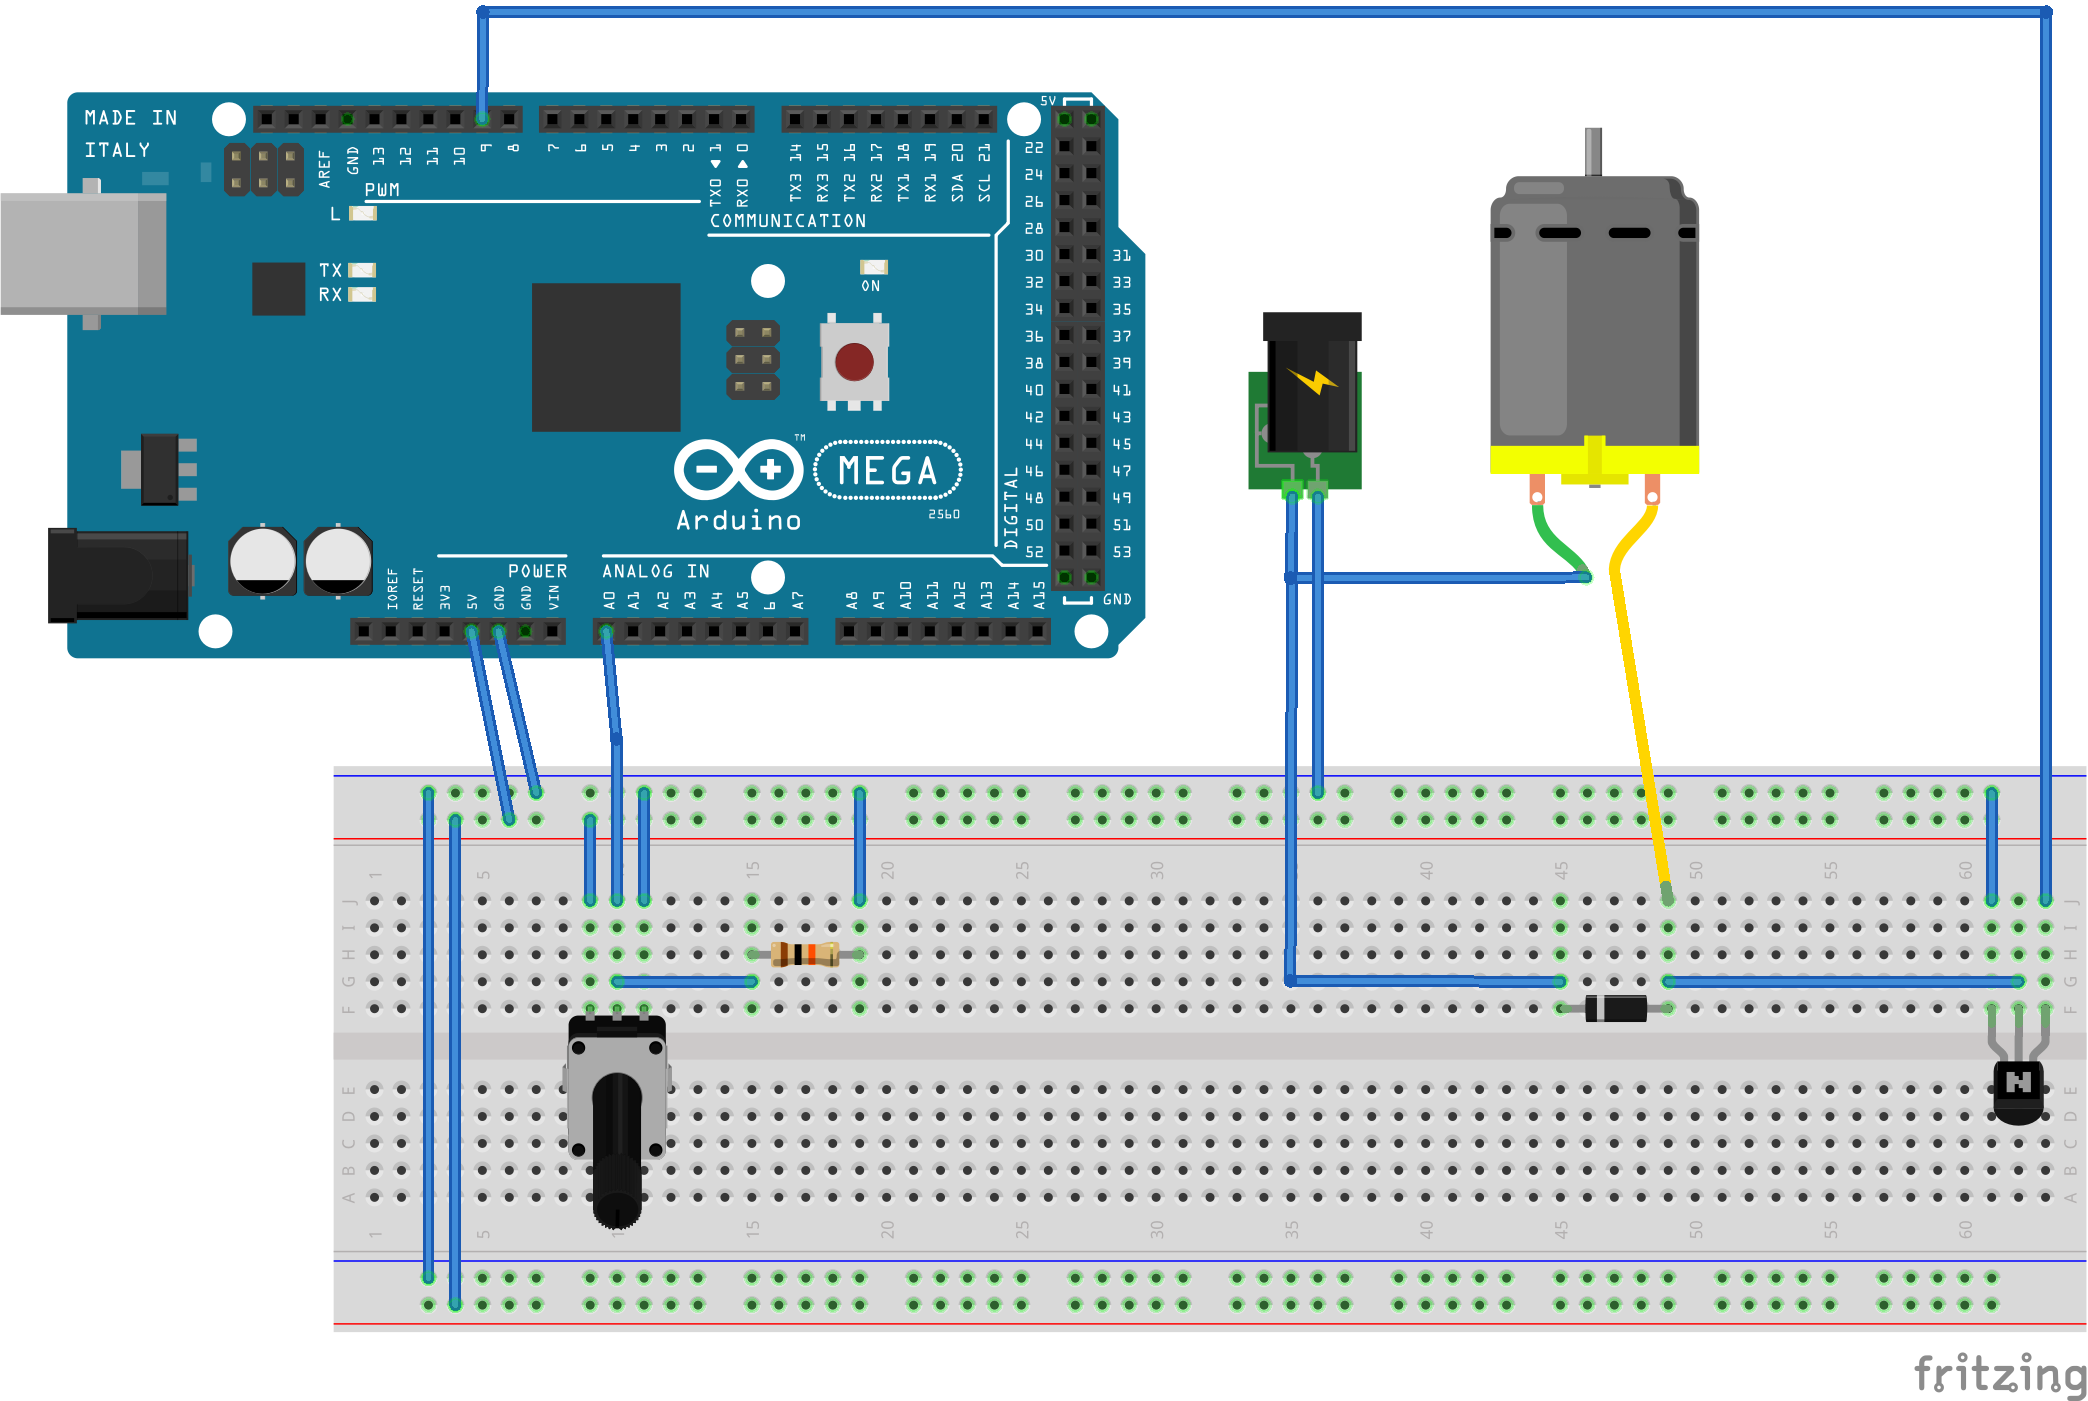
Multimeter

Story

Read more

Schematics

magnetic_stirrer_bb_2NYTYwdNCa.png

Code

Magnetic Stirrer

Arduino
/*
 Magnetic Stirrer
 
 Layman summary: 
 We will use a potiometer to control the speed of a DC motor.
 When the potiometer is turned to full Ohms then the motor should stop.
 When the potiometer is turned to 0 Ohms then the motor should be running full speed.
 And if the potiometer is somewhere in the middle then the motor speed will follow. 
 
 
 InDepth summary;
 This code will read an analog voltage of the potiometer using pin(A0). 
  We will take the analog to digital conversion (ADC) value and 
 produce a corresponding PWM signal on pin(9). The PWM signal will turn the 
 NPN transistor on/off very quickly to the point where the motor will spin like
 it is getting less than full power. 
 
 Notes:
 1. Please note the ADC on the Arduino mega is 10 bits. The PWM is 8 bits. 
 So we need to divide the ADC value from pin(A0) by 4 and then send that value to 
 the PWM on pin(9).  
 
 2. Intersting to note that if you leave out the division then 
 you will notice that a 1/4 turn of the potiometer will give you a 0 rpm to full speed 
 on your motor. This is because 8 bits will get you 255 steps for the PWM and the 
 ADC 10 bits will give you 1023 steps. 1023/255 = 4 (roughly) 
 
 3. I added a delay at end of loop to help stablize motor speed. I noticed
 with PC fans I was using that if you rotated the potiometere quickly or back and fourth
 that the load of the magnets and the drastic speed up/down would burn out the 
 cheap PC fan motors. So a word of caution is to turn the pot slowly to avoid motor burn out :)
 
 
 Brief Function description: 
 analogWrite() allows us to send a 0 to 255 value to a PWM pin. 
 ReadAnalogVoltage() allows us to read a 0 to 5Vdc voltage and convert
 voltage into a value between 0 to 1023. 
 Serial.Began starts serial communication to "Serial Monitor" 
 Serial.PrintLn writes one line to "Serial Monitor"


 Credits:
 Giving credit to the contributors of the example (basic) "Fade" program 
 and "ReadingAnalogVoltage" program since this code is really just a cut/paste of 
 both example programs into one working code.
 
 
 leaving the original ReadAnalogVoltage notes since I found them useful as well :) 
   ReadAnalogVoltage
  Reads an analog input on pin 0, converts it to voltage, and prints the result to the serial monitor.
  Graphical representation is available using serial plotter (Tools > Serial Plotter menu)
  Attach the center pin of a potentiometer to pin A0, and the outside pins to +5V and ground.

  This example code is in the public domain.
 */


int motor1 = 9;           // the PWM pin 
int motor1speed = 0;    // how fast motor1 is

// the setup routine runs once when you press reset:
void setup() {
  // declare pin 9 to be an output:
  pinMode(motor1, OUTPUT);
    // initialize serial communication at 9600 bits per second:
  Serial.begin(9600);
}

// the loop routine runs over and over again forever:
void loop() {
  
      // read the input on analog pin 0:
  int motor1speed = analogRead(A0);
  
    // Convert the analog reading (which goes from 0 - 1023) to a voltage (0 - 12V):
  float voltage = motor1speed * (12.0 / 1023.0);
  
  // print out the value you read:
  Serial.println(motor1speed);
  // print out the voltage 
  Serial.println(voltage);
  
  // set the motor1speed of pin 9:
  analogWrite(motor1, motor1speed/4);
  
  // delay 30 miliseconds. this pre
  delay(30);
}

Magnetic Stirrer Rev 3

This is rev 3 of the code. There was issues with motor response at slow rpms. So I improved the code by making the PWM frequency proportional to the motor rpm.

Credits

jdale18

jdale18

1 project • 2 followers

Comments