int pin2,pin3,pin6,pin7,pin10,pin11;
//...................................................................................
void setup() {
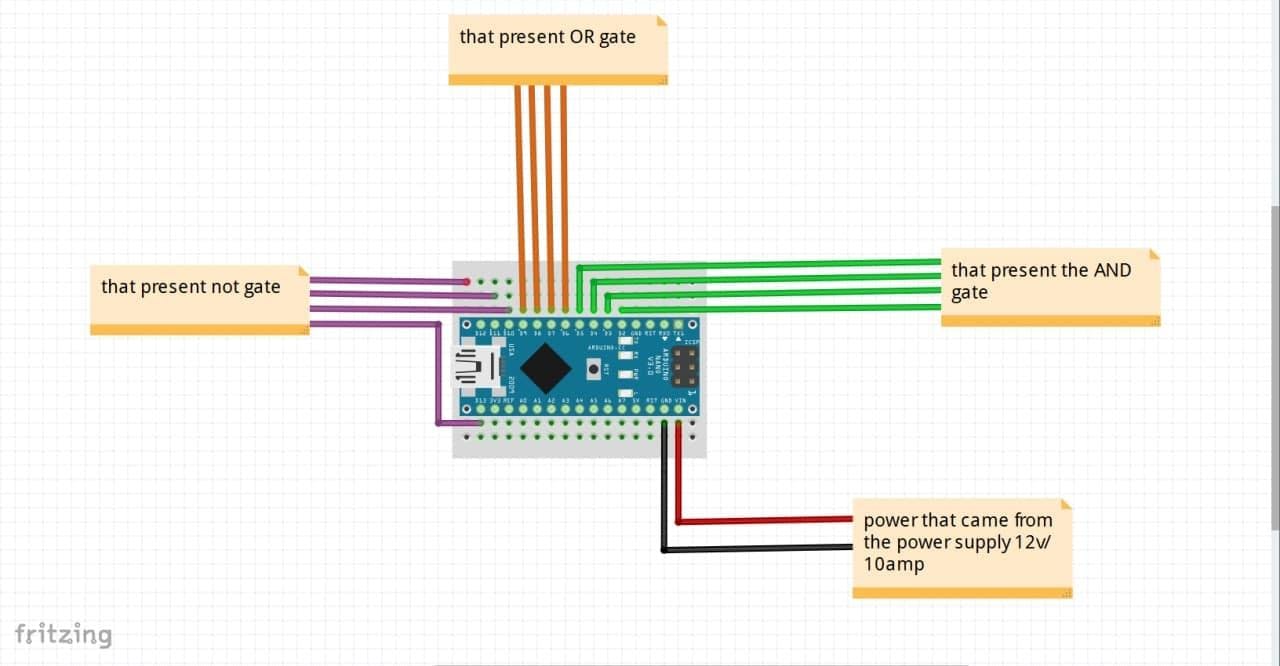
//and
pinMode(2,INPUT);
pinMode(3,INPUT);
pinMode(4,OUTPUT);
pinMode(5,OUTPUT);
//or
pinMode(6,INPUT);
pinMode(7,INPUT);
pinMode(8,OUTPUT);
pinMode(9,OUTPUT);
//not
pinMode(10,INPUT);
pinMode(11,INPUT);
pinMode(12,OUTPUT);
pinMode(13,OUTPUT);
}
//...........................................................................................
void loop() {
// AND
pin2=digitalRead(2);
pin3=digitalRead(3);
//OR
pin6=digitalRead(6);
pin7=digitalRead(7);
//NOT
pin10=digitalRead(10);
pin11=digitalRead(11);
//........................................................................................
//THE AND GATE
if(pin2==0 && pin3==0){
digitalWrite(4,0);
digitalWrite(5,0);
}
else if(pin2==1 && pin3==0){
digitalWrite(4,0);
digitalWrite(5,0);
}
else if(pin2==0 && pin3==1){
digitalWrite(4,0);
digitalWrite(5,0);
}
else if(pin2==1 && pin3==1){
digitalWrite(4,1);
digitalWrite(5,1);
}
else{
digitalWrite(4,0);
digitalWrite(5,0);
}
//...............................................................................
//THE OR GATE
if(pin6==0 || pin7==0){
digitalWrite(8,0);
digitalWrite(9,0);
}
else if(pin6==1 || pin7==0){
digitalWrite(8,1);
digitalWrite(9,1);
}
else if(pin6==0 || pin7==1){
digitalWrite(8,1);
digitalWrite(9,1);
}
else if(pin6==1 || pin7==1){
digitalWrite(8,1);
digitalWrite(9,1);
}
else{
digitalWrite(8,0);
digitalWrite(9,0);
}
//.....................................................................................
//THE NOT GATE
if(pin10==0){
digitalWrite(12,1);
}
else{
digitalWrite(12,0);
}
if(pin11==0){
digitalWrite(13,1);
}
else{
digitalWrite(13,0);
}}


_ztBMuBhMHo.jpg?auto=compress%2Cformat&w=48&h=48&fit=fill&bg=ffffff)


Comments