

Hardware components | ||||||
 |
| × | 1 | |||
 |
| × | 1 | |||
 |
| × | 1 | |||
 |
| × | 1 | |||
 |
| × | 1 | |||
 |
| × | 1 | |||
| × | 1 | ||||
Software apps and online services | ||||||
| ||||||
 |
| |||||
Hand tools and fabrication machines | ||||||
 |
| |||||
 |
| |||||
Have you ever seen those spy movies where the spy tries to sneak in and trips a laser alarm? I've always wanted one of those so I kept searching for DIY laser alarms etc. But they all used simple electronics to perform simple ineffective methods.
During the corona lockdown, I took up the Bolt IoT course and decided to use it to make a much more effective and smart system.
DescriptionThis alarm will send you an SMS with the message "Someone has entered... call 100 for police" when it is blocked in an interval of at least 3.4 seconds to avoid accidental messages. This system is designed for doors and windows or any entry point that a trespasser has to take time with to not make any sound. The system will also alert you with the same SMS if the laser is replaced with a different laser or light source.
The best part of this system is that after you are alerted. You can use the Bolt app to trigger the buzzer or choose not to. This is so that if you are not at home. you can call the police without alerting the trespasser to help them arrest the individual. If you happen to be at home, then you can trigger the buzzer to spook the trespasser so that the individual runs away and you are safe.
This system is to assist the police in catching these criminals.
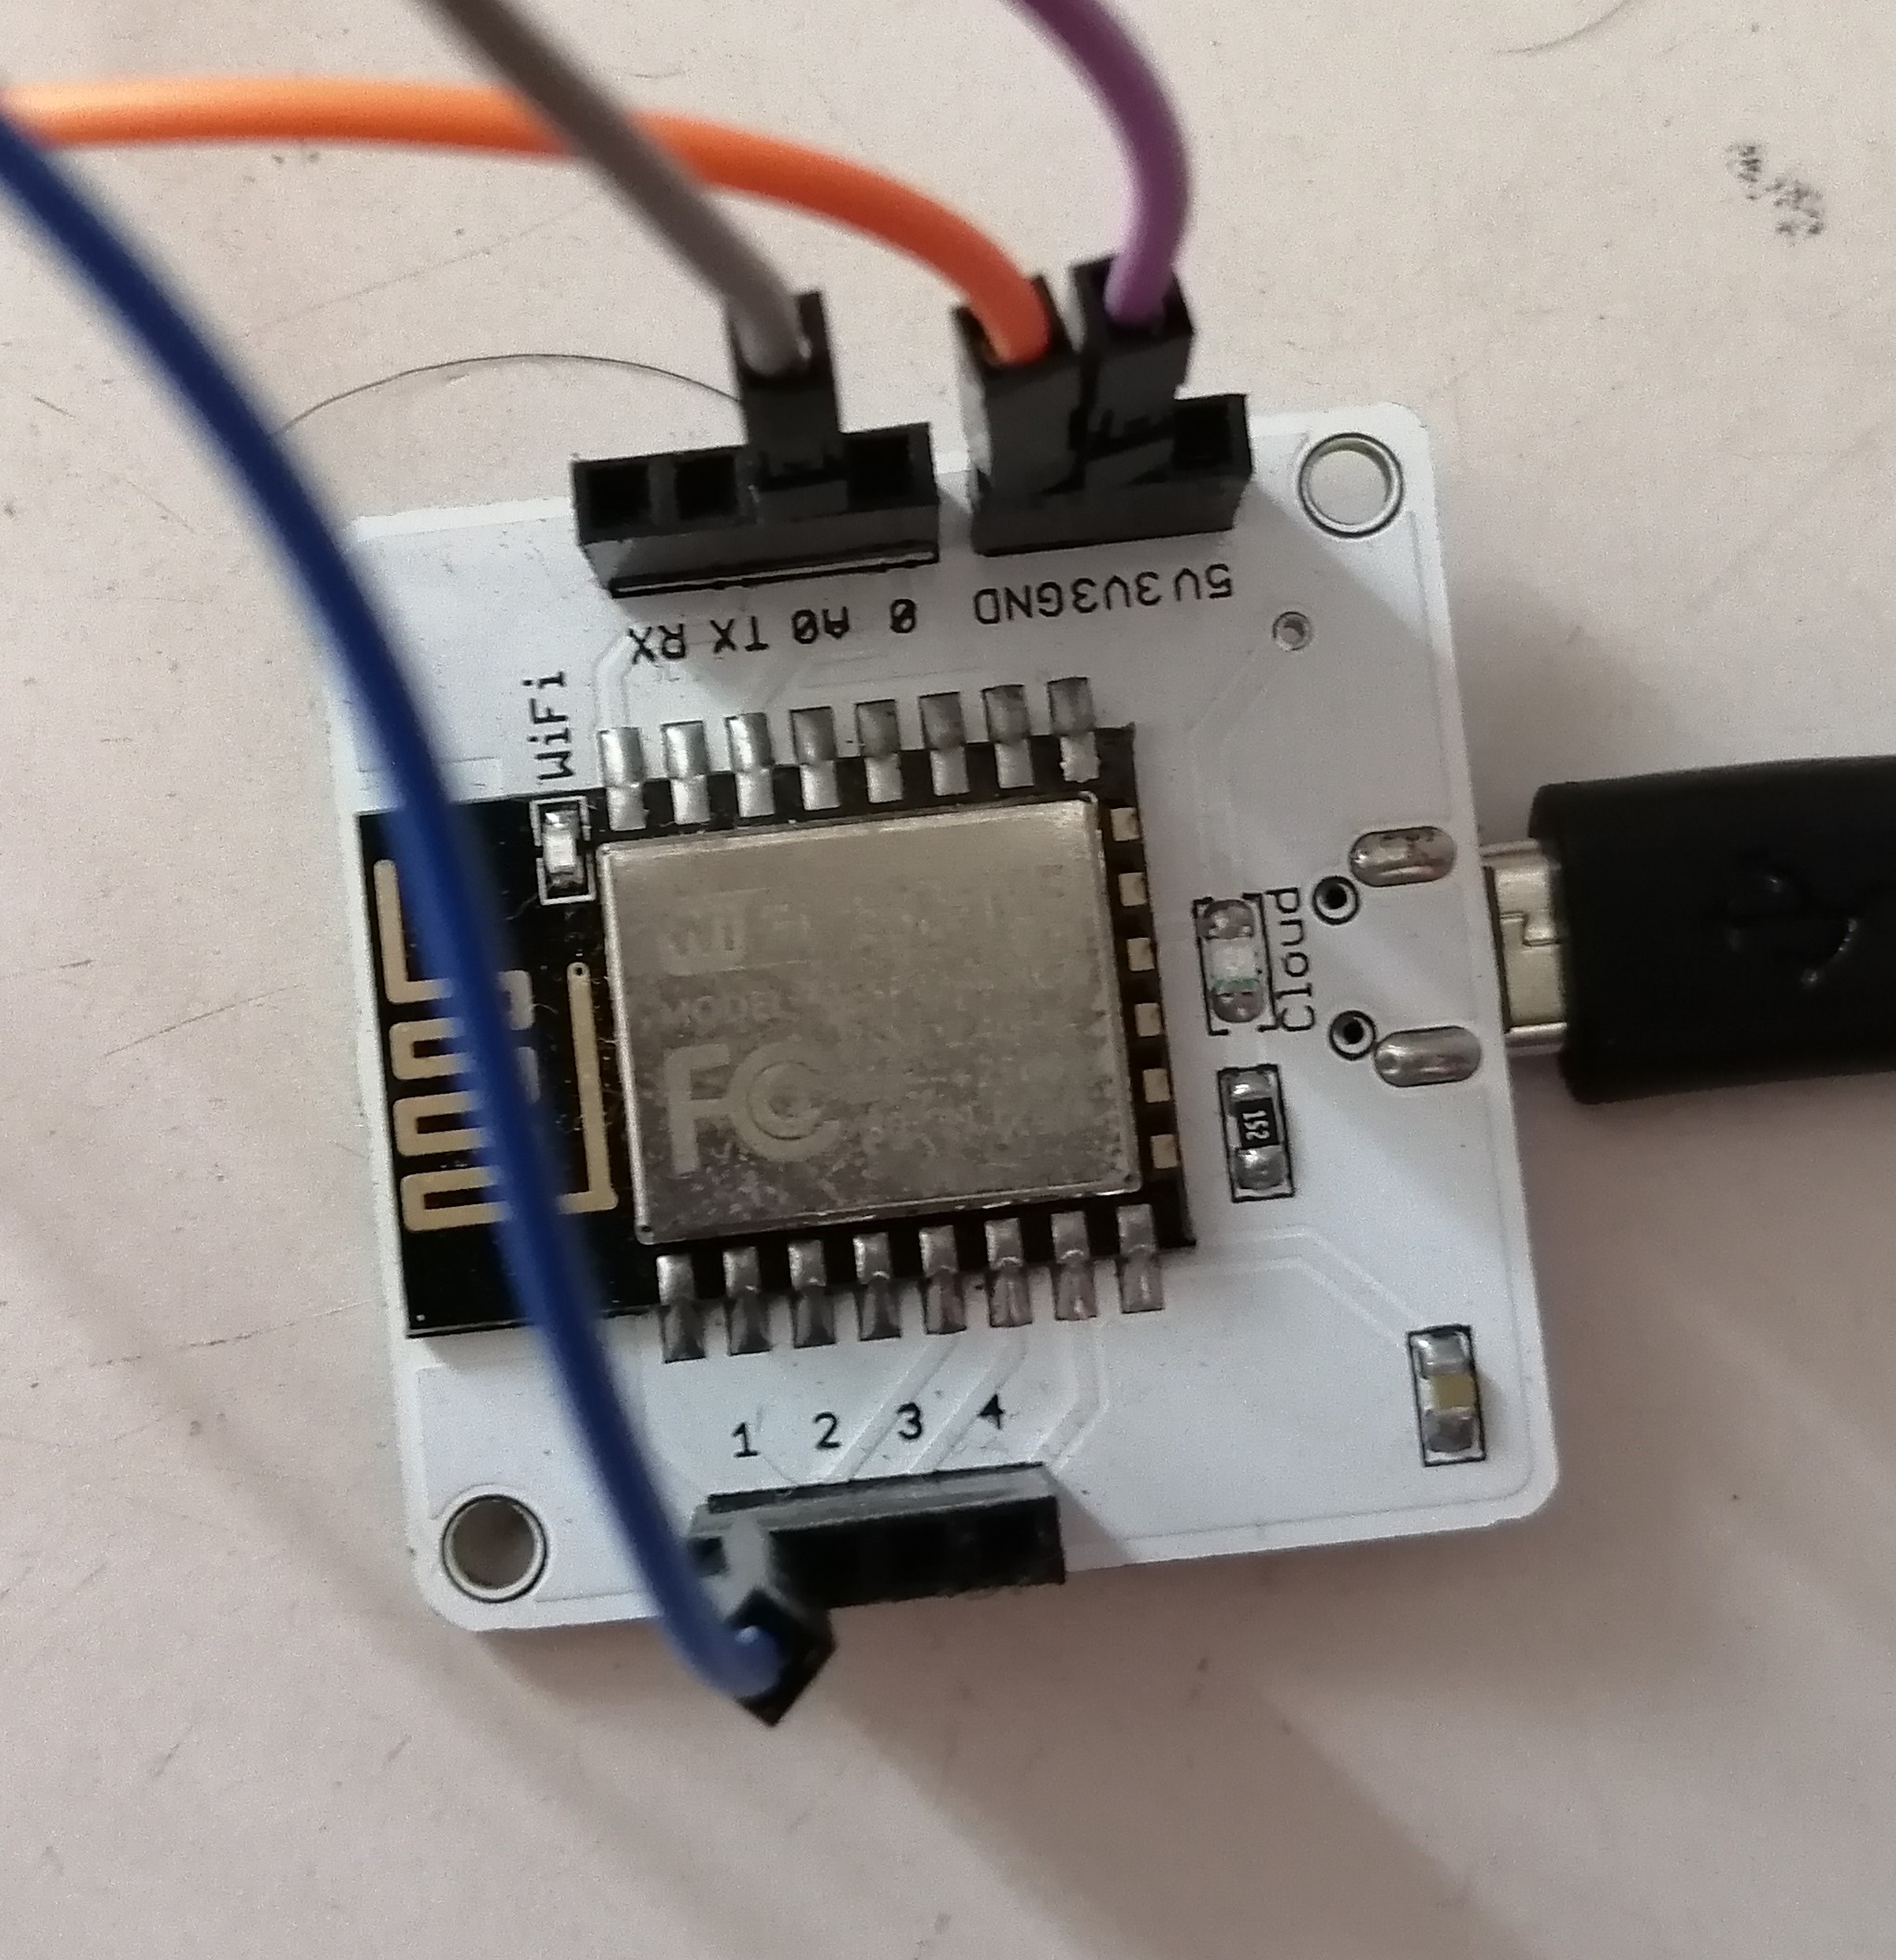
step 1 : Connections...make the following connections on the breadboard and Bolt module using single-core wires so that they are easy to insert into the breadboard and Bolt module. Here's the entire connection.
These are temporary connections for you to understand the system.
step 2 : Assembling...This is optional as you could figure out your own way of mounting the system. This is what I did.
Replace the jumper wires with single-core wires and use double-sided tape to place them together.
Make a case with foam or thermocol (also known as styrofoam).
There is a hole for the LDR to pop out. There is also an indentation for the buzzer. Make sure that there is a hole for the wire from the USB-A cable.
place the setup inside the case and close it up. I also painted the case black for "cosmetic purposes".
There will be two codes. As we are using the system to send an SMS. A Twilio account is necessary. It has a trial account that is free of cost to make that also gives you some cash, to begin with. This will be quite enough for the project to last a very long time. You could still get the pro account by paying, it is entirely up to you. Here's the link to their page.
I have also used digitalocean to create a droplet (Linux server- Ubuntu). You can also use VirtualBox. If you are a mac user or Linux user it will already be built in as the command prompt is in windows. The main goal is to add a separate code in the form of an Operating System for the Bolt module. The Bolt cloud will also be used for another code.
In the Linux server, there are two codes. One is for reference by the second program called "conf". The second one I named "trip". I have linked both of them on the page. The code trip has two important values that are called 'minimum_value' and 'maximum_value'. These values must be entered by you as the laser diode you use has different intensities. Make sure you pick the correct range. It should be 2 or 3 values above the laser's maximum output intensity and vice-versa for the minimum intensity. This is what allows the system to notice a different intensity if the laser is replaced or trifled with.
For the Bolt cloud, we need a program to display two buttons that switch on and off the buzzer. First, create a product on the cloud and configure the module as 'output' and 'GPIO'. Then select any pin from 0 - 1 as the buzzer output and give it a respective variable name. I have named mine as 'buzz'.
The code will be in HTML.
<!DOCTYPE html>
<html>
<head>
<title>Laser Trip</title>
<script type="text/javascript" src="https://cloud.boltiot.com/static/js/boltCommands.js"></script>
<script>
setKey('{{ApiKey}}','{{Name}}');
</script>
</head>
<body>
<center>
<button onclick="digitalWrite(1, 'HIGH');">Spook The Tresspasser</button>
<button onclick="digitalWrite(1, 'LOW');">OFF</button>
</center>
</body>
</html>The device requires it's own power source. A power bank or some other power source would be appropriate. Or you could plug it into the socket using a 1 amp and 5v mobile charger. The device must be placed in a position similar to the one below
This is so that when the door opens, it blocks the laser hiding it from the view of whoever enters.
Like this.
So that's all folks. If you have any issues, do comment.
Video Tutorial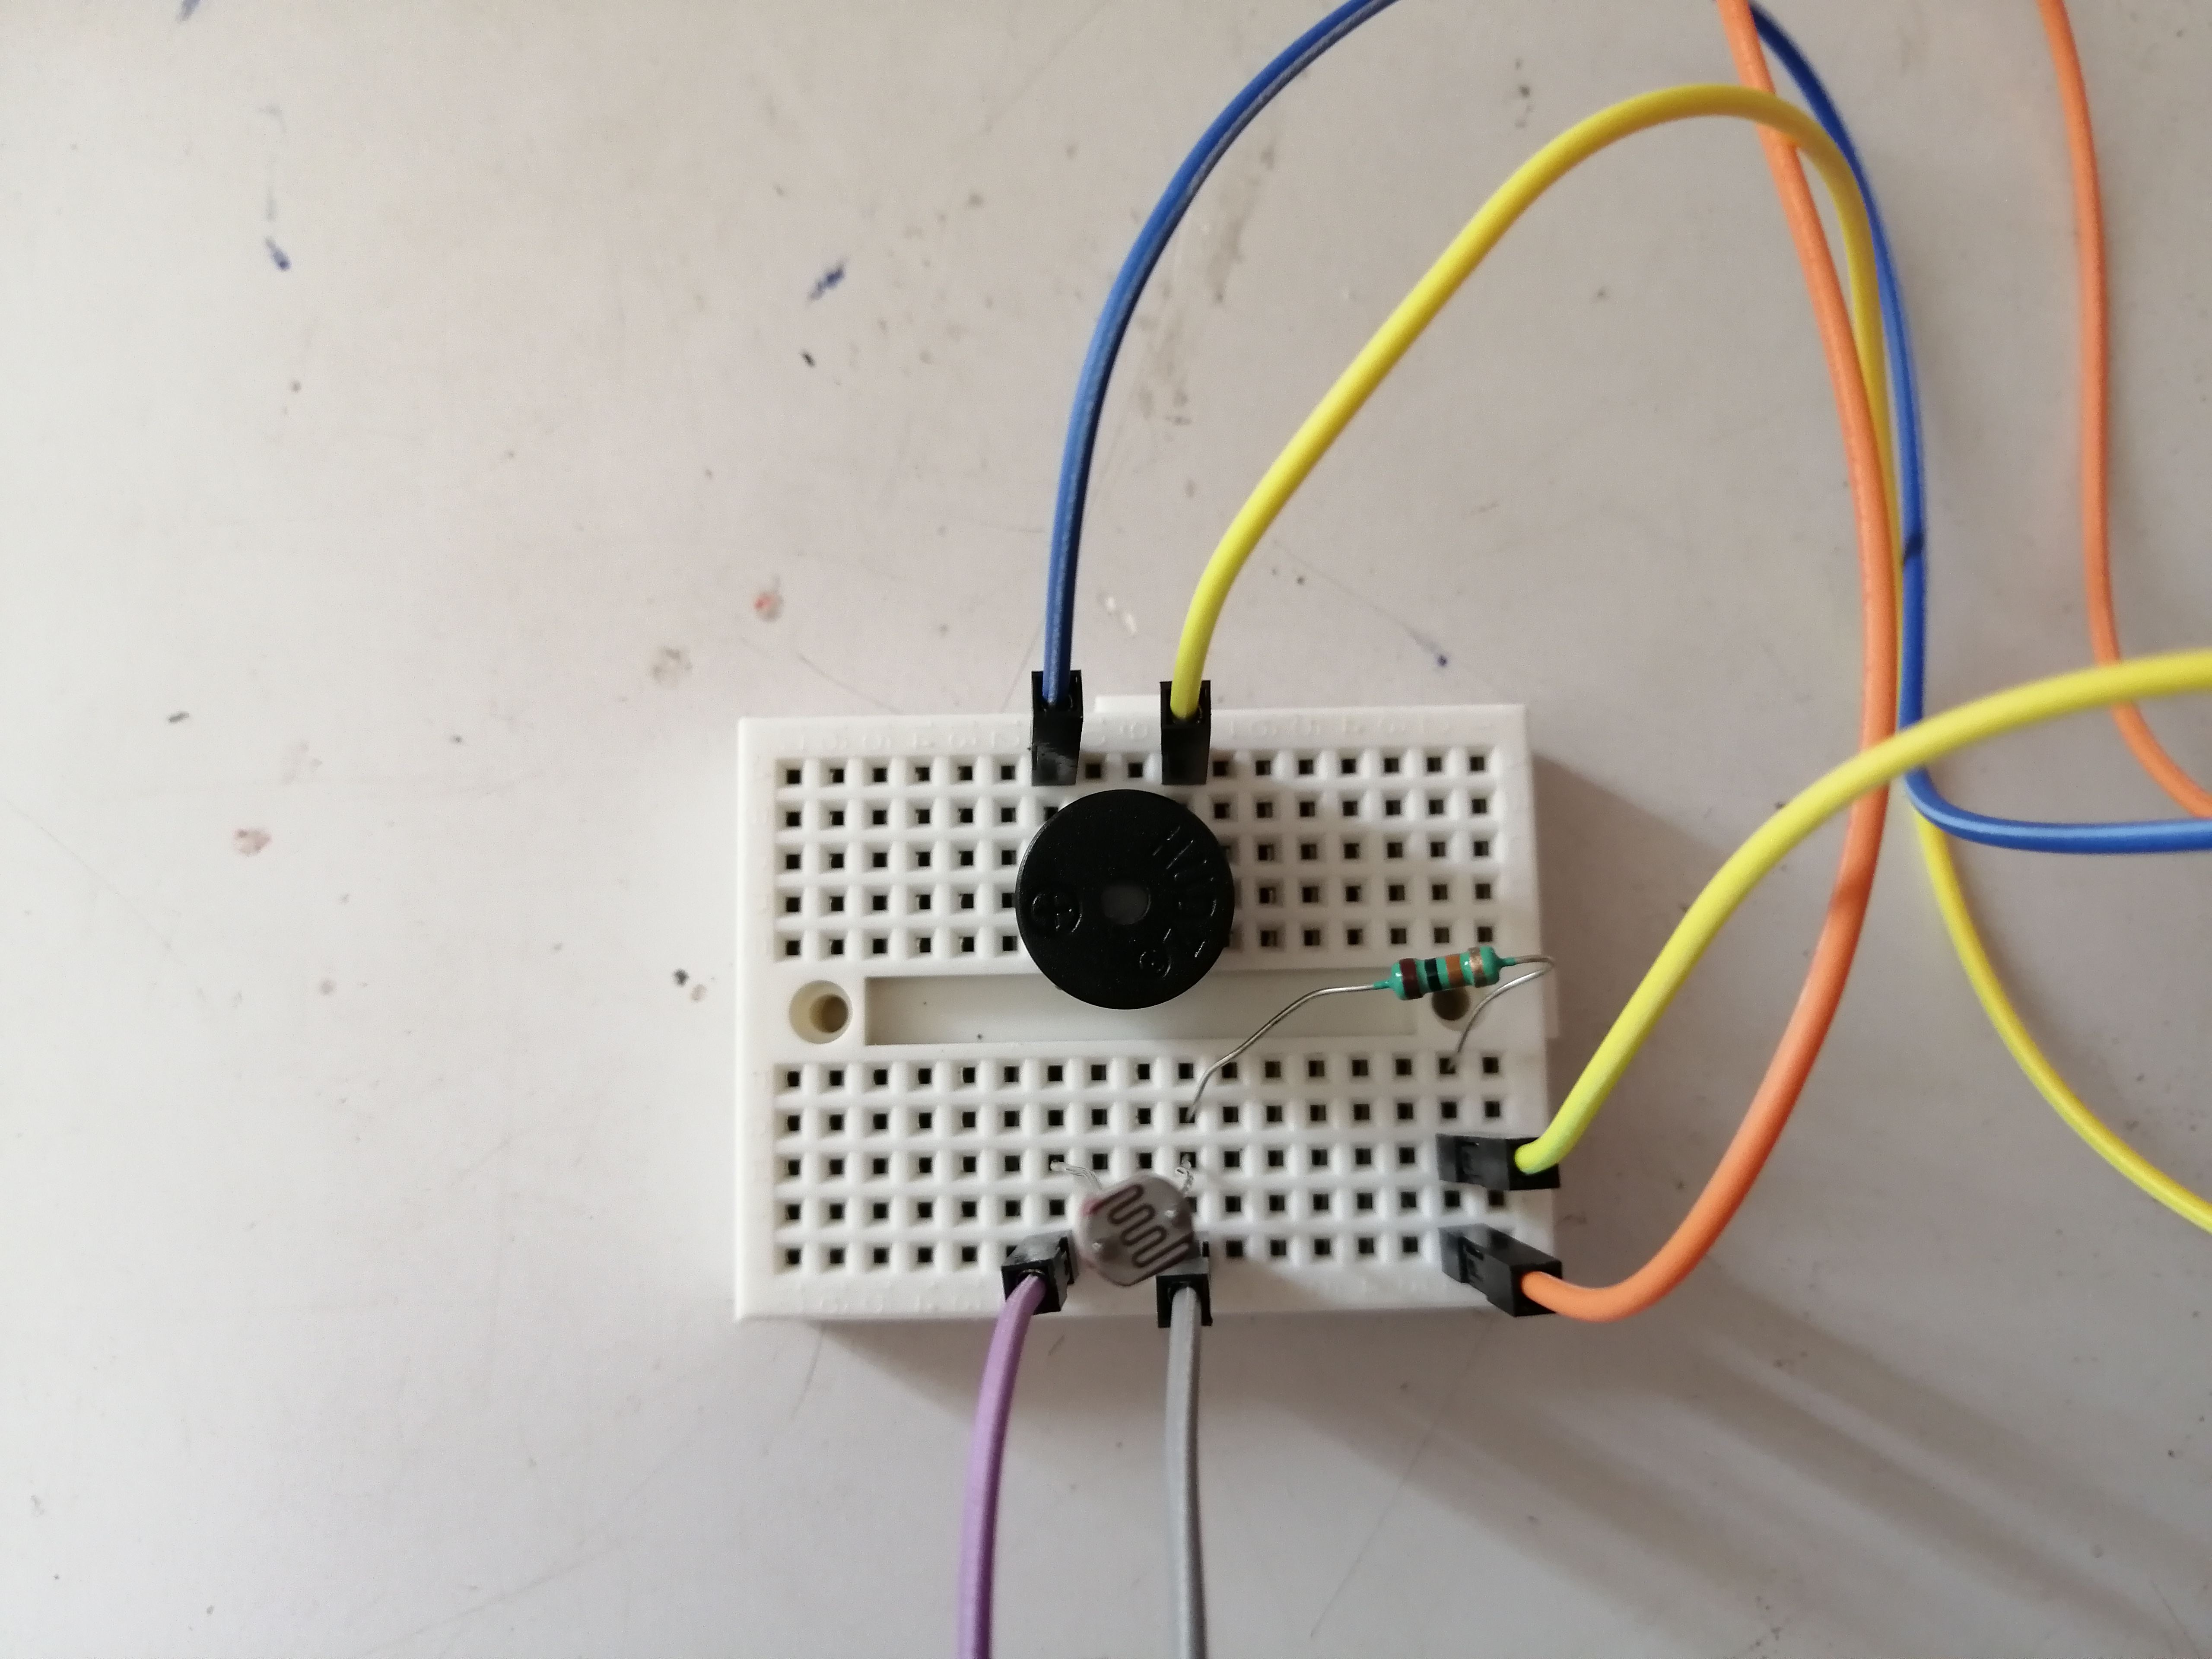


Comments