

Hardware components | ||||||
| × | 1 | ||||
| × | 1 | ||||
| × | 1 | ||||
| × | 1 | ||||
| × | 1 | ||||
 |
| × | 1 | |||
| × | 1 | ||||
Software apps and online services | ||||||
 |
| |||||
 |
| |||||
_4YUDWziWQ8.png?auto=compress%2Cformat&w=48&h=48&fit=fill&bg=ffffff) |
| |||||
This project introduces an innovative approach to broadcast audio in public and semi-public environments, leveraging nRF5340 and Bluetooth Low Energy (BLE) Audio.
We have designed audio broadcast speaker with targeted, high-quality audio delivery to specific individuals or groups.
This project main topics are as follows:
- Implementation of Bluetooth LE Audio on the nRF5340 platform.
- Integration of Broadcast Audio with Multi-Stream functionality.
- Development of PMIC monitoringand Speaker angle adjustment.
- Introduction to PCB Design Featuring an Extremely Small Audio IC.
This bellow video summarizes the main results. It's all wrapped up in about five minutes, so please take a look!
2.Proposal Requirements:What problem does your Bluetooth audio device solve?
This device addresses the need for flexible and targeted broadcast audio in public or semi-public environments, like airports and stations.
- Ex.1: General Announcements : General information (e.g., station and airport announcements) in multiple languages is delivered as clear, amplified audio both to individual earphones and through speaker dissemination.
- Ex.2: Targeted Announcements : Beyond directional speaker delivery at events, high-quality audio (e.g., 5.1ch) is also streamed to individual earphones for a more immersive experience.
It allows for both general and targeted audio delivery (broadcast audio) experiences using a single device.
Does it improve sound quality, reduce latency, enhance accessibility, or introduce a novel feature?
- Enhance accessibility: The device improves audio accessibility for both the public and targeted individuals by using broadcast audio and directional speakers.
Who is your target audience?
- Businesses and Institutions: Airports, train stations, museums, convention centers, schools, and hospitals that require both general public address and targeted information delivery.
- Individuals with Hearing Impairments: Benefit from clear, amplified audio through Auracast compatible hearing aids or devices.
- Presenters and Speakers: Can easily switch between broadcasting to a large audience and providing high-quality audio to a smaller group or individual.
What is the core innovation in your design?
This device offers superior connectivity through its Adaptive Directional speaker and Broadcast Audio technology.
This allows for efficient audio distribution to a wider audience in public and semi-public settings. The device will support multi-language announcements and 2/5.1-channel audio broadcasting.
Furthermore, consider these examples from my design:
- Ex.1: Normal Announcements can be broadcast via Broadcast Audio to both the device's speaker and individual headphones. The transceiver and receiver functionalities are integrated on a single, custom-designed PCB.
- Ex.2: Simultaneous Multi-Language Broadcast is possible via Broadcast Audio. To reach a broader audience in public spaces, the speaker's direction can be diffused.
- Ex.3: High-quality audio (e.g., 2 or 5.1-ch Sound) can be broadcast. The speaker direction can be focused to target specific individuals within a public area.
Are you doing any noise cancellation,integrated antennas, or equalization algorithms?
- EX.4:Equalization Algorithms: When using multiple speakers, it's important to adjust the volume of each speaker to prevent sound from clashing.
For example, we will lower the specific frequency ranges volume(80kHz-120kHz) of the Subwoofer (.1) to prevent its audio from being overpowering, or adjust the volume(2kHz-4kHz) of the Center (C) channel to improve voice clarity.
Are you addressing any low-latency streaming and synchronization?
- EX.5:LC3 Codec: Low-latency streaming and synchronization are crucial for broadcast audio. We will leverage the capabilities of nRF5340 + Bluetooth LE Audio(LC3 codec) to minimize latency and ensure seamless synchronization across all channels.
Bluetooth LE Audio Features Integrated:
- Auracast™ Broadcast Audio: Yes, it will be supported. As mentioned before, we plan to test audio broadcasting for multiple speakers in public spaces and to a large number of individual earphones.
- LC3 Codec Optimization: Yes, we plan to investigate the LC3 settings within the SDK to find the right balance between sound quality and power efficiency:
- Multi-Stream Audio: Yes, we plan to conduct testing with audio streams in multiple languages.
This section details the core components.
For details, Please refer to the KiCadProjectfiles(.zip),Schematics(.pdf), Gerber(.zip) and BOM(.xlsx) files in the 'Schematics' section.
These below image are Key features of this project.
Here is the overview.
Here is the KiCad 3D-image.
Here is the KiCad multi-layer image.
This PCB is 6-Layer, 80mm x 100mm Size, and Thickness:1.6 mm.
- 1-layer...Signal and Power
- 2-layer...Gnd
- 3-layer...Signal
- 4-layer...Gnd
- 5-layer...Signal
- 6-layer...Signal and Power
(For details, Please refer to the KiCad Project file.)
Form Factor & Usability
Design: This device consists of an external speaker, servo motors, and a PCB.
- SOC+PMIC: 6-layer PCB design Incorporates Nordic Semiconductor's nRF5340 and nPM1300.
- Battery Powered & Type-C Charging: The PCB is battery-powered and can be charged via a Type-C connector
- Audio IC: Cirrus Logic CS47L63 IC + Audio jack 3.5mm.
- Speakers : USB-powered speaker with AUX input.
- Servo Motors: This PCB has servo control connector with PWM. For directional speakers(e.g., SG-90).
- Debug connectors: UART, SWD interface.
*The J2 SWD pin Artwork was incorrect, because we can not use 10pin cable directly for programming. So we corrected and updated the PCB KiCad-data(-T >> -U).
User Interface & Control Mechanism
The speaker system will have a simplified UI, primarily utilizing LEDs and switches.
- Simple UI: DIP switches and tactile switches will be included for music playback and configuration control. Multiple LEDs, including RGB and single-color types, will be used for visual feedback.
Power & Battery Strategy:
Power management for this board is handled by the nPM1300 PMIC.
It generates the required 1.8V and 1.2V from the Type-C's 5V input, supplying power to the SOC (nRF5340) and Audio IC (CS47L63).
The SOC (nRF5340) can control and monitor the PMIC (nPM1300) via I2C
- Battery Type: Rechargeable Lithium-Ion battery.
- Charging Method: USB-C(5V) + nPM1300.
Expected Power Consumption:(from datasheet)
Based on the nRF5340's current consumption, I estimate the following:
- Standby: A few uA to tens of uA.
nRF5340: 1.3uA (ION_IDLE4_LP) *from the datasheet
- Music Playback: In the several hundred mA.
nRF5340: 15.5mA (IAPPCPU0) + 2mA (II2S0) + 1.79mA (IQSPI, ACTIVE) = ~ 19.3mA
USB Speaker: < 500mA (Peak consumption).
Servo Motor: 100mA - <1A (Peak during motor load).
- Broadcasting: In the tens of mA range
nRF5340: 9.7mA (IRADIO_TX3) + 5.1mA (INETCPU0) = ~14.8mA
3. Software DesignAll source code and board files(DeviceTree) for this project are available on GitHub.
https://github.com/iotengineer22/Sonic-Sprint
We chose Zephyr RTOS for this project. It offers scalability and a robust ecosystem for the nRF5340.
The codes and other details will be released collectively upon project completion.
- Zephyr RTOS: An open-source RTOS that is well-suited for this kind of embedded system.
- Nordic Semiconductor nRF Connect SDK: This SDK is a very useful tool for developing BLE on a custom board for nRF5340. We will also introduce practical debugging and usage methods. We use SDK Ver v3.0.0.
All source codes for projects are also available on GitHub.
https://github.com/iotengineer22/Sonic-Sprint/tree/main/src/project
3-2. Board file(DeviceTree)The original board(DeviceTree) files for this project are available on GitHub.
https://github.com/iotengineer22/Sonic-Sprint/tree/main/src/boards
Based on and modified from the Nordic nRF53430 Audio DK.
https://github.com/zephyrproject-rtos/zephyr/tree/main/boards/nordic/nrf5340_audio_dk
3-3 Software Development EnvironmentHere's an introduction to the software development environment used and the simple setup process. For details, please refer to the official link provided.
- nRF Connect for Desktop
https://www.nordicsemi.com/Products/Development-tools/nRF-Connect-for-Desktop
Although not used directly for this project, we installed this beginner-friendly desktop tool from Nordic. (It is noted to be convenient for getting started with official Nordic evaluation boards.)
nRF Connect for Desktop
In addition, the driver for programming the nRF*** board was available for download at the same time.
- nRF Connect for VS Code Extension Pack(nRF Connect for VS Code)
https://www.nordicsemi.com/Products/Development-tools/nRF-Connect-for-VS-Code
For this project, we utilized the nRF Connect SDK via VS Code.
And, we used SDK Version v3.0.0
The nRF Connect SDK itself was also installed through the VS Code extension.
- nRF-Util
https://www.nordicsemi.com/Products/Development-tools/nRF-Util
Simply installing nRF Connect for VS Code was not sufficient to flash the nRF5340, resulting in an error.
Flashing build to 1057787458 C:\Windows\system32\cmd.exe /d /s /c "west flash -d c:\boards\test\blinky_3\build --skip-rebuild --dev-id 1057787458"

-- west flash: using runner nrfutil -- runners.nrfutil: reset after flashing requested FATAL ERROR: required program nrfutil not found; install it or add its location to PATH
Therefore we reference Installation guide:
https://docs.nordicsemi.com/bundle/nrfutil/page/guides/installing.html
We downloaded nrfutil and placed it in the following folder within the nRF-SDK:
\ncs\toolchains\***<is your toolchain>\opt\bin\Scripts
To address this, we installed nRF Util via the command prompt. The nrfutil command becomes available after restarting.
C:\Users\***>curl https://files.nordicsemi.com/artifactory/swtools/external/nrfutil/executables/x86_64-pc-windows-msvc/nrfutil.exe -o nrfutil.exe

C:\Users\***>nrfutilThis audio data(.wav) was used for testing purposes.
https://github.com/iotengineer22/Sonic-Sprint/tree/main/src/audio-data
The audio was generated using the Google Cloud Text-to-Speech service, based on the introductory text of the nRF5340 documentation.
Separate audio tracks were created for English, German, Chinese, and Spanish.
https://cloud.google.com/text-to-speech
https://www.nordicsemi.com/Products/nRF5340
These individual language tracks were then mixed or combined using ffmpeg into 2-channel (2-language) audio files.
Examples of the ffmpeg commands used for 2-channel mixing are provided.
ffmpeg -i nRF5340_en.wav -i nRF5340_ge.wav -filter_complex "[0:a]pan=mono|c0=c0[left];[1:a]pan=mono|c0=c0[right];[left][right]amerge=inputs=2[a]" -map "[a]" nRF5340_en_ge.wav

ffmpeg -i nRF5340_cn.wav -i nRF5340_sp.wav -filter_complex "[0:a]pan=mono|c0=c0[left];[1:a]pan=mono|c0=c0[right];[left][right]amerge=inputs=2[a]" -map "[a]" nRF5340_cn_sp.wavBefore the contest started, I didn't have the nRF5340 Audio DK and the nRF5340 Custom board.
But I had the nRF54L15-DK.
I've checked basic communication and interface testing for I2S, PWM + Servo motor, and BLE_Sync on it. Furthermore, I had a Zephyr RTOS development environment set up and ready for the nRF5340.
4-1. I2SWe've connected the nRF54L15DK to an I2S-to-DAC converter IC (MAX98537A) and am performing speaker output tests.
Test code is below.
https://github.com/iotengineer22/Sonic-Sprint/tree/main/src/project/pre_nrf54l15_i2s
The program is designed to play a sound when flashed and when the device is reset. The following is a test video.
We've verified that the I2S waveform output is as expected. And checking the waveform using an oscilloscope.
The following is a test video.
This waveform means CH1_3.3V, CH2_BCLK, CH3_DIN, CH4_LRC.
We've confirmed that the clock and data waveforms match the target waveforms.
We've connected the nRF54L15DK and Servo Motor with PWM.
Test code is below.
https://github.com/iotengineer22/Sonic-Sprint/tree/main/src/project/pre_nrf54l15_pwm
The following is a test video.
We've confirmed that the PWM waveforms and Servo Motor(SG-90) Action.
(And We checked RISC-V GPIO Action, too)
This waveform means CH1_RISC-V_GPIO, CH2_M33_PWM.
We've connected the nRF54L15DKs and checked BLE ISO Sync signals.
Test code is below.
https://github.com/iotengineer22/Sonic-Sprint/tree/main/src/project/pre_nrf54l15_iso
The following is a test video.
We've prepared nRF54L15DK boards, and implemented BLE ISO Sync signal.
This waveform means CH1, CH2_BLE ISO Sync.
I have confirmed that BLE synchronization is achieved with sub-millisecond accuracy.
After the contest started, I got the nRF5340 Audio-DK.
I've checked BLE Audio Pre-Tests about "Connected Isochronous Streams (CIS)" and "Broadcast Isochronous Stream (BIS)".
This is a Unicast test involving the output of two languages (English + German) via BLE Audio.
In this mode, one Connected Isochronous Group (CIG) can be used with two Connected Isochronous Streams (CIS).
We are referencing the following documentation:
https://github.com/nrfconnect/sdk-nrf/tree/main/applications/nrf5340_audio/unicast_server
https://github.com/nrfconnect/sdk-nrf/tree/main/applications/nrf5340_audio/unicast_client
Here is the demo video:
The original audio source is being played from a PC.The PC is connected to the nRF5340 Audio-DK, which is configured as a BLE Gateway and USB Audio device.
This is a preliminary test involving the output of two languages (English + German) via BLE Audio (Unicast).
This pre-test of the Broadcast feature using the nRF5340 Audio-DK was conducted.
In this mode, transmitting broadcast audio happens using Broadcast Isochronous Stream (BIS) and Broadcast Isochronous Group (BIG).
We are referencing the following documentation:
https://github.com/nrfconnect/sdk-nrf/tree/main/applications/nrf5340_audio/broadcast_source
https://github.com/nrfconnect/sdk-nrf/tree/main/applications/nrf5340_audio/broadcast_sink
Demo video is below.
We can check broadcast connection.
We will continue with debugging and coding for the main test.
A pre-test of the Broadcast feature using the nRF5340 Audio-DK was conducted.
In this mode, transmitting broadcast audio happens using 4 Broadcast Isochronous Stream (BIS) and Broadcast Isochronous Group (BIG).
But this test Result is NG. we cannot adjust sink 4BIS mode.
The following program was used for testing:
https://github.com/iotengineer22/Sonic-Sprint/tree/main/src/project/pre_nrf5340_4_bis
Demo video is below.
We can customize the Broadcast for 4BIS mode.
Also, we can check the 4-channel Broadcast Source from the log.
However, we cannot adjust the 4-channel Broadcast Sink.
A pre-test of the Multi-Stream Broadcast Audio feature using the nRF5340 Audio-DK was conducted.
In this mode, multiple Gateways transmit different Broadcast Audio (Multi-Stream), and the device switches between them.
We were able to switch between 4 languages (English, German, Chinese, and Spanish).
The following program was used for testing:
https://github.com/iotengineer22/Sonic-Sprint/tree/main/src/project/pre_nrf5340_2_bro
Demo video is below.
We are using two Broadcasters (Gateways), and configuring the Broadcast Source settings.
And checking the audio output from both Gateway 1 (Right/Left) and Gateway 2 (Right/Left). We have successfully achieved 4-Language Broadcast using these two Gateways.
After we designed and ordered custom nRF5340 board, we got the Custom nRF5340 Boards from PCBWay.
(The important points of the PCB design will be described later.)
First of all, We've checked and debugged Custom nRF5340 Board.
This section describes the Custom nRF5340 Board voltage check.
Power management for this board is handled by the nPM1300 PMIC.
PMIC generates the required 1.8V and 1.2V from the Type-C(5V) or Battery(3.7V), supplying power to the SOC (nRF5340) and Audio IC (CS47L63).
You can also see the actual checking process in the video.
First, we checked Voltage sequence from TypeC with Oscilloscope. Result is OK.
Waveform means CH1_TypeC(5V), CH2_1.8V, CH3_1.2V.
Secondly, we checked Voltage sequence from Li-ion Battery with Oscilloscope.
We used common commercial Li-ion Battery(3.7V).
Voltage sequence Result is OK.
Waveform means CH2_1.8V, CH3_1.2V, CH4_Battery(3.7V).
Caution Point!
PMIC(nPM1300) has protection for Overvolatge. From datasheet, Overvoltage protection threshold(VBUSovp) is Typ_5.5V.
Some Type-C adapters or power sources may output a voltage around 5.5V. If this occurs, the protection function will prevent the 1.8V and 1.2V outputs.
This waveform means about Overvoltage protection threshold. CH1_TypeC(5V), CH2_1.8V, CH3_1.2V.
This section describes the procedure for flashing programs onto the "Custom nRF5340 Board" and the "nRF5340 Audio-DK". Please refer to the official documentation for detailed steps.
https://docs.nordicsemi.com/bundle/ncs-latest/page/nrf/applications/nrf5340_audio/doc/building.html
The following is an example outlining the process for building and flashing a broadcast source project:
Create a project for the nRF5340 Audio DK.
We use nRF SDK Ver v3.0.0.
When initially setting up the board, make sure to load all necessary configuration files.
After the build is complete, edit the device configuration file(nrf5340_audio_dk_devices.json) used for flashing.
Example file path: C:\boards\test\nrf5340_audio\tools\buildprog\nrf5340_audio_dk_devices.json
For my setup, I change the section corresponding to the target board (e.g., nrf5340_audio_dk_snr) to the serial number of the specific nRF5340 Audio-DK I want to flash, or to the serial number of a relay nRF board if used.
When I flashed "custom nRF5340 board", I used nRF54L15-DK board.
Configure the terminal settings using nRF Connect.
Finally, use the provided Python script (buildprog.py) to flash the program.
PS C:\boards\test\nrf5340_audio\build\nrf5340_audio> cd ..
PS C:\boards\test\nrf5340_audio\build> cd ..
PS C:\boards\test\nrf5340_audio> cd .\tools\buildprog\
PS C:\boards\test\nrf5340_audio\tools\buildprog> python buildprog.py -c both -b debug -d both -t broadcast -p --recover_on_failYou can also see the actual flashing process in the video.
(This example is case of flashing Broadcast sink project.)
Please see Demo Video for flashing Custom nRF5340 Board.
Connect the Debug OUT connector on the nRF54L15 DK to connector J2 on custom nRF5340 board using a 10-pin cable with a 1.27mm pitch.
After flashing, the change in the Custom board's LED lighting indicates successful programming.
This section details the process of adapting the nRF5340 Audio-DK board files for a custom nRF5430 board and the error handling performed.
Due to significant differences between the nRF5340 Audio-DK and the custom nRF5430 board, directly using the original board files resulted in numerous errors. The primary source of these errors was related to I2C power sensors.
-- [00:00:00.776,733] <err> INA230: Failed to write configuration register!
-- [00:00:01.276,916] <err> INA230: Failed to write configuration register!
-- [00:00:01.777,069] <err> INA230: Failed to write configuration register!
-- [00:00:02.277,221] <err> INA230: Failed to write configuration register!
*** Booting nRF Connect SDK v3.0.0-3bfc46578e42 ***
*** Using Zephyr OS v4.0.99-3e0ce7636fa6 ***
-- [00:00:02.277,343] <err> power_meas: INA231 device not ready: VBAT

-- [00:00:02.288,543] <inf> board_version: Compatible board/HW version found: 0.8.0
-- [00:00:02.299,163] <err> board_version: Board ver search failed. ADC reg read: 627
-- [00:00:02.299,163] <err> main: ERR_CHK Err_code: [-29] @ line: 546
To address this, unnecessary configurations were disabled (masked). The main changes made were:
- Project File (\src\utils\nrf5340_audio_dk.c): Masked the board version check function.
// ret = board_version_valid_check();
	// if (ret) {
	// 	return ret;
	// }

	// ret = board_version_get(&board_rev);
	// if (ret) {
	// 	return ret;
// }- Board File (nrf5340_audio_dk_nrf5340_cpuapp_common.dtsi): Masked the I2C sensor information.
arduino_i2c: &i2c1 {
compatible = "nordic,nrf-twim";
status = "okay";
pinctrl-0 = <&i2c1_default>;
pinctrl-1 = <&i2c1_sleep>;
pinctrl-names = "default", "sleep";
// vbat_sensor: ina231@44 {
//  compatible = "ti,ina230";
//  reg = <0x44>;
//  adc-mode = "Bus and shunt voltage continuous";
//  vbus-conversion-time-us = <4156>;
//  vshunt-conversion-time-us = <4156>;
//  avg-count = <1024>;
//  current-lsb-microamps = <1>;
//  rshunt-micro-ohms = <510000>;
// };
// vdd1_codec_sensor: ina231@45 {
//  compatible = "ti,ina230";
//  reg = <0x45>;
//  adc-mode = "Bus and shunt voltage continuous";
//  vbus-conversion-time-us = <4156>;
//  vshunt-conversion-time-us = <4156>;
//  avg-count = <1024>;
//  current-lsb-microamps = <1>;
//  rshunt-micro-ohms = <2200000>;
// };
// vdd2_codec_sensor: ina231@41 {
//  compatible = "ti,ina230";
//  reg = <0x41>;
//  adc-mode = "Bus and shunt voltage continuous";
//  vbus-conversion-time-us = <4156>;
//  vshunt-conversion-time-us = <4156>;
//  avg-count = <1024>;
//  current-lsb-microamps = <1>;
//  rshunt-micro-ohms = <2200000>;
// };
// vdd2_nrf_sensor: ina231@40 {
//  compatible = "ti,ina230";
//  reg = <0x40>;
//  adc-mode = "Bus and shunt voltage continuous";
//  vbus-conversion-time-us = <4156>;
//  vshunt-conversion-time-us = <4156>;
//  avg-count = <1024>;
//  current-lsb-microamps = <1>;
//  rshunt-micro-ohms = <1000000>;
// };
};- Configuration File (\boards\nrf5340_audio_dk_nrf5340_cpuapp.conf): Masked the power measurement functionality.
# CONFIG_NRF5340_AUDIO_POWER_MEASUREMENT=y
CONFIG_NRF5340_AUDIO_POWER_MEASUREMENT=n
While there may still be other error sources requiring attention, these modifications have successfully made the system operational for now.
6-4. Monitoring PMIC(nPM1300) ControlThis section describes the Custom nRF5340 Board Battery Power Monitoring.
PMIC (nPM1300) controls battery power and charging from TypeC. Monitoring PMIC control from nRF5340 via i2c.
We created this configuration by referring to the following sample from the nRF Connect SDK:
https://github.com/nrfconnect/sdk-nrf/tree/main/samples/pmic/native/npm1300_fuel_gauge
To configure the PMIC (nPM1300), we are modifying the Device Tree (.dtsi), the CMakeLists.txt file used for the build, and the prj.conf file.
The following program and setting was used for testing:
https://github.com/iotengineer22/Sonic-Sprint/tree/main/src/project/nrf5340_pmic_npm1300
You can also see the actual checking process in the video.
Please see Demo Video.
We can check Battery Voltage(V), Current(I), Thermal(T)... via I2C.
PMIC(nPM1300) Controls Li-ion Battery Charging and Consuming.
- Current(I) '-' means Charging Battery.
- Current(I) '+' means Consuming Battery.
The custom board includes pin headers designed for connecting servo motors. This header provides both the necessary 5V power supply and PWM output for controlling the servo.
The following program was used for testing:
https://github.com/iotengineer22/Sonic-Sprint/tree/main/src/project/nrf5340_pwm
A standalone test was performed using this feature, specifically focusing on adjusting the angle of a speaker (audio output functionality was not used in this test).
The servo motor used was an SG-90, mounted using a common, commercially available mounting unit designed for the SG-90.
You can also see the actual checking process in the video.
Please see Demo Video.
We have successfully generated the necessary PWM pulses, ranging from 600us to 2400us, to control the SG-90 servo motor. It has been confirmed that the servo motor operates correctly on its own (standalone).
Furthermore, we were able to successfully control the angle even when the speaker was mounted.
We have also confirmed that the other interfaces available on this custom nRF5340 board are functioning correctly.
- We confirmed that we can acquire logs by connecting the UART to a USB serial cable. (We need to prepare 1.8V USB serial cable.)
- We confirmed that SPI and I2S are functioning, enabling audio output from the Audio IC (CS47L63).
- We verified that each GPIO is functioning, allowing for input from DIP switches and push buttons, and controlling LED blinking without issues.
We tested BLE(Bluetooth LE) Audio in Unicast and Broadcast from Custom nRF5340 boards. We explain in detail.
7-1. BLE Audio UnicastThis is a Unicast test involving the output of two languages (English + German) announcement via BLE Audio.
In this mode, one Connected Isochronous Group (CIG) can be used with two Connected Isochronous Streams (CIS).
The following program was used for testing:
https://github.com/iotengineer22/Sonic-Sprint/tree/main/src/project/nrf5340_unicast
Please see Demo Video for BLE Audio Unicast.
First of all, we prepared and reset Unicast Server and Client(Right/Left).
We can check Unicast connection from Log.
We confirmed Unicast Sounds in 2 Languages(German/English) from Client speakers.
Moreover, we controlled Start/Stop and Sound Volume from both clients SW.
This is a Broadcast test involving the output of two languages (English + German) announcement via BLE Audio.
In this mode, transmitting broadcast audio happens using one Broadcast Isochronous Stream (BIS) and one Broadcast Isochronous Group (BIG).
The following program was used for testing:
https://github.com/iotengineer22/Sonic-Sprint/tree/main/src/project/nrf5340_broadcast
Please see Demo Video for BLE Audio Broadcast.
We prepared Broadcast one Source and one Sink.
We checked Broadcast connection from Log, and test Right/Left Broadcast sound.
We can change Broadcast sounds from Custom nRF5340 board SW.
In this mode, multiple Gateways transmit different Broadcast Audio (Multi-Stream), and the device switches between them.
We were able to switch between 4 languages (English, German, Chinese, and Spanish)from Custom nRF5340 boards.
The following program was used for testing:
https://github.com/iotengineer22/Sonic-Sprint/tree/main/src/project/nrf5340_broadcast
Please see Demo Video for Multi-Stream Broadcast.
We prepared Broadcast 2-Source and 1-Sink.
We can change Broadcast Stream from sink device.
This means that audio can be freely selected from multiple sources. In the context of this test example, users can freely select from broadcast announcements in multiple languages.
In this mode, multiple Gateways transmit different Broadcast Audio (Multi-Stream). We have confirmed that precise Broadcastsynchronization is achieved among the sink devices.
The following program was used for testing:
https://github.com/iotengineer22/Sonic-Sprint/tree/main/src/project/nrf5340_broadcast
Please see Demo Video for Multi-Stream Broadcast.
We prepared Broadcast 2-Source and 2-Sink.
While the video provides more details, we have successfully achieved synchronized reception of the same broadcast stream at each sink.
Specifically, this means we can output audio in the same language across different devices with synchronization. (To my ear, there was absolutely no noticeable audio delay!)
This section primarily serves as an Introduction to PCB Design, with a specific focus on integrating and working with an extremely small audio IC.
8-1. KiCadThis project involves a 6-layer PCB. We used KiCad Ver9.0 for creating the schematics and board outline (artwork frame).
The Bill of Materials (BOM) and Gerber data, including the artwork frame, are also made public. Please refer to the released 'Schematics' to check them.
You can use KiCad Project files(Schematics, ArtWork, 3D_Image) free.
The key components presenting a routing challenge are the SOC (nRF5340) and the Audio IC (CS47L63), both having a 0.4mm pitch.
Furthermore, they have a staggered array, making it difficult to route from the inner pins directly on the surface layer without interfering with surrounding pins and traces.
To overcome this, we employed the Via-in-Pad technique. While typically patterns or pads cannot be placed directly over vias, this method allows for placing pads/patterns by first filling the vias.
For detailed information on this technique, please refer to the PCBWay page: https://www.pcbway.jp/pcb_prototype/PCB_Via_in_Pad.html
Upon reviewing the datasheets for the SOC and Audio IC, the recommended pad sizes for a single pin are:
- SOC(nRF5340): φ0.2mm (Typ.)
- Audio IC(CS47L63): φ0.27mm (Typ.)
Based on these recommendations, we designed the Via-in-Pad with a via drill diameter of 0.2mm and a via pad diameter of 0.3mm. This setting is consistently applied to all Via-in-Pad locations on this board.
As an example shown for the SOC, the inner pins can be routed from the 3rd layer (orange) through the vias directly beneath their pads.
During the DRC (Design Rule Check), a warning appeared: "Drill to drill distance too close" (or similar, indicating holes being too close).
Note that these are my specific design constraints and serve as an example; they vary depending on the board manufacturer's capabilities and technology.
The approach is to either relax the design constraints or ignore the warning if deemed non-critical, and then output the Gerber files.
When communicating Via-in-Pad requirements to the PCB manufacturer (specifically PCBWay):
When requesting a quote on the PCBWay website, there is an option for Via-in-Pad that should be checked.
Even if not specified during the quoting phase, the manufacturer will typically send an Engineering Queries Sheet (EQ) after the order is placed, where they will ask for clarification on such features. You will need to respond to these questions from the PCB manufacturer.
- Additionally, it is helpful to specify which locations and which vias are for Via-in-Pad in the comments section. For example:
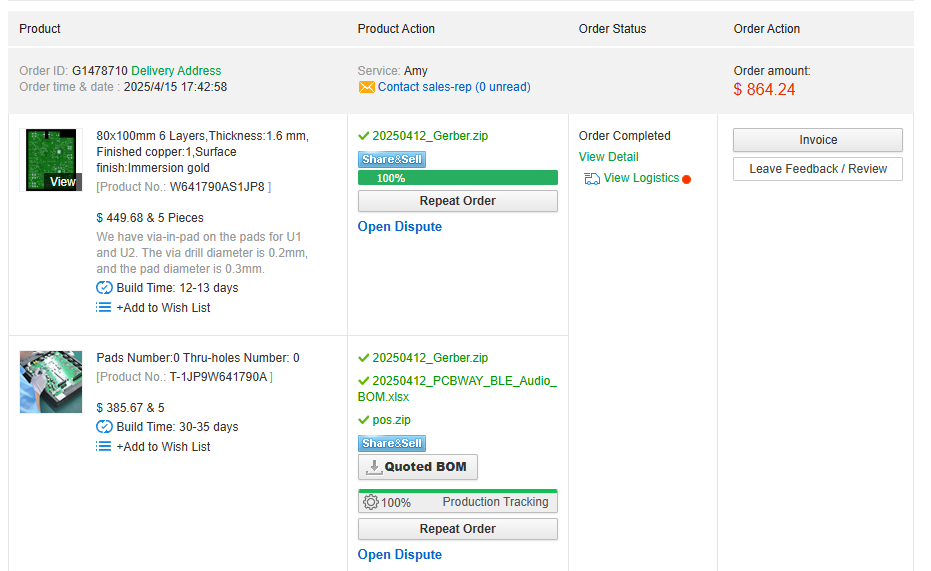
"We have via-in-pad on the pads for U1 and U2. The via drill diameter is 0.2mm, and the pad diameter is 0.3mm."
- It's important to note that using Via-in-Pad, especially with such small BGA sizes (0.2mm drill / 0.3mm pad), can limit the available surface finish options. In this project, we chose to use below.
ENIG (Electroless Nickel Immersion Gold) with a gold thickness of 1u" for the surface finish.
- Furthermore, locations with Via-in-Pad require the vias to be filled with resin before the pad is placed.
In this project, we applied Resin filling to all vias on the board, including those not used for Via-in-Pad. (Note: Depending on desired board quality and cost, sometimes only the Via-in-Pad locations are resin-filled).8-4. PCB Settings
This PCB is 6-Layer, 80mm x 100mm Size, and Thickness:1.6 mm.
In detail, please refer to below PCB Parameter settings.
After placing the order, you just wait for the PCB to arrive. Based on personal experience, the total lead time was approximately 1 month (4 weeks).
Fabrication of the 6-layer board was time-consuming due to the implementation of Via-in-Pad technology.
Despite this, component preparation was conducted in parallel during the fabrication period, which allowed for a smooth process with PCBWay.
Breakdown:
- Board Fabrication: approx. 12-13 days
- Board Assembly: approx. 2 weeks
- Shipping: approx. 5 days
A significant number of features were successfully implemented and tested during this project. However, due to constraints imposed by the project deadline, the following items remain incomplete:
- Mechanical Integration of Speaker and Servo Motor:
Individual testing of both servo motor operation and audio output (including BLE Audio) was successfully conducted. Nevertheless, the final system test with the speaker and servo motor mechanically coupled was not fully performed.
The CS47L63 is primarily designed as an audio IC for headphones. Its recommended load impedance range for direct connection is 15 Ω to 100 Ω. The datasheet specifies that it can deliver 20 mW into a 32 Ω load, typically serving as a headphone amplifier output.
However, many general-purpose commercial speakers are rated at 8 Ω. Although this falls outside the CS47L63's recommended impedance range, we conducted a test to confirm if it could directly drive such a speaker.
The motivation behind this was to simplify the process of creating and connecting custom speakers if direct drive were possible.
Our board is equipped with pin headers specifically for direct speaker connection. We connected the speaker to the OUTP (TIP) and OUTN (SLEEVE) pins.
Upon playing audio, the sound was output without any issues. This functionality is also demonstrated in our demo video.
This test confirms that when developing custom speakers, an external (USB) power source would not be required for the amplifier section, making the design process significantly easier.
This project successfully achieved the following:
- Implementation of Bluetooth LE Audio on the nRF5340 platform.
- Integration of Broadcast Audio with Multi-Stream functionality.
- Development of PMIC monitoringand Speaker angle adjustment.
- Introduction to PCB Design Featuring an Extremely Small Audio IC.
This bellow video summarizes the main results.
This has been a great fun challenge.
Thanks to to Nordic Semiconductor, PCBWay and hackster.io for hosting this exciting competition.
Thank you very much for all the support provided.

_Ujn5WoVOOu.png?auto=compress%2Cformat&w=40&h=40&fit=fillmax&bg=fff&dpr=2)

_SPmZ63wPgQ.png?auto=compress%2Cformat&w=40&h=40&fit=fillmax&bg=fff&dpr=2)
Comments