IOT Group 9- Fall 2019
Published

MEGR 3171-IOT Project-Group 9- WAKEY WAKEY

This is an IOT project created for MEGR 3171 at UNC Charlotte. We hope you find it useful and can WAKEY WAKEY!

BeginnerFull instructions provided8 hours1,212
MEGR 3171-IOT Project-Group 9- WAKEY WAKEY

Things used in this project

Hardware components

Breadboard (generic)
The breadboard that came with each Particle Argon.
×3
Argon
Particle Argon
One Argon from each group member.
×3
3 mm LED: Green
3 mm LED: Green
Used with the Alarm Argon.
×1
LED (generic)
LED (generic)
The generic white LEDs from the Argon kit were used with the Button Argon and Lamp Argon.
×2
SG90 Micro-servo motor
One servo was connected to the Lamp Argon and one to the Alarm Argon.
×2
Development Kit Accessory, Jumper Wire Kit
Used to connect all the components on the breadboards.
×1
Pushbutton switch 12mm
SparkFun Pushbutton switch 12mm
Used with the Button Argon to signal the servos.
×1
Desk Lamp, LED
Desk Lamp, LED
The servo connected to the Lamp Argon is taped to the lamp to flip the switch.
×1
GE alarm clock
The servo connected to the Alarm Argon is taped to the alarm clock to press the snooze button.
×1
Jumper wires (generic)
Used to connect the Alarm and Lamp Argons to the servo motors.
×1
Resistor 220 ohm
Resistor 220 ohm
Used in line with the push button.
×1

Software apps and online services

easySensors EasyEDA
Created schematics with EasyEDA.
Maker service
IFTTT Maker service
Told the Alarm Argon when to begin and allowed the Alarm Argon to publish back when complete.
Particle Build Web IDE
Coded the Argons with this.
Google Sheets
Google Sheets
The data found by the IFTTT Applet is sent here.

Hand tools and fabrication machines

Multitool, Screwdriver
Used to assemble the servo motor arms.
Tape, Electrical
Tape, Electrical
Used to hold the servo motors to the lamp and alarm clock.
Scissor, Electrician
Used to trim the leads on the resistor and LEDs.

Story

Read more

Schematics

Button Argon Schematic

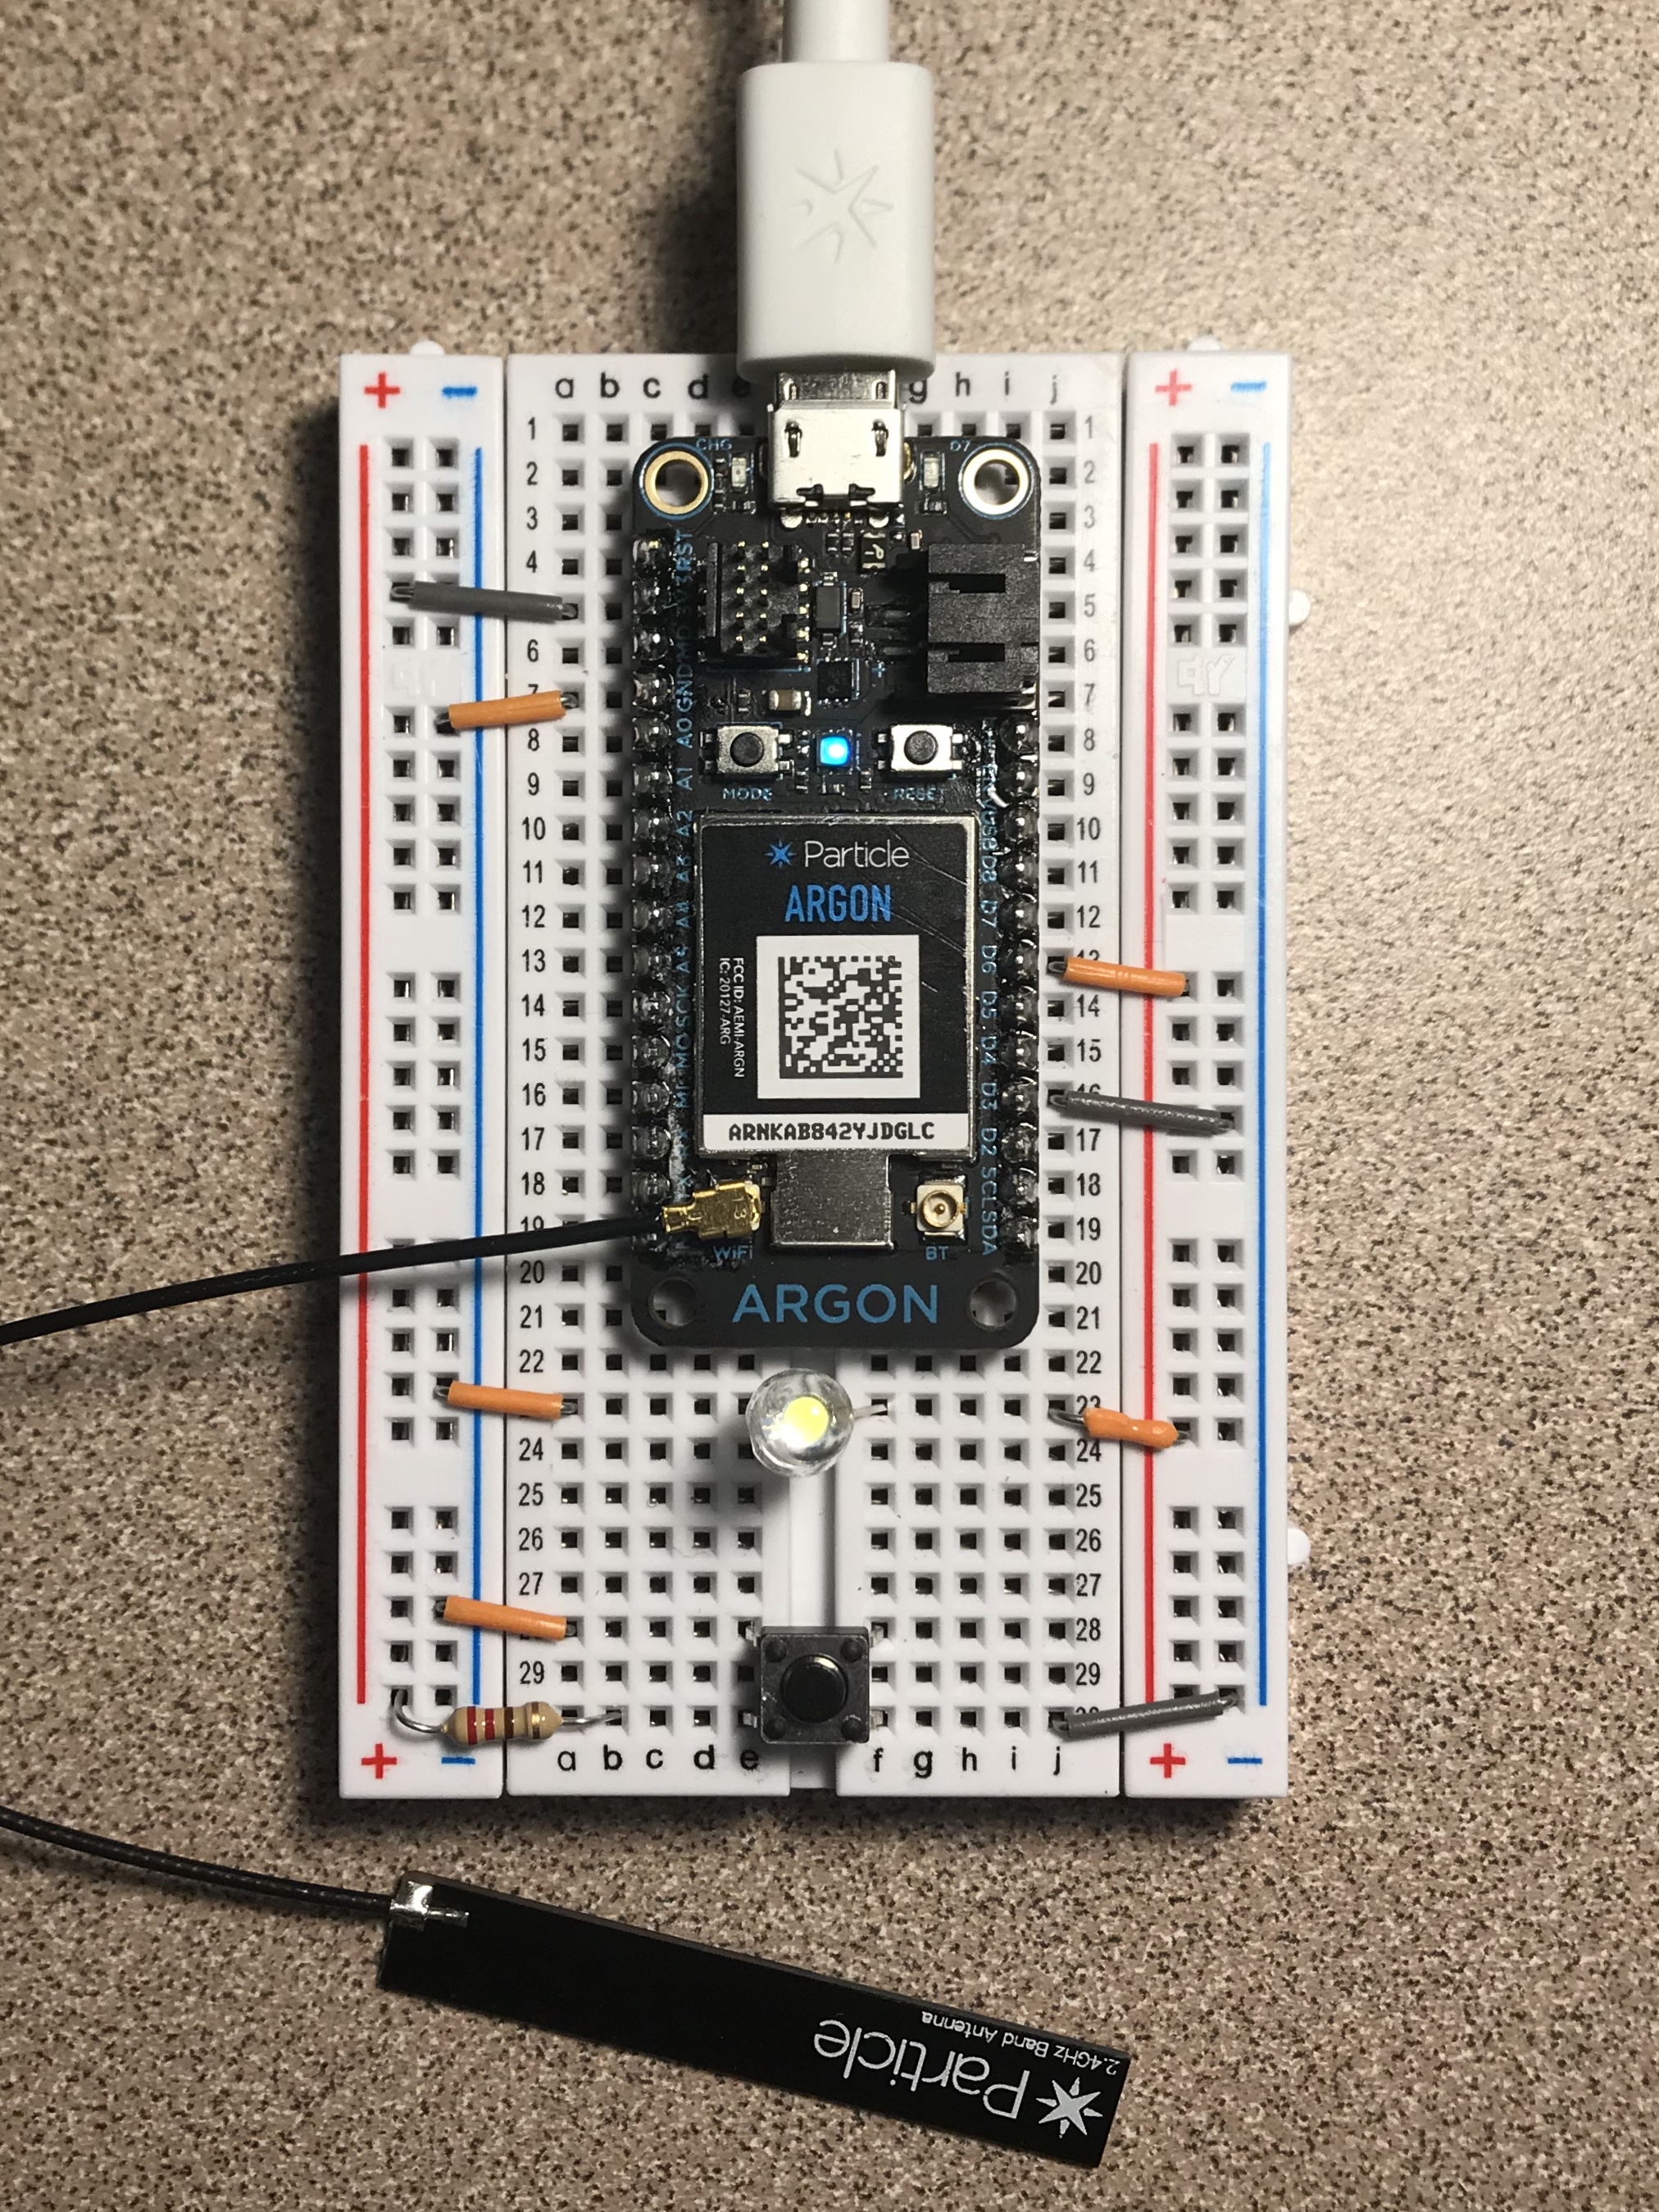
Button Argon Picture

Lamp Argon Schematic

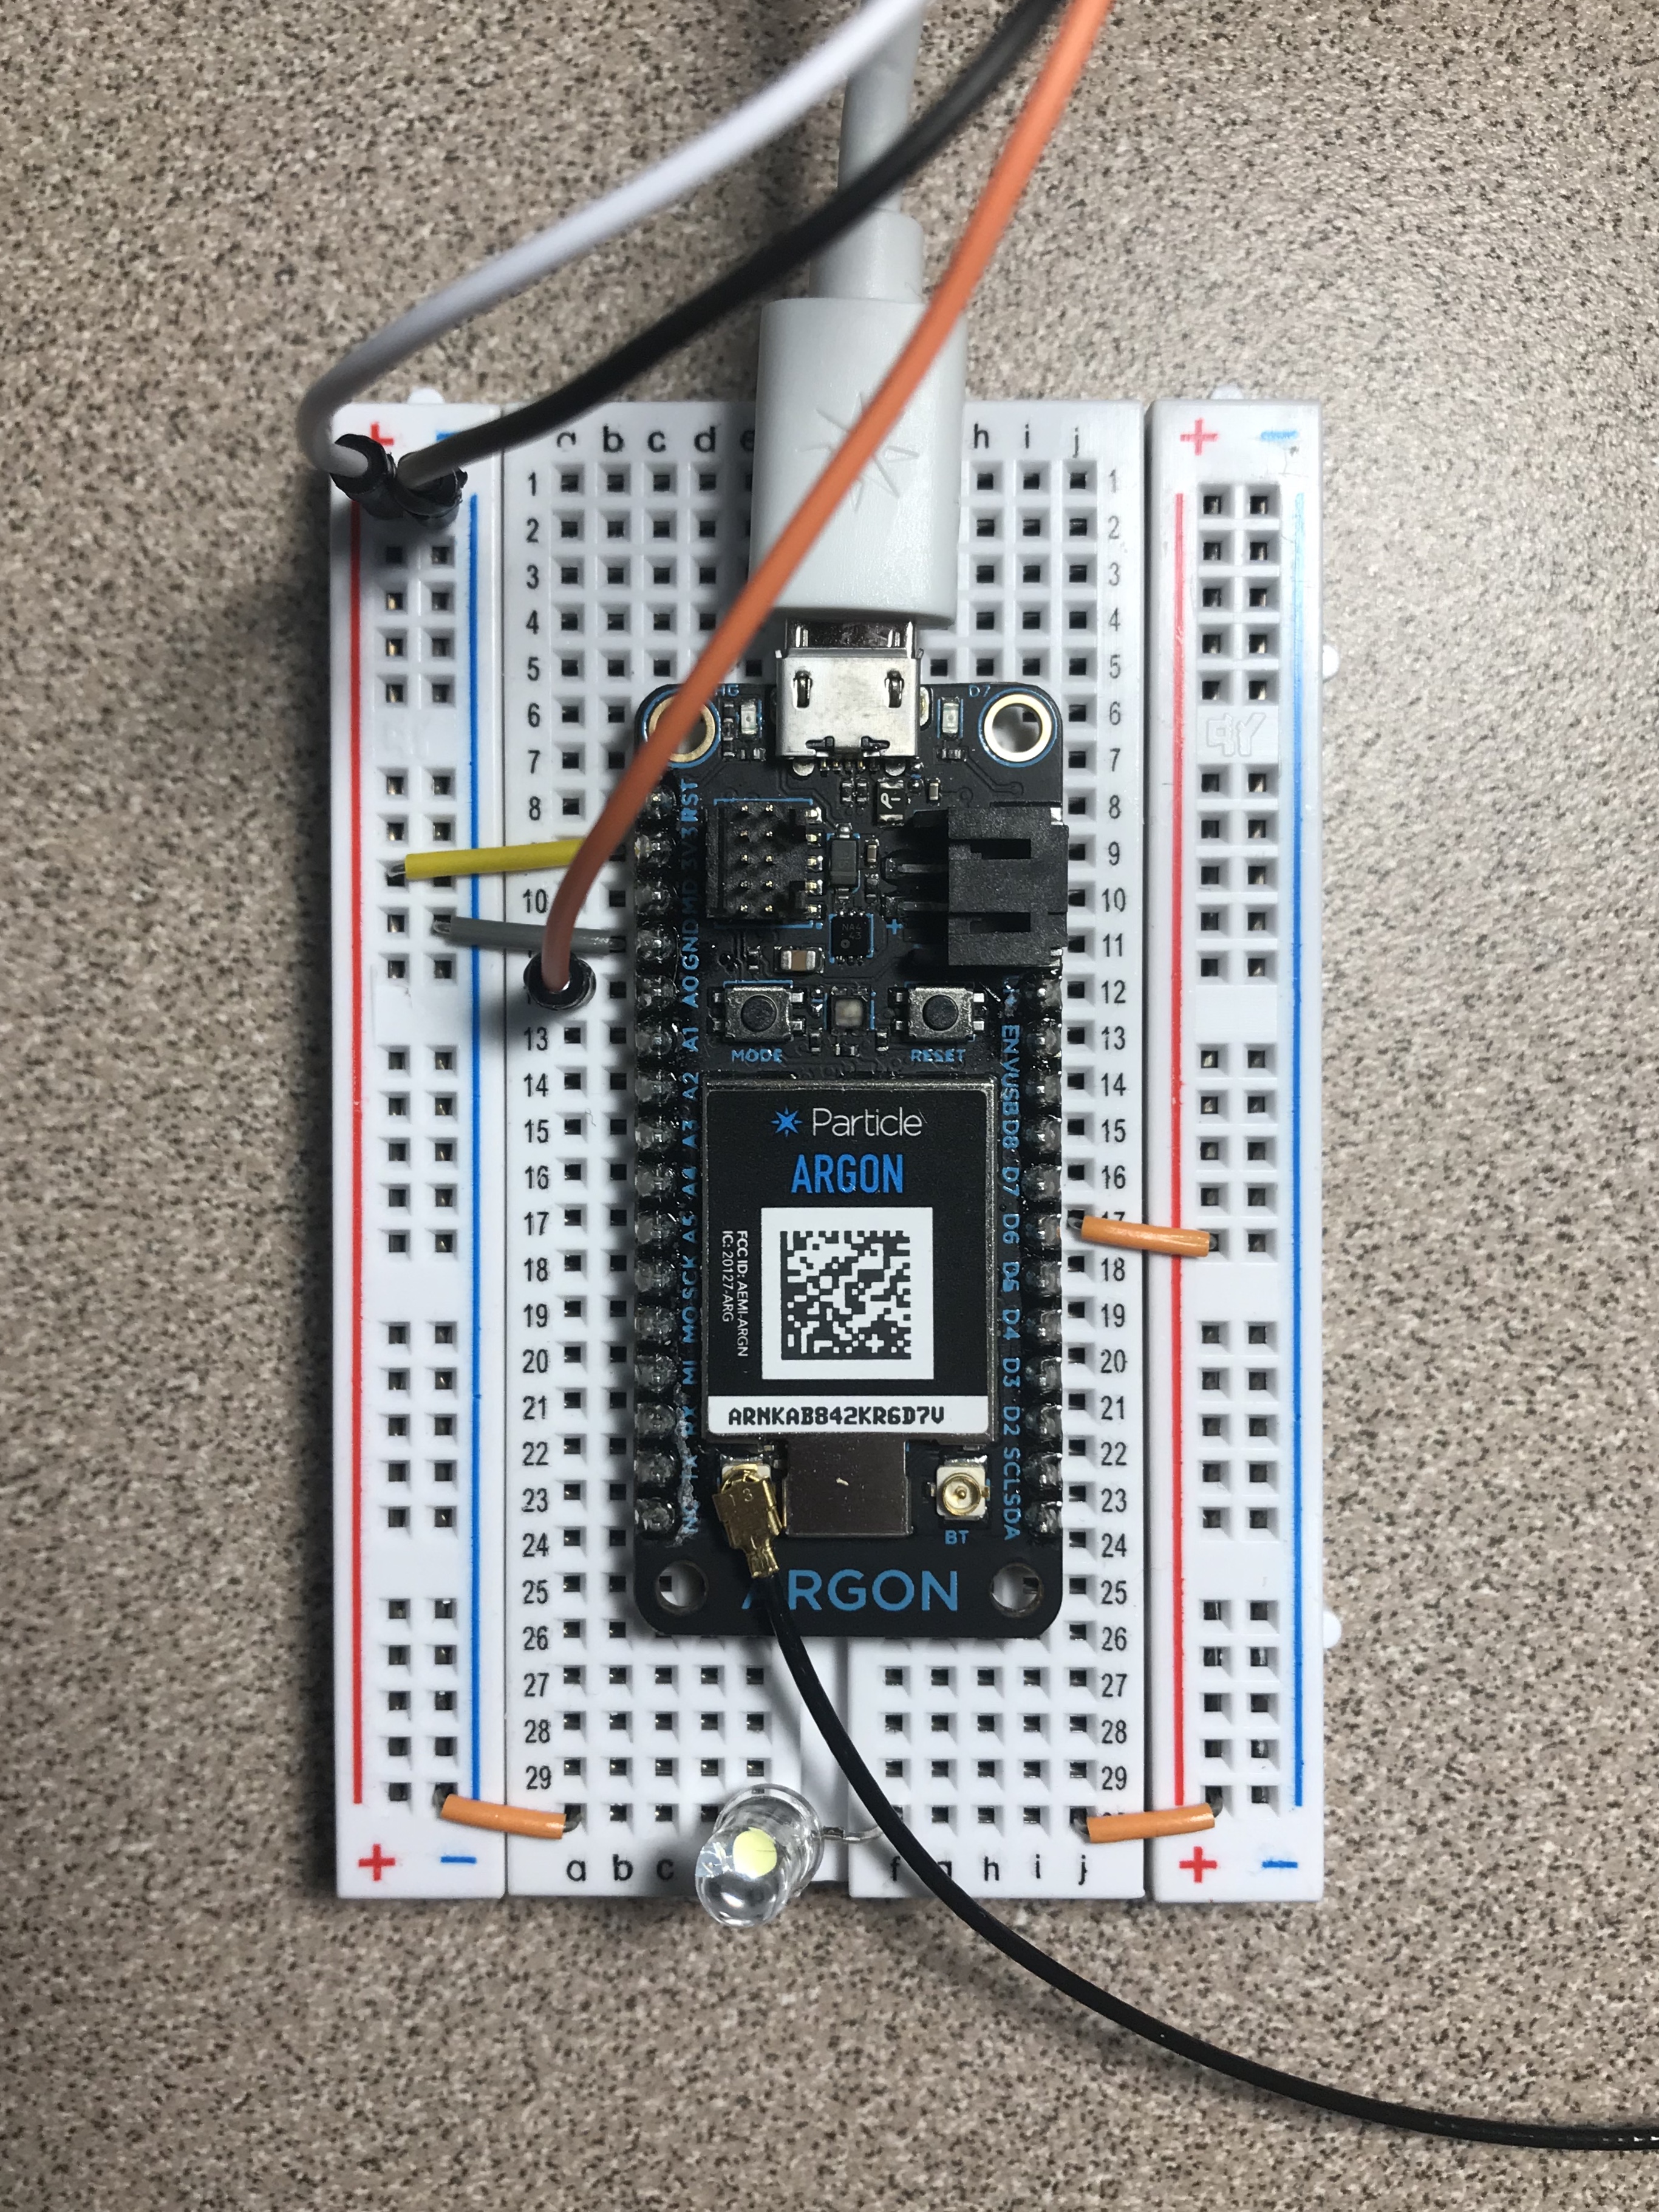
Lamp Argon Picture

Alarm Argon Schematic

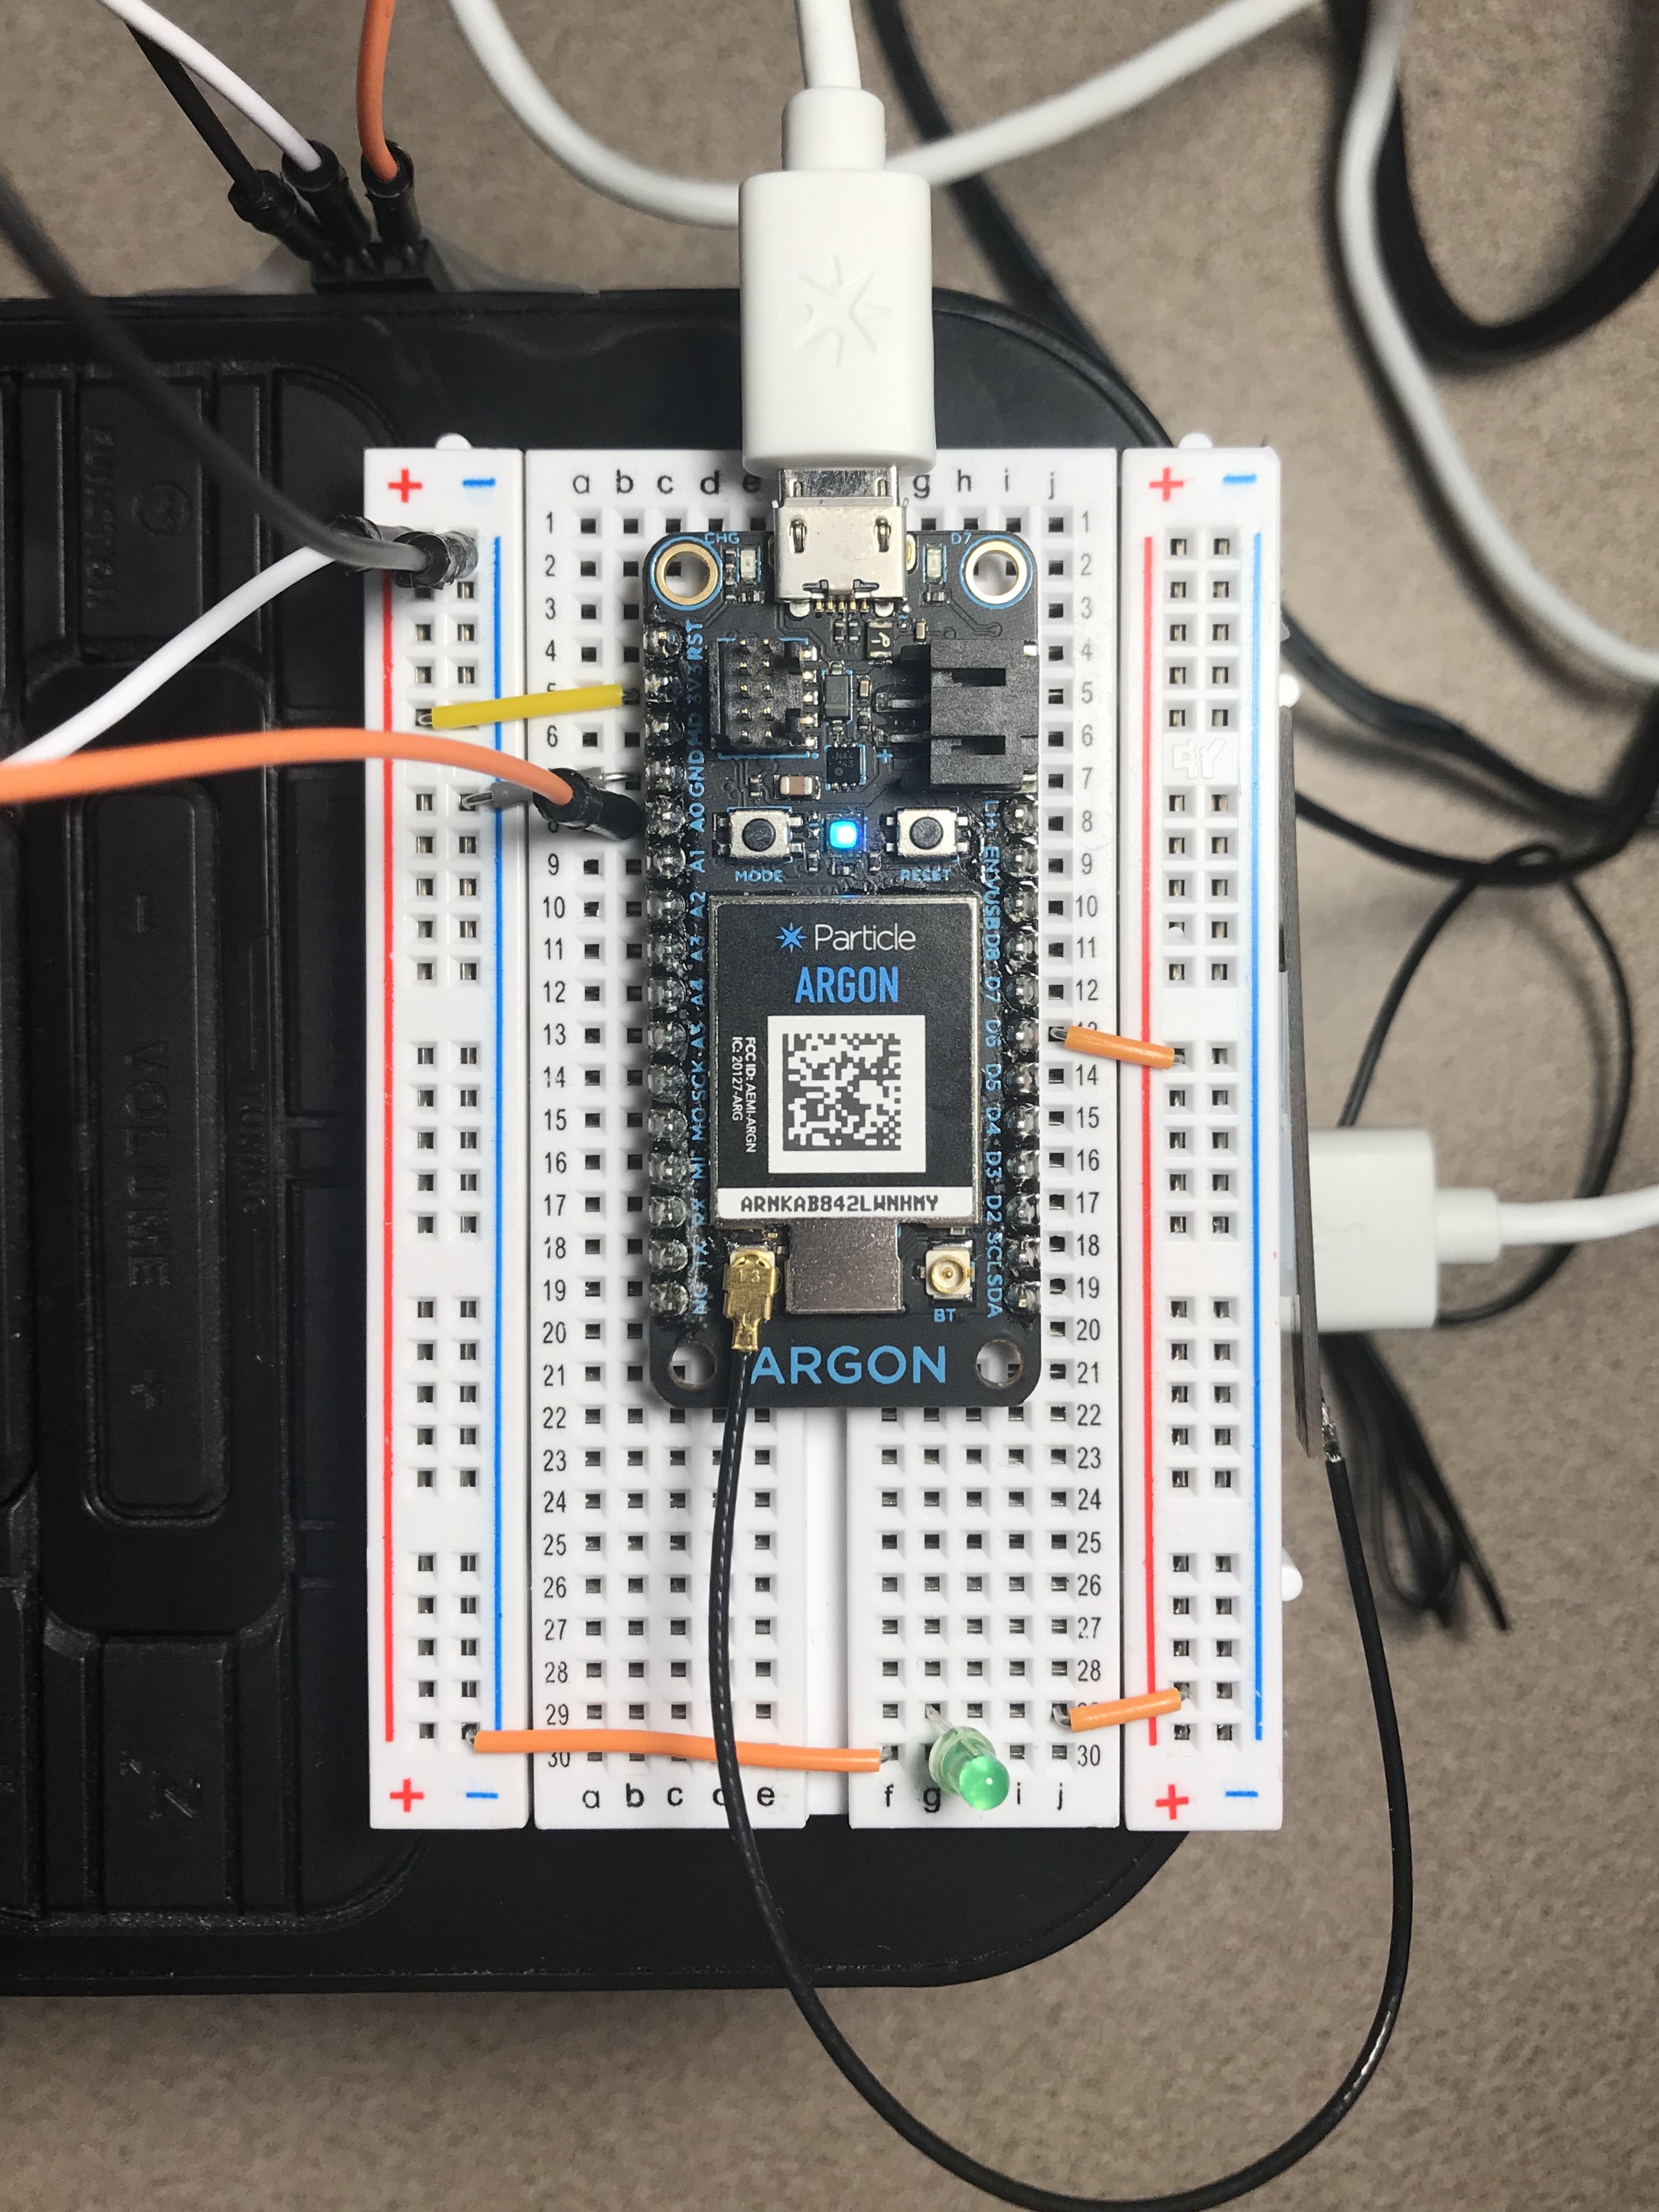
Alarm Argon Picture

Code

Button Argon

C/C++
This is the code on the Button Argon.
/////////////////////////////////////////////////////////////////////////////////////////////////////////////////////////////////////////////////////////////////

int button1Pin = D3;  // pushbutton is controlled by D1
int onboardLED = D7; //Expresses the onboard D7 LED
int firstLED = D6; //makes the big LED controled by D6
 
/////////////////////////////////////////////////////////////////////////////////////////////////////////////////////////////////////////////////////////////////

void setup()
{
  pinMode(button1Pin, INPUT); // Set up the pushbutton pins to be an input
  pinMode(onboardLED, OUTPUT); // Set up the LED pin to be an output  
  pinMode(firstLED, OUTPUT); // set up the big LED pin to be an output


Particle.subscribe("wakey_wakey_LED_group_9", wakey_wakey_9, ALL_DEVICES); //subscribes to Alarm Argon to turn LED on
// wakey_wakey_9 is the function, remotes cloud to code
} 

/////////////////////////////////////////////////////////////////////////////////

 void wakey_wakey_9 (const char *event, const char *data) {
     digitalWrite(firstLED, HIGH); // flashes LED to let you know button is live and that alarm has went off
     delay(1000);
     digitalWrite(firstLED, LOW);
     delay(1000);
     digitalWrite(firstLED, HIGH);
     delay(1000);
     }
     
//////////////////////////////////////////////////////////////////////////////////////////////////////////////////////////////////////////////////////////////////

void loop() 
{
    
    
  int button1State;  // variable to hold the pushbutton states


  // Since a pushbutton has only two states (pushed or not pushed),
  // we've run it into digital input. To read an input, we'll
  // use the digitalRead() function. This function takes one
  // parameter, the pin number, and returns either HIGH (3.3V)
  // or LOW (GND).
  button1State = digitalRead(button1Pin);


if  ((button1State == HIGH)) { //This says the button is getting the full 3.3 volts from the Argon
    digitalWrite(onboardLED, LOW);  // turn the LED off
}

  else //When the 3.3V is interupted, then the Argon will blink two times then the D7 LED and publish to the other Argons
  {
    digitalWrite(onboardLED, HIGH);// Blinks the LED when the button is pushed
    delay(200);
    digitalWrite(onboardLED,LOW);
    delay(1000); //One second delay
    
    digitalWrite(onboardLED,HIGH); //Blinks the D7 LED 2 times to give a warning it is about to publish
    delay(200);
    digitalWrite(onboardLED,LOW);
    delay(100);
    digitalWrite(onboardLED,HIGH);
    delay(200);
    digitalWrite(onboardLED,LOW);
    delay(1000); //One second delay between last flash and the other Argons receiving the signal

Particle.publish("wakey_wakey_button_group_9"); //Publishes to the subscribing Argons to complete their tasks
 
 digitalWrite(firstLED, LOW); // turns LED off in prep for next time alarm goes off
     delay(1000);

// THE END

  }
}

/////////////////////////////////////////////////////////////////////////////////////////////////////////////////////////////////////////////////////////////////

Lamp Argon

C/C++
This is the code on the Lamp Argon
//////////////////////////////////////////////////////////////////////////////////////////////////////////////////////////////////////////////////////////////////

Servo myservo; //This is the command to signify that this is for a servo motor.

int servopin = A0; //This is where the servo sensor is plugged in. Power of servo to argon 3v3 pin and ground of servo to argon GND pin.
int led1 = D7; //This is the onboard LED that we will use to show the process has been completed.
int firstLED = D6; //This is the external LED. Connect from D6 to LED to GND.

//////////////////////////////////////////////////////////////////////////////////////////////////////////////////////////////////////////////////////////////////

void setup()
{
    pinMode(firstLED, OUTPUT);

Particle.subscribe("wakey_wakey_LED_group_9", wakey_wakey_9, ALL_DEVICES); //subscribed to turn on external LED.

Particle.subscribe("wakey_wakey_button_group_9", wakey_uppy_9, ALL_DEVICES); //This is the code that will pick up 
    //the published event delivered from the other argon/particle device and run the function "wakey_uppy_9".
    
    pinMode(led1, OUTPUT); //Set the onboard LED as an output,
    
    myservo.attach(servopin); //Start the command to run the servo.
    myservo.write(30); //Set servo position to 30 degrees.
}

/////////////////////////////////////////////////////////////////////////////////

void wakey_uppy_9(const char *event, const char *data) //this is the function to run the servo code. This will occur once the argon 
//sences the published event.
{
    digitalWrite(firstLED, LOW);//Turns off external LED signaled to turn on earlier.
    
    digitalWrite(led1, HIGH); //Flash onboard LED three times to signal subsribed event recieved.  HIGH turns it on, LOW turns it off.
    delay (200);
    digitalWrite(led1, LOW);
    
    delay (100); //Delay bewteen LED flashes
    
    digitalWrite(led1, HIGH); //Second Flash
    delay (200);
    digitalWrite(led1, LOW);
    
    delay (100); //Delay bewteen LED flashes
    
    digitalWrite(led1, HIGH); //Third Flash
    delay (200);
    digitalWrite(led1, LOW);
    
    delay (100); //Delay bewteen LED flash and servo running.
    
    myservo.write(50); //Move servo to position 80 degrees
    delay (500); //delay of 500 milliseconds which is 0.5 seconds.
    
    myservo.write(30); //Move servo to position 100 degrees.
    delay (1000);

    digitalWrite(led1, HIGH); //Flash onboard LED to show completion.
    delay (200);
    digitalWrite(led1, LOW);

Particle.publish("wake_wakey_all_done_group_9");//This is the code that will tell
    //the alarm clock argon to turn off LED and stop recording time data.
}

/////////////////////////////////////////////////////////////////////////////////

 void wakey_wakey_9 (const char *event, const char *data) {
     digitalWrite(firstLED, HIGH); // flashes LED to let you know button is live and that alarm has went off
     delay(1000);
     digitalWrite(firstLED, LOW);
     delay(1000);
     digitalWrite(firstLED, HIGH);
     delay(1000);
     }
     
//////////////////////////////////////////////////////////////////////////////////////////////////////////////////////////////////////////////////////////////////

Alarm Argon

C/C++
This is the code on the Alarm Argon.
//////////////////////////////////////////////////////////////////////////////////////////////////////////////////////////////////////////////////////////////////

Servo myservo; //This is the command to signify that this is for a servo motor.

int servopin = A0; //This is where the servo sensor is plugged in. Power of servo to argon 3v3 pin and ground of servo to argon GND pin.
int led1 = D7; //This is the onboard LED that we will use to show the process has been completed.
int firstLED = D6; //This is the external LED. Connect from D6 to LED to GND.

//////////////////////////////////////////////////////////////////////////////////////////////////////////////////////////////////////////////////////////////////

void setup(){

    pinMode(led1, OUTPUT); //Set the onboard LED as an output.
    pinMode(firstLED, OUTPUT); //Set the external LED pin (D6) as an output.
    
    myservo.attach(servopin); //Start the command to run the servo.
    
Particle.subscribe("wakey_wakey_eggs_and_bakey", good_morning, ALL_DEVICES);//This is the code that will pick up
    //the published event from IFTTT and run the function "good_morning".

Particle.subscribe("wakey_wakey_button_group_9", wakey_uppy_9, ALL_DEVICES); //This is the code that will pick up 
    //the published event delivered from the other argon/particle devices and run the function "wakey_uppy_9".
    
Particle.subscribe("wake_wakey_all_done_group_9", wakey_stoppy_9, ALL_DEVICES); //This is the code that will pick up
    //the published event from the other argon/particle device and run the function "wakey_stoppy_9"
}

/////////////////////////////////////////////////////////////////////////////////

void good_morning(const char *event, const char *data)//This function is to get all the argons to begin communicating with each other.
{
    digitalWrite(firstLED, HIGH);//This LED will turn off when time stops.
    
    Particle.publish("wakey_wakey_LED_group_9"); //Publishes the event to turn on other LED's on group's argon
}

/////////////////////////////////////////////////////////////////////////////////

void wakey_uppy_9(const char *event, const char *data) //this is the function to run the servo code. This will occur once the argon 
//sences the published event.
{
    digitalWrite(led1, HIGH); //Flash onboard LED three times to signal subsribed event recieved. HIGH turns it on, LOW turns it off.
    delay (200);
    digitalWrite(led1, LOW);
    
    delay (100); //Delay bewteen LED flashes
    
    digitalWrite(led1, HIGH); //Second Flash
    delay (200);
    digitalWrite(led1, LOW);
    
    delay (100); //Delay bewteen LED flashes
    
    digitalWrite(led1, HIGH); //Third Flash
    delay (200);
    digitalWrite(led1, LOW);
    
    delay (100); //Delay bewteen LED flash and servo running.
    
    myservo.write(60); //Move servo to position 80 degrees
    delay (500); //delay of 500 milliseconds which is 0.5 seconds.
    
    myservo.write(100); //Move servo to position 100 degrees.
    delay (1000);

    digitalWrite(led1, HIGH); //Flash onboard LED to show completion.
    delay (200);
    digitalWrite(led1, LOW);
}

/////////////////////////////////////////////////////////////////////////////////

void wakey_stoppy_9(const char *event, const char *data)//This is the function to turn off the external LED & stop recording time.
//This will occur once the argon sences the published event.
{
    digitalWrite(firstLED, LOW); //Turns off external LED.
    
Particle.publish("wakey_wakey_data_data_group_9"); //Publishes timer data to google sheets.
}

//////////////////////////////////////////////////////////////////////////////////////////////////////////////////////////////////////////////////////////////////

Credits

IOT Group 9- Fall 2019

IOT Group 9- Fall 2019

1 project • 2 followers
This is the project account for MEGR 3171 IOT Group 9. The members are Bryan Sandifer, Jacob Schronce, and Josh Greene.

Comments