Maqui3000 Quichua Language word Maqui (hand). Electronics prosthesis created for amputee people with easy and cheap materials implements Arduino board one.
Short Video about the function of Maqui3000
Video of Maqui3000 Pictures about of assembly step by step
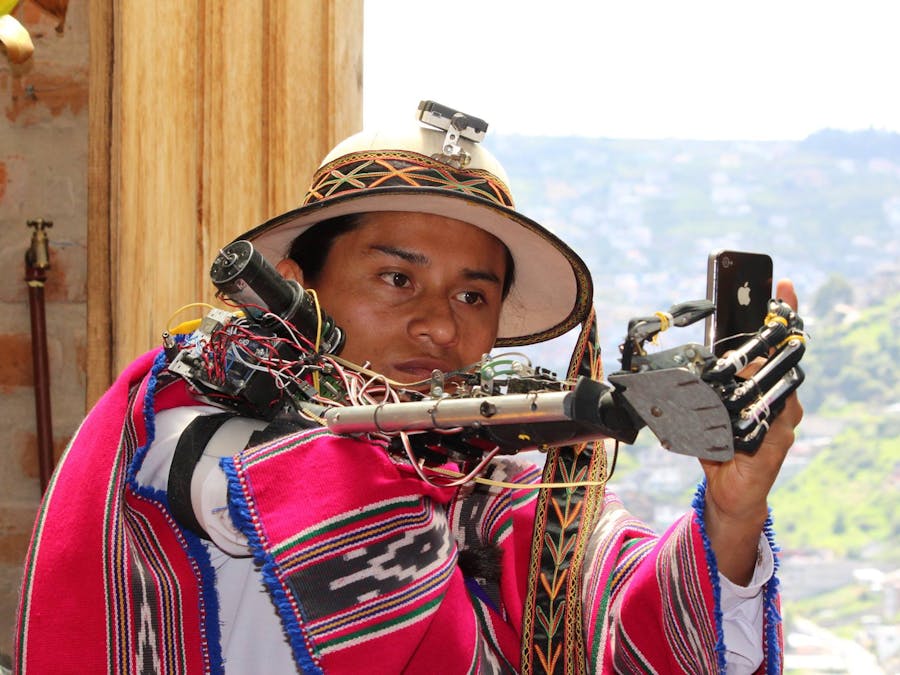
Photo: Carolina Proaño
This is a robotic prosthesis for a person with arm amputation, implements Open Source technology of Arduino, it is an electronic card that does not require payment of licenses, nor has intellectual property limitations to be used. This prototype of prosthesis is created so that a person can fulfill basic tasks, take things, lift things, say hello. Over time the design of this prototype will evolve at the level of ergonomics, and aesthetically for amputees of the arm who need this technology.
I have received unconditional support from private individuals who find me on the street and they tell me with great joy, wow inti I have seen you on television, I have read you in the newspaper, I have listened to your interview on the radio and He liked it very much These situations constitute for me a great honor that people do for me, this fills me with happiness, satisfies me as a person. I am convinced that all this is an incentive to continue contributing to society, because it is a path in which we must find balance we have to know how to resist the storms and overcome the obstacles that life brings each day. I think it is an inner and spiritual strength that leads you to convince yourself, that your knowledge, your way of seeing life is also valid before the various forms of manifestation of the world. At this point, in which the combination materializes, by manifesting an untiring struggle to show your culture, to enforce your language, to place your name among the intellectual and scientific elite representing an entire people.
Photo: Jary Lema
It is the reason why I promote my research work to fulfill a defined social role and that contribute to the lives of people. Please share this video
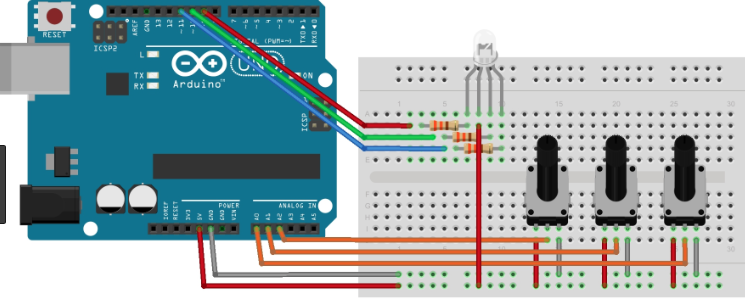
This is the entire code to Move articulation and fingers of the hand Maqui300 using potentiometers connected and servos connected too.
#include<Servo.h>ServoServodedodos;//Declaramos que queremos controlar un Servo, al cual le vamos a poner un nombre cualquieraServoServodedotres;ServoServodedocuatro;ServoServodedocinco;ServoServodedoseis;ServoServomunecauno;ServoServocodouno;intpot2=2;//El pin anlogo donde va conectado el Potencimetrointpot3=3;intpot4=4;intpot5=5;intpot6=6;intpot7=7;intpot8=8;intval2;//El valor a leer por el puerto anlogointval3;intval4;intval5;intval6;intval7;intval8;voidsetup(){Serial.begin(9600);Servodedodos.attach(2);//El pin al cual conectaremos nuestro Servo para eldedo Servodedotres.attach(3);Servodedocuatro.attach(4);Servodedocinco.attach(5);Servodedoseis.attach(6);Servomunecauno.attach(7);Servocodouno.attach(8);}voidloop(){//dedo unoval2=analogRead(pot2);//Aqu le decimos que lea el valor del potencimetro, valor el cual oscila entre 0 y 1023val2=map(val2,0,1023,0,180);//Traduce la lectura anlga (0, 1023) a grados (0, 180)Servodedodos.write(val2);//Mueve el Servo segn la lectura anlogaSerial.println(val2);//dedo dosval3=analogRead(pot3);val3=map(val3,0,1023,0,180);Servodedotres.write(val3);Serial.println(val3);//dedo tresval4=analogRead(pot4);val4=map(val4,0,1023,0,180);Servodedocuatro.write(val4);Serial.println(val4);//dedo cuatroval5=analogRead(pot5);val5=map(val5,0,1023,0,180);Servodedocinco.write(val5);Serial.println(val5);//dedo seisval6=analogRead(pot6);val6=map(val6,0,1023,0,180);Servodedoseis.write(val6);Serial.println(val6);//muneca unoval7=analogRead(pot7);val7=map(val7,0,1023,0,180);Servomunecauno.write(val7);Serial.println(val7);//codo unoval8=analogRead(pot8);val8=map(val8,0,1023,0,180);Servocodouno.write(val8);Serial.println(val8);//float niv=analogRead (A0)/4;//analogWrite (3, niv);// Serial .println (niv);delay(15);}
Code1servo1potenciometer.ino
Arduino
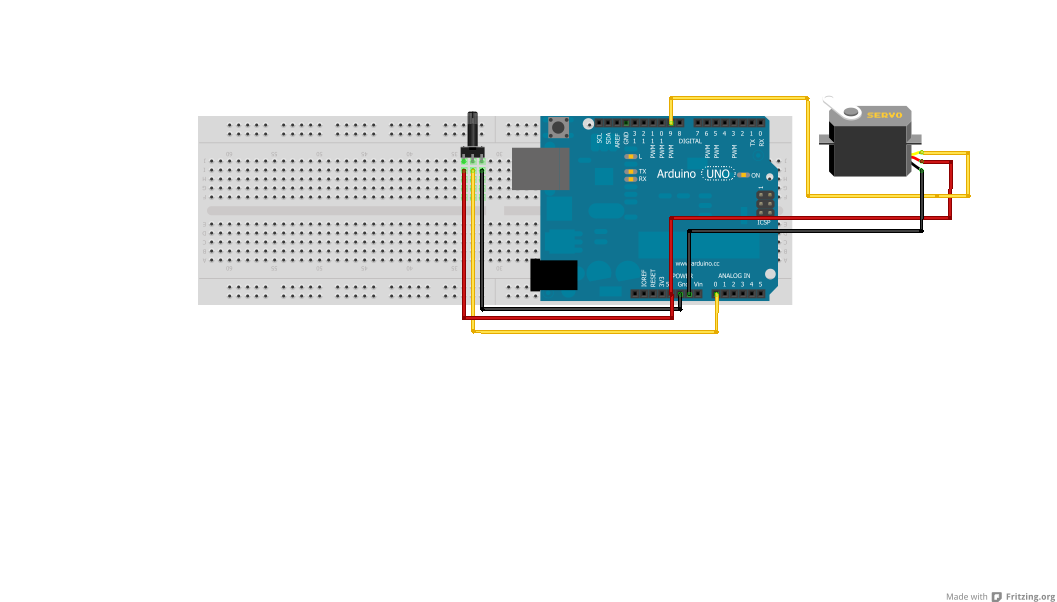
Test first with one component each time. Is a personal recommendation.
#include<Servo.h>ServoServodedo;//Declaramos que queremos controlar un Servo, al cual le vamos a poner un nombre cualquieraintpot=0;//El pin anlogo donde va conectado el Potencimetrointval;//El valor a leer por el puerto anlogovoidsetup(){Serial.begin(9600);Servodedo.attach(2);//El pin al cual conectaremos nuestro Servo para eldedo }voidloop(){val=analogRead(pot);//Aqu le decimos que lea el valor del potencimetro, valor el cual oscila entre 0 y 1023val=map(val,0,1023,0,180);//Traduce la lectura anlga (0, 1023) a grados (0, 180)Servodedo.write(val);//Mueve el Servo segn la lectura anlogaSerial.println(val);delay(15);}


_ztBMuBhMHo.jpg?auto=compress%2Cformat&w=48&h=48&fit=fill&bg=ffffff)


Comments