

So I looked at another Keyestudio robotic kit: the Smart Little Turtle Robot v2.0 kit and I'm not sure yet. After about 2.5h I had put together the kit and tried with different Arduino codes, but I had to skip some hurdles to finishing.
It started promising: a tidy box with colored instructions listing the parts and good labeling.
The pictures in the manual make it easy to identify the individual components. There is also the English language of the instructions no problem to follow, even if one of the English is not powerful. I recommend already opening the electronic manual: here you can recognize individual things even better.
In preparation, use mini nuts in the preparation. This costs nerves and time - hopefully no one falls on the ground. There is no substitute. Fortunately, the screwdriver is magnetic.
The good thing: the information in these 4 pages leads to success. It is just a little complicated formulated. Fortunately, the motors (and not the holders as shown) are labeled A and B in the same way as the board. An indication in which direction the JST connectors should be aligned would have been completely sufficient.
The adapters show upwards, downwards (page 15/17) - sometimes the sides of A and B are reversed (page 17/18). And yet they are identical engines...
Decisive, however, is the advice that I advise to carry out the wiring of page 26 of these two engines much earlier than only after the battery compartment was firmly mounted. Then, when using the AA battery compartment, there is no room left to insert the cables into the JST adapter.
The two tires fit well into the preparation of the axle: there is only one way possible.
Unfortunately, no batteries are part of the kit. However, 2 battery compartments are available, as described on page 24. One for the widely used 18650 batteries and one for AA batteries. I have decided to install the AA battery compartment and meet
Hurdle 2The pre-drilling of the bottom plate does not fit to fix the intended second screw. There are about 2-3 mm offset required.
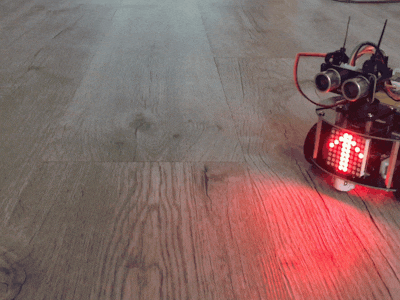
The servo rotation is to be loaded by the user at 90 degrees with the help of a code (page 36). I simply skipped that point. This motor is also used only in use with a mode so as not to drive against objects. For this purpose, an ultrasonic is mounted.
I can not answer why the good principle of JST adapters is not also used for the dot matrix (page 43). Here lurks the danger of a confusion of the I2C connection (A5 = SCL, A4 = SDA).
If you have successfully fought to page 47 and also checked the hookup of page 48 again, so are still the Bluetooth module and another plastic part unmounted in front of the user. The BLE module did not make it into the documentation until the time of printing. What the plastic part is for, does not cover me.
In my case, just missed an M3 screw with 6mm length.
are listed on page 51 ff examples of the individual components: these are presented and provided with code snippets. The user will be familiarized with the components from the beginning (downloading the Arduino IDE, as well as a sort of "Mixly" Blockly blend).
The disappointment then followedin these 2 points:
a.) the control via Bluetooth HC-06 is only possible via Android app.Although the iPhone has its own app available ("keyes BT car"), in my case the coupling via BLE did not work. The iPhone could not find a Bluetooth module even though Code Example 17 was installed. This is incomprehensible and should be corrected.
b.) the critical vulnerability, however, is the not maintained download area: the online documentation (PDF) speaks of 18 example projects. In search of these projects you get into a public Google Drive folder. Here the source code deployment ends with code 14!That may not be true: users are forced to transfer from the PDF the source code of the desired examples 15-18 into the Arduino IDE.
Since Code 18 is the crowning glory in the interaction with infrared controller, Bluetooth control with use of all components, I would have liked either the provision of the examples on Google Drive - better still in a Gitlab repository - even better pre-flashed on the Arduino clone.
It is forgivable if the user guide is not reissued with the changes in time, but the enhanced codes should be made available online to ensure an unrestricted user experience.
SumIn sum, a nice gadget to refresh the Arduino knowledge, which is complemented by Mixly - a graphical user interface. If the weaknesses are eliminated, the price of around 66 euros can be justified.
Update 10.06.2019Keyestudio has responded to the product review in a few points in the short term and so the complete source code of all 18 projects described so far is available for download!
A complete summary of illustrated instructions, including the presentation of the individual component examples can be found in the wiki for the product:
https://wiki.keyestudio.com/Ks0364_keyestudio_Smart_Little_Turtle_Robot_V2.0
If you have problems during assembly, Keyestudio will be happy to answer your questions. Please address your questions to the following e-mail, which is also stated in the wiki: Fennie@keyestudio.com
Problems can only be solved by mutual discussion. A one-sided assessment of the situation leads to no improvement. By the way, this sentence is not only valid for the Turtle Robot, but has general validity.


Comments