
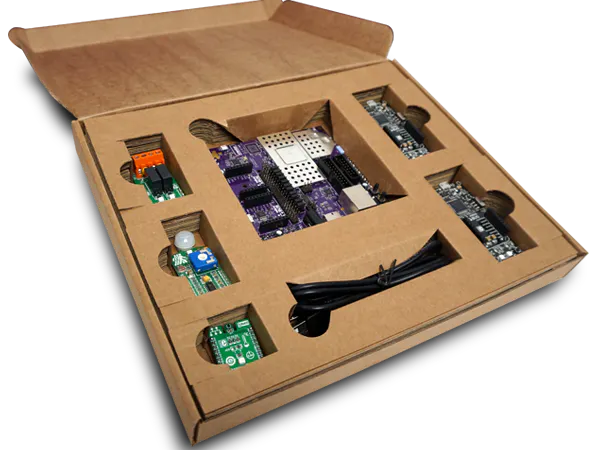
Hardware components | ||||||
 |
| × | 1 | |||
| × | 1 | ||||
 |
| × | 1 | |||
Building a secure, scalable IoT platform can be hard. This project looks at the implementation of a temperature logging solution built using the Creator IoT Framework, an open-source LWM2M + IPSO object framework for IoT.
The project walks through how to develop and deploy a third-party application that interacts with, and utilises the Creator IoT framework.
Using tools like node.js, express.js and a mongo database the project use the Creator Ci40 IoT hub and a MikroE temperature clicker as the hardware for the embedded system that captures the data. This project also looks at device management, data storage and the use of Webapps to show how to create an end-to-end IoT solution.
At it essence the Temperature Logger captures and stores temperature sensor data to the cloud via the Creator Device Server. The cloud provides a safe and secure way, to store and access data. A mobile application allows you to visualise the temperature values in real time by generating graphs from the temperature logs.
System ArchitectureIn this project you will build and implement the IoT architecture shown below. The project is divided in three main components, namely:
- Creator Ci40 temperature logger
- Hosted Web Application, that we call 'Kiwano'
- A mobile application
The Creator Ci40 reads a temperature value from the Thermo3 Click board and records the value in an Awa Resource. The Device Server can then read the value from the Creator Ci40. The Web Application then acts as the bridge, taking the temperature values from the Device Server and making them available to a database and mobile app.
Assumptions
This project assumes that you have some familiarity with the Creator Ci40 and specifically that you have an up to date Creator software image on your Creator Ci40 board. We recommend at least completing Workshop 1 - SwitchCounter from the Creator team before working through this project.
1. Install Ci40 Temperature LoggerFor this project we will use a Thermo 3 Click temperature sensor connected to a Creator Ci40 board. The focus of this project is on the webapp and mobile app side, so we will simply use a prebuilt application for Creator Ci40.
Note: Should you wish to edit and build the application code directly (not required for this project) then you can find all the source code for this application on Github here.
Download the Temperature Logger .ipk onto your Ci40 using wget by:
1.1 Install Application DependenciesThe Temperature Logger requires two OpenWrt packages: Awa LwM2M and LetMeCreate. You can install these on Creator Ci40 by running the following commands:
root@OpenWrt:/# wget http://downloads.creatordev.io/creator-workshops/temperaturelogger_1.0.0-1.ipk
Install the .ipk using opkg:
root@OpenWrt:/# opkg install temperaturelogger_1.0.0-1.ipk
Run the application:
root@OpenWrt:/# temperaturelogger
Check your Developer Console account to ensure that values are being pushed to the cloud. (If you don't already have a free developer console account please follow through workshop 1). The application is configured to record one temperature update every 10 seconds.
2. Install Webapp (Kiwano)The Webapp codenamed - Kiwano, is developed in Node.js and sits between the Creator Device Server and the Mobile App. In this project we will use Heroku(PaaS), to host the webapp. (Note it is just as easy to use other services, such as Amazon AWS or Google Cloud, we just happen to be using Heroku for this example). The application queries the Device Server for temperature sensors (AwaLWM2M clients) and their data, storing the values in a cloud MongDB Database mLab.
2.1 Project Setup- Clone the application code from the repository on Github
- In the projects directory, rename template_config.js to config.js
- Remove config.js from .gitignore
- Create a Developer Console account
- Generate a set of API Keys
- Insert the API Keys into the config.js file, located on your projects root folder
- Sign up for an mlab account
- Create a new database (select Single Node, Sandbox for the free tier)
- Add a database user (dbuser)
- Get the database URI (connection string) visible on the dashboard:
mongodb://<dbuser>:<dbpassword>@<dbuser>.mlab.com:<port>/<db_name>
- Create an Heroku account
- Enter your Heroku credentials:
$ heroku login
- Create the application on Heroku:
$ heroku create
- You will see output similar to the following image, with an App name (Purple), herokuapp.com URL (Blue/Cyan) and a heroku .git URL (Green).
- Use the Heroku app name and MongoDB URI that you retrieved earlier in the following command to link the two together:
$ heroku config:set MONGOLAB_URI=<your_db_uri> --app <your-heroku-app-name>
- Modify config.js and update HOST, with your application URL (will be used to handle subscriptions)
- On the console (within the ci40-kiwano-webapp directory) commit the changes to the repository:
 $ git add .
 $ git commit -m "First commit"
- Add your heroku repository as a remote:
$ git remote add heroku <your-heroku-.git-url>
- Deploy the application on Heroku:
$ git push heroku master
Run the temperature logging application on the Creator Ci40 board. You should now see your data being logged to the Mongo database. Check the MongoDB database dashboard to see if entries are being correctly written.
3. Mobile App - AndroidThe mobile app shows the temperature values in real time, for each temperature sensor (AwaLWM2 client) on your account. The Mobile App can show a graph of the temperature logs stored in the cloud, selecting between: 1h, 12h, 24 and full week readings.
3.1 Install the Mobile ApplicationTo install the Mobile App, go to releases page and download the .apk file. You can download the file directly onto your mobile by opening the link in a browser. When the download has finished, a notification will appear on your screen. Click it to complete the installation process.
Note: If you receive a warning when installing the App, you need permission to install 3rd party Apps through APK files on your device. To change the permission on your mobile go to: Settings > Security > Scroll down and check “Unknown sources” box > Tap ‘OK” when it shows the warning.
3.2 Initial ConfigurationNow you need to configure the Mobile App to access your instance of the Webapp that is hosted on the cloud (Heroku). For this: click on the top right menu (3 dots) > settings. The following image shows the Web App Creditials.
HOST: Is the URL, of your Webapp instance running in the cloud. For example:
Secret: The Mobile App encodes a secret used as a token. This secret is shared with the Webapp. For the default type: secret.
3.3 Final ResultThe next image shows the final result. We can see two connected temperature sensors and the history graph from the "office-temperature" sensor.
If you have any issues installing or utilising this project, please drop a comment here or alternatively there is a support forum for the Creator Ci40 board which has many great hints and hits that can be found here Creator Forum.


Comments