
Hardware components | ||||||
 |
| × | 1 | |||
 |
| × | 1 | |||
 |
| × | 1 | |||
| × | 1 | ||||
 |
| × | 1 | |||
 |
| × | 1 | |||
Software apps and online services | ||||||
 |
| |||||
| ||||||
 |
| |||||
Hand tools and fabrication machines | ||||||
 |
| |||||
 |
| |||||
 |
| |||||
A smart iot outlet controlled by Google assistant, telegram, button widget, blynk app etc. An easy way to automate your home
This project can be divided into 3 parts
1 Controlling a light through blynk app2 Connecting blynk with ifttt3 Making the extension codeControlling light through blynkStep 1 - Install blynk app from play store
Step 2-Click on new project
After that click on create, a dialog box like this will appear
Click ok, this token is needed later on this project
Step 3-Click on the add button
Step4- Add 3 buttons
Step 5-Give the button a name, chose whether it is push or switch like button and set the digital pins
Selct the pin D1 for switch 1,D2 for switch 2,D3 for switch 3 respectively
So the blynk app settings are completed
Step 5-uploading the code into nodemcu
Connecting blynk with iftttStep 1-Download and login into ifttt
Step 2-Click on my applets
Step 3-click + button to create new applet
step 5- Click on "this" button
Step 5-Search for Google assistant and select it
Step 6 -Select "Say a simple phrase option"
Step 7-Fill in the blanks ,with what i exactly filled up,its your choice
after that click on create a tigger button
A new window like this will open
Click on that button
Search for webhooks and select it
A window like this will open up,select make a web request
- In URL enter
http://cloud.blynk.cc:8080/XXXX your TOKEN XXXX/update/zzz Forindian users replace cloud.blynk.cc:8080 with this ip address 188.166.206.43- and replace
XXXX your TOKEN XXXXwith your actual token andZZZwith the PIN number , for Digital PIN use DX like D1, D5 etc. and for Virtual PIN use VX like V1 ,V5 etc. - in Method select
PUTto WRITE a value to that PIN. - in Content Type select
application-json. - in body write
["0]to make the PIN High or["1"]to set the PIN Low
click on create action button
click on finish button ,now the applet creation process is completed
Now make a applet for turning off light by following the exactly same steps mentione above ,but make the necessary changes as given belowReplace turn on liight with turn off light
Replace ["0"] with ["1"]
Now applet for switching off the light is completed
Now the software part is completed lets move onto the hardware partMAKING THE EXTENSION CODEExtension code design is upto you ,you can buy ball the necessary parts from nearby electrical shop http://www.edisonelectricals.com/
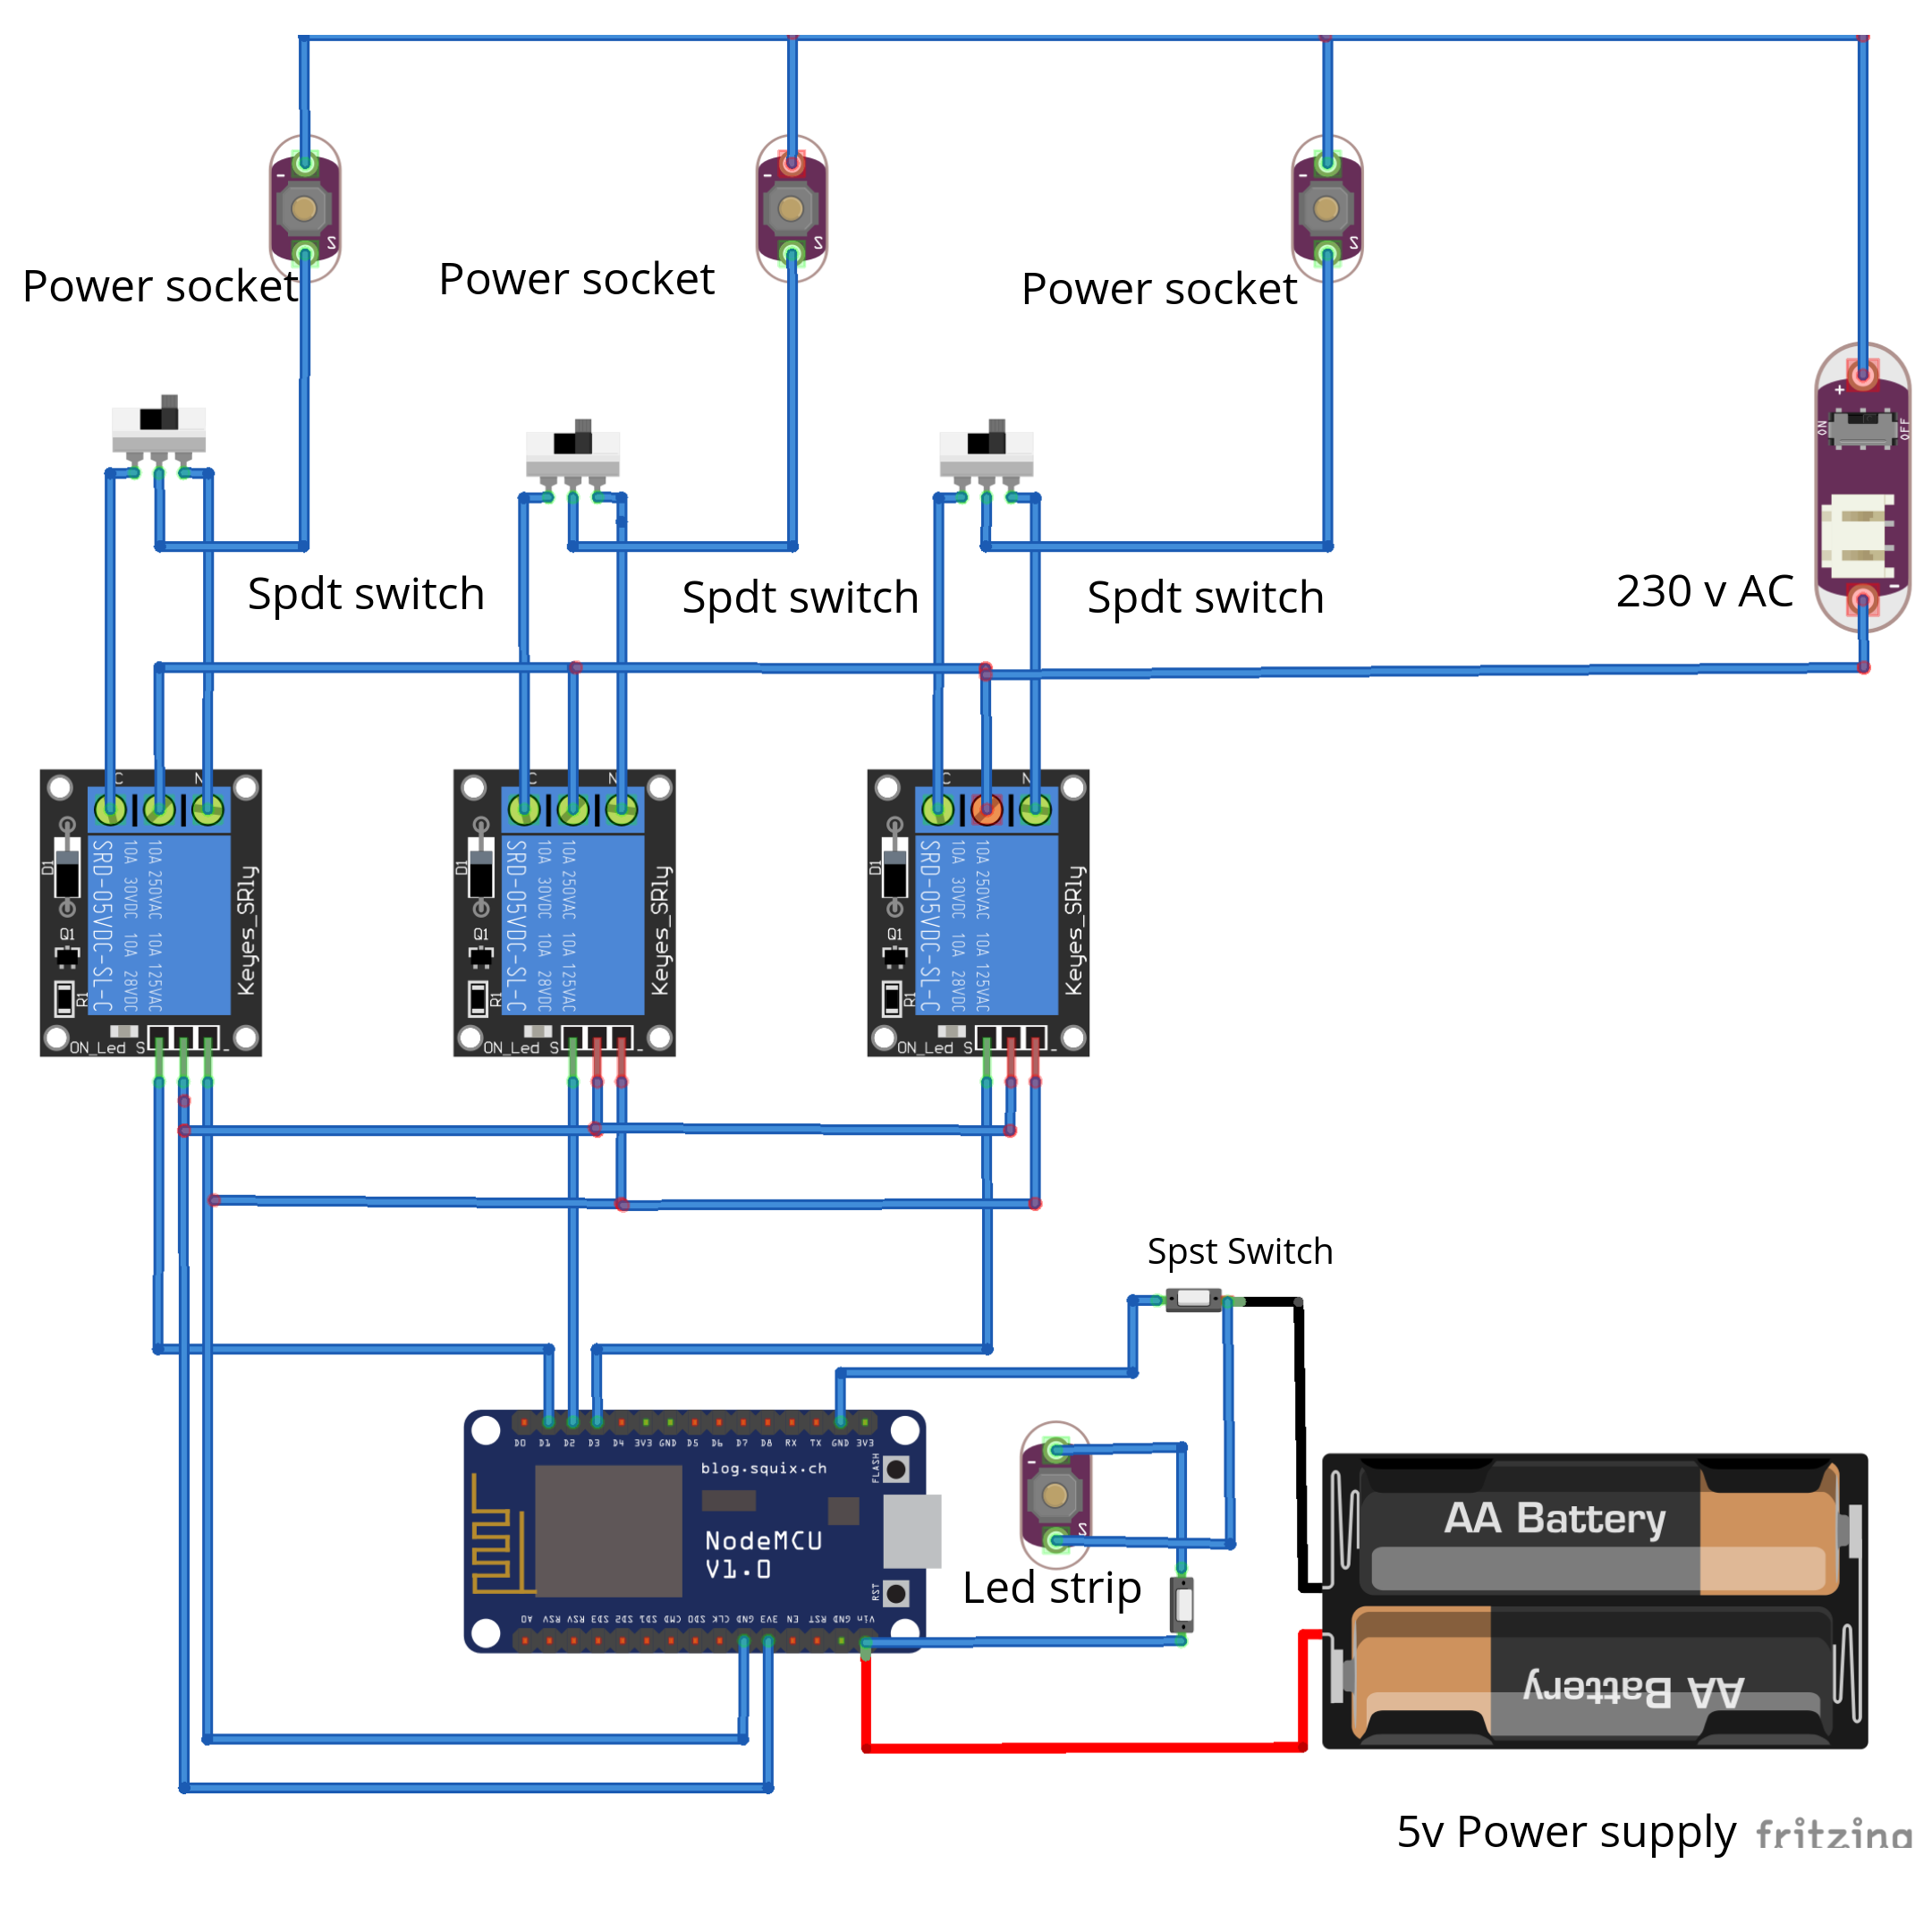
Necessary items
3 SPDT Electrical switch
Extension box
Led strips
2 SPST switch
3 channel relay module
nodemcu
Schematics
Working video


Comments