

Hardware components | ||||||
_ztBMuBhMHo.jpg?auto=compress%2Cformat&w=48&h=48&fit=fill&bg=ffffff) |
| × | 1 | |||
| × | 1 | ||||
| × | 1 | ||||
 |
| × | 1 | |||
 |
| × | 1 | |||
 |
| × | 1 | |||
 |
| × | 1 | |||
 |
| × | 1 | |||
 |
| × | 1 | |||
Software apps and online services | ||||||
 |
| |||||
| ||||||
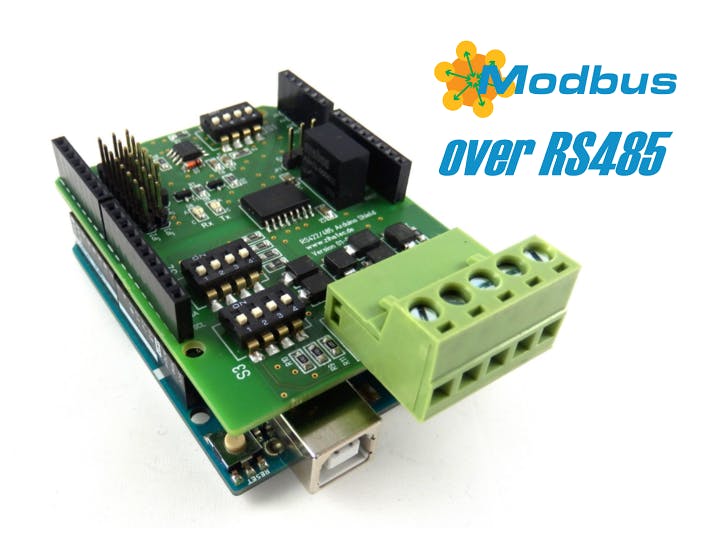
Modbus, a serial communication standard, has become a de facto standard communication protocol and is now a commonly available means of connecting industrial electronic devices. In Modbus RTU and Modbus ASCII, RS485 is used as the physical layer. It's possible to use an Arduino as slave (and with some restrictions also as master) in Modbus applications, but a RS485 interface is needed. Our RS422 / RS485 Shield is a fully galvanic isolated serial communication shield designed for use with the Arduino UNO and other compatible boards like Arduino 101, STM Nucleo... This shield the perfect choice for such kind of applications.
The objective of this document is to show how to create together with an Arduino UNO a simple Modbus slave device. We will use a PC as Modbus master.
Tools & Materials
- Arduino UNO
- Any RS485-USB-Adapter for PC connection (or a cheaper one)
Optional:
- Breadboard
- Push button
- Red LED
- 220 Ohm Resistor
- 10k Resistor
- Jumper wires
Software
- Arduino IDE
The wiring is very simple. You have to connect only the A and B terminals of the shield with the A and B line of the Modbus system. Y and Z terminals are not used for this kind of application. For long distances it is recommend to use twisted pairs for A and B.
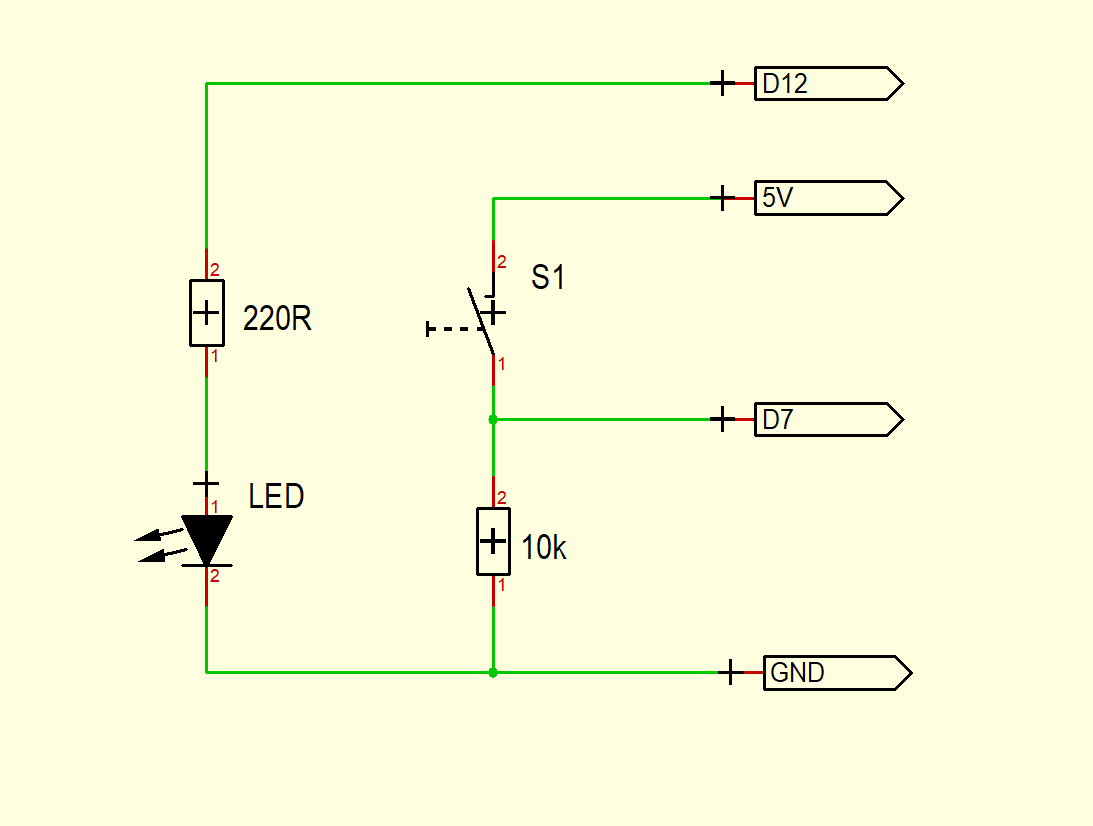
Wiring Arduino (Optional):It's recommend to add a LED and a button to the Arduino to see some effects of the Modbus communication. It's optional and not necessary needed.
The RS422/RS485 Shield comes with 3 DIP switch banks. You have to set these DIP switches for Modbus as shown in the picture below.
Switch 1:1-OFF 2-ON 3-ON 4-OFF
Switch 2: 1-OFF 2-OFF 3-ON 4-ON
Switch 3: 1-OFF or ON* 2-OFF 3-OFF 4-OFF
*Depending of the position of the RS422/RS485 Shield in the Modbus line you have to switch the terminating resistor ON or OFF. Please switch the resistor to ON position only if the Shield is on one end of the bus line. In all other cases switch the terminating resistor OFF:
You can find 3 different jumper areas on the shield. Very important is the Jumper JP1 for the power supply voltage. The Arduino UNO works with 5V internally. You have to set this Jumper to the 5V position (for 3.3V boards for example Arduino 101 to the 3.3V position).
Furthermore set the jumpers for the communication ports in the upper left corner as in the picture above. The internal UART on port 0 and 1 will be connected in this case to the RS485 interface of the shield.
Last but not least we have to set Jumper for the RX/TX control port.We don't use this Jumper, because the automatic RX/TX switching is configured.
We will use in this example the PC as Modbus master. You've to download Modbustester. Please unpack the zip archive to a new directory on your harddisk. Open the software and change the marked fields as in the picture below. You have to connect the USB-RS485-adaptor bevore- Please choose the right COM-port for this adaptor in Modbustester.
Please load the firmware into the Arduino IDE for compiling and programming.
Test Your Work:Now its time to test your work!
You can press the Read button in Modbustester. This command will read 8 bytes of the memory of our new slave device. In address 400008 you can find the status of the button. The address 400001 - 400006 contains values of the ADC ports.
With the write button you can manipulate registers in the slave. You can enter in address 400007 a 0 or 1 to switch the LED ON or OFF.


_3u05Tpwasz.png?auto=compress%2Cformat&w=40&h=40&fit=fillmax&bg=fff&dpr=2)
Comments