

This CyBalls project was motivated by a yearly activity of our company, inviting employee’s children to our office and doing some age-appropriate handcraft, while I am always offering a soldering course to children of 10+ years. In the past we did solder basic electronic kits like blinking LEDs, e.g. Christmas Tree PCBs, etc, bought from electronic shops.
As our children became obviously older and most have already build up some soldering experience in the last years, this time I liked to do a little bit more exciting exercise, little bit more complex project, and last but not least something, that allows us to go forward into direction of software programming maybe in some future kid’s events.
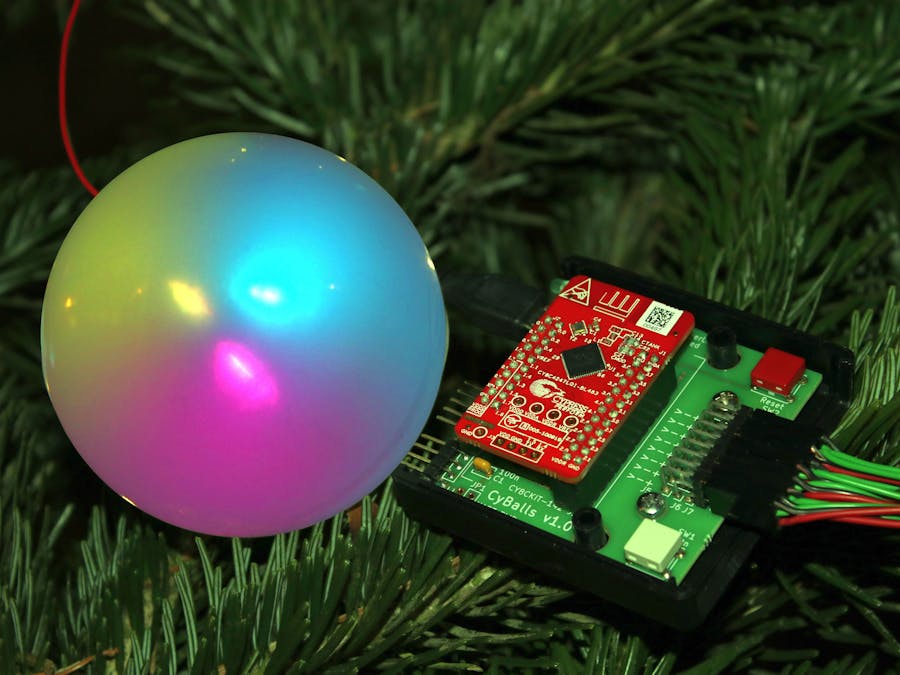
Transparent (preferred opal) plastic balls can be found generally in craft shops. The idea is to put six LEDs inside for 360° illumination. Using a microcontroller allows some effects like fading or color change and rotation.
MechanicsMost critical problem was to find out how to realize the RGB illumination in the center of the transparent plastic ball. Finally, I decided to 3D-print a cube exactly matching the sizes of WS2812B LED stripes (60LEDs/m), meaning 1.67cm x 1.67cm x 1.67cm. As still the weight of that construct was very light I put a metal ball (d=15mm) inside so that the LED-cube at the end as more or less centered.
Note, both LED stripes need to be electrically connected. One isolated wire must be soldered from the Dout of the first stripe to the Din> of the second stripe. Further, both GND and both +5V pads must be connected by wires, too. Be careful not to shortcut GND and +5V!
Finally put the LED cube into the transparent, preferred opal, plastic ball.
As already mentioned the electronics especially the current software can drive up to eight balls. Go ahead... making more balls now!
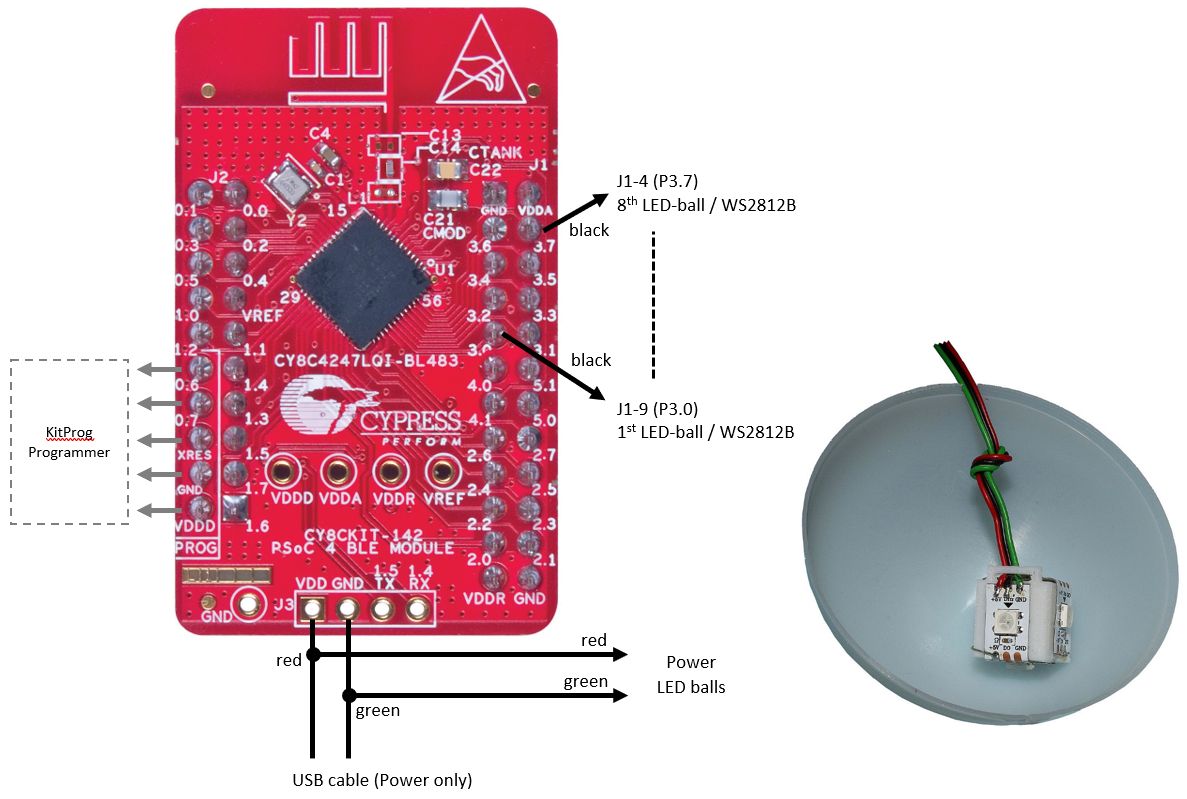
ElectronicsCypress' CY8CKIT-142 PSoC 4 BLE Module is the heart of the project. The PSoC offers a lot of on-chip peripherals, suitable for this project:
- GPIOs and UDBs (Universal Digital Blocks) for driving WS2812 Neopixel LEDs
- Bluetooth Low Energy (BLE), e.g. remote control by smart phone
- Timer, e.g. to generate the color sequences
- ADC, CapSense, PWM, etc. are not used (yet)
So, the project's block-diagram looks straightforward
and that makes the complete setup straightforward as well:
You can easily hand-wire the power and 3-wire connections to each ball.
As this project was intended to run during a kid's event I developed some simple PCB, but that's not mandatory for the project but was good to give some more solder experience to the children. Just for reference find the PCB here:
Be not confused, the buttons (Reset, User) are not used by the projects, but maybe the PCB will be used for further projects.
SoftwareAs usual for Cypress PSoC4 microcontroller the software is developed by using PSoC Creator. Sorry, I will/cannot give a complete course here. So please feel to contact me in case you have dedicated question especially when you are not familiar with that Cypress IDE.
The full project is attached, and details are given below in the section 'Developers and Experts'
Run & TestHardware only
After you have programmed the CY8CKIT-142 (e.g. using the CY8CKIT-042-BLE base board, or a separate Cypress KitProg or MiniProg programmer) depending on the chosen output (P3.0 to P3.7) the light cube will show different colors and/or effects. Note: Switch power off (remove USB cable) before connecting the light ball to another output!
Smartphone App
Unfortunately, no dedicated smartphone App is yet available. Are you willing in to do develop one?
In between, the App ‘CySmart’ (Android, Apple) by Cypress can be used to control the CyBalls, too.
When starting, select CyBalls from the list of visible BLE devices, and available services are shown. The RGB service allows to change statically the color of all connected CyBalls. The brightness can be changed, too.
Instead of connecting the light ball to a dedicated output (as described before), CySmart can select which output shall be visible on all output channels:
Select ‘Unknown Service’, confirm the hint, and again select ‘Unknown Service’.
Entering a HEX value from ‘1’ to ‘8’ to that characteristic with the UUID [0003CBB8-0000-1000-8000-00805F9B0131] will output the dedicated color scheme to all hardware outputs. E.g. the output color scheme normally visible at output #3 can be routed to all eight outputs.
Entering ‘0’ will disable this function, and the original color scheme is visible on each dedicated hardware output.
Enjoy your CyBalls with the given color illumination effects.
In case you like to program your own light program continue reading... (Again, you might need some basic understanding of Cypress PSoC4 and PSoC Creator. If you do not know such devices yet, please check the training material at www.cypress.com first.)
For Developers and ExpertsExpecting you know the basics about PSoC4 and PSoC Creator just the major topics will be mentioned here to lead you to modify project mainly with focus on changing the illumination program of each CyBall.
Start PSoC Creator 4.2 or newer and open the workspace CyBalls.cywrk.
Two projects and one library are included:
- BLE_OTA_FixedStack_BootloadableThis is the main CyBalls application. Herein you find the CyBall0/1/2/3/4/5/6/7.c files. Each describe a state machine where you can modify and add new states as it will be described below.
- BLE_OTA_FixedStack_BootloaderThis project allows to update your firmware via Bluetooth. See section 'Firmware update by BLE OTA (Over-the-Air)' below. You only need to touch this project if you like to change BLE settings, e.g. changing the BLE device.
For details on the used bootloader see Cypress' application note BLE_OTA_FixedStack_Bootloadable.pdf and AN97060.
- WS281xLib.cylibThanks to Marc, this great library for PSoC4 and PSoC5 can be found on bottom of page https://www.ihastings.com/ws2812-leds/. It makes driving the intelligent WS2812/Neopixel by PSoC microcontroller very easy. You do not have to touch the library. It works perfect as is.
Within CyBalls#.c a state machine runs the desired illumination and some special functions and variables are needed to define your own flow:
- SetCubeTargetColor(BALL, 0xFF, 0x00, 0x00);Define the next color (R, G, B) to be shown on whole cube.The given example will change to red.
- SetCubeTargetColor3(BALL, 0xFF, 0x00, 0x00, 0x00, 0xFF, 0x00, 0x00, 0x00, 0xFF);Define the next color to be shown per 2 sides (0/5, 1/2 and 3/4) on the cube.The given example will show red on side 0/5, green on 1/2, and blue on 3/4.
- u8LedMode[BALL] = Mode_Col2Col6Init;The new mode Mode_Col2Col6Init will initiate to change the color to the given values (see SetCubeTargetColor/SetCubeTargetColor6 above)
- u8LedMode[BALL] = Mode_DiscoRotateInit;The new mode Mode_DiscoRotateInit will swap/turn the colors from one side to another
- i32LedDiscoLoop[BALL] = 30;This value defines the number of side transitions to be initiated by Mode_DiscoRotateInit. Additionally, the sign defines the direction.
- i32LedTimeChange[BALL] = LEDTIME(3000);Used by mode Mode_Col2Col6Init it defines the time in ms to reach the new target. The given example will change the color within 3000ms to the new target.Used by mode Mode_DiscoRotateInit it defines the time in ms to turn colors to next side. The given example will exchange the side color within 3000ms. The complete time depends on i32LedDiscoLoop. Total Time [ms] = i32LedDiscoLoop X i32LedTimeChange.
- HOLD(1000);If you like to freeze the current illumination station, just define the time in ms.
- WAITMODEThis mode waits until the previous given command/mode has finished.
After building 'BLE_OTA_FixedStack_Bootloadable' use a Cypress KitProg or MiniProg programmer to program the CY8CKIT-142.Alternatively, the firmware can be updated via Bluetooth LE (see below).
Firmware update by BLE OTA (Over-the-Air)The 'BLE_OTA_FixedStack_Bootloadable' includes already the 'BLE_OTA_FixedStack_Bootloader' (See Cypress' application note BLE_OTA_FixedStack_Bootloadable.pdf and AN97060). This means - if once the project has been programmed by KitProg/MiniProg then new updates can be done by using a BLE dongle.
In order to start the bootloader, again the CySmart App has to be used, but this time the value 0x99 (instead of 0 to 8) has to be written to the mentioned characteristic UUID [0003CBB8-0000-1000-8000-00805F9B0131].
All LEDs will change to blue, demonstrating that the bootloader has been started.Disconnect BLE and quit the CySmart App on your phone.
Enter the BLE dongle to your PC and start the CySmart app on your PC.
Click [ Start Scan ] to search the CyBalls device.
[ Stop Scan ] and click on the CyBalls device to select it.
Click [ Update Firmware ]
Select the new firmware image (*.cyacd), what is located in your project folder BLE_OTA_FixedStack_Bootloadable.cydsn\CortexM0\ARM_GCC_541\Debug\BLE_OTA_FixedStack_Bootloadable.cyacd
and click the [ Update ] button.
Observe the green progress bar.
The new application image will be started automatically. Enjoy!
Well, I know this was a very rough introduction to Cypress OTA Firmware update. Normally this should work straight forward as described here. If you run into trouble or like to understand details, then please have a look the mentioned application note mentioned above on the Cypress website.
The EndWell - that's it!
Of course, Christmas is over, but the illumination CyBalls can surely be used for your next party, too... just modify the illumination effect program for different occasions.
Reproduce by yourself and Enjoy!
Regards, Holger


Comments