hevangel
Published © MIT

Traffic Lights

A simple traffic on prototype PCB board with an Arduino Nano.

BeginnerFull instructions provided1 hour1,069
Traffic Lights

Things used in this project

Hardware components

Arduino Nano R3
Arduino Nano R3
×1
Prototype Pcb
×1
Resistor 220 ohm
Resistor 220 ohm
×3
LED (generic)
LED (generic)
×3
female single row pin header strip
×2

Software apps and online services

Arduino IDE
Arduino IDE

Hand tools and fabrication machines

Soldering iron (generic)

Story

Read more

Schematics

Traffic light

Circuit diagram created with TinkerCAD Circuit. It does not have an Arduino Nano icon, so I use a Uno instead

Code

Traffic light

Arduino
Traffic light for Arduino Nano.
Press each button to toggle one of the LED.
Continuous pressing the button will blink the LED
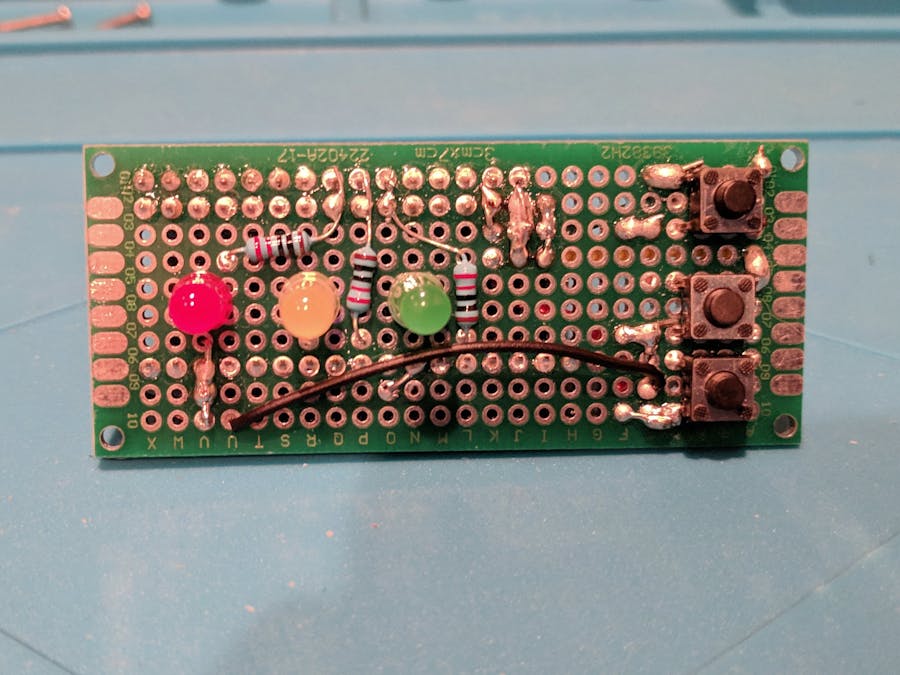
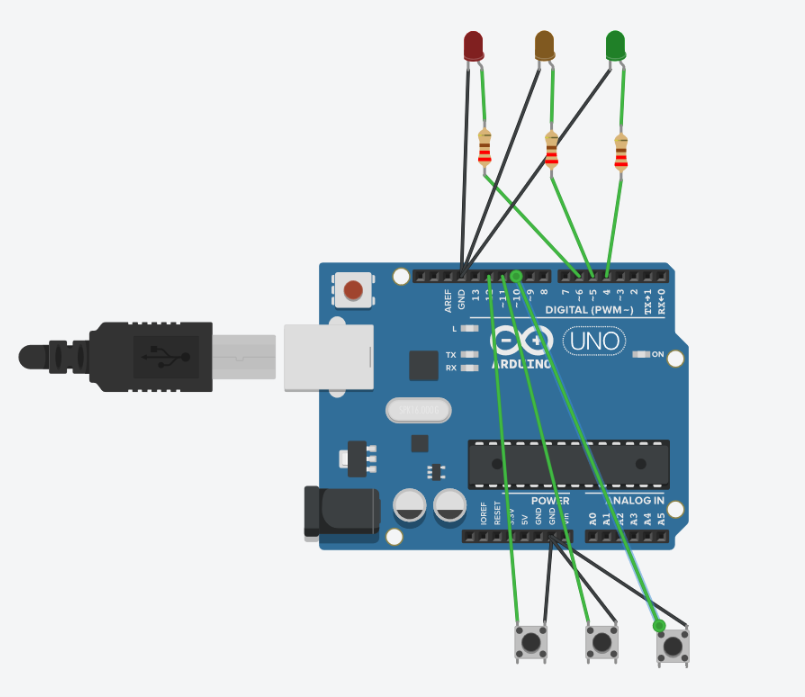
// traffic light LED

const int led[3] = {4, 5, 6};
const int button[3] = {10, 12, 11};

int state[3] = {0, 0, 0};
int button_on[3] = {0, 0, 0};
long last_time[3] = {0, 0, 0};
long cur_time[3] = {0, 0, 0};
long debounce_delay = 500;


void setup() {
  for (int i = 0; i < 3; i++) {
    pinMode(led[i], OUTPUT);
  }
  for (int i = 0; i < 3; i++) {
    pinMode(button[i], INPUT_PULLUP);
  }
}

void loop() {
  for (int i = 0; i < 3; i++) {
    digitalWrite(led[i], state[i]);
    button_on[i] = (digitalRead(button[i]) == LOW);
    cur_time[i] = millis();
    if (cur_time[i] - last_time[i] > debounce_delay) {
      if (button_on[i]) {
        state[i] = 1 - state[i];
        last_time[i] = cur_time[i];    
      }
    };
  };    
}
  

Credits

hevangel
2 projects • 0 followers
Trying to learn anything from hardware to software

Comments