

Hardware components | ||||||
| × | 1 | ||||
 |
| × | 1 | |||
| × | 3 | ||||
| × | 1 | ||||
| × | 4 | ||||
Software apps and online services | ||||||
| ||||||
| ||||||
How interesting if we can control Arduino using some GUI controls (for example Buttons) or represent the sensor results to the screen in graph or slider or text-box or knobs. It would be very nice. Isn't it?
If you have basic idea of Arduino programming then you are totally ready to go. If you don't have, still not a big issue. It is very simple.
In this project you will learn how to create nice GUI to control Arduino and at the end i am sure you will be able to create your own GUIs and i hope you will love it.
RequirementsAs you want to control Arduino, Arduino IDE is first need. And to create GUI all you need is Processing IDE (or you can call it Processing sketchbook). Now let's see what is Processing in short?
What is Processing?
Processing is a flexible software sketchbook and a language for learning how to code within the context of the visual arts. Processing is very useful platform for hobbyists, researchers, students for learning and prototyping. Some of the features are:
- Free and open source
- For all platforms (GNU/Linux, Mac OS X, Windows, Android, and ARM)
- Well documented
- Many libraries
- Good community
Arduino IDE
To download Arduino IDE go here : Arduino IDE Download page
Processing IDE
To download Processing go here: Processing Download page
Running Processing
When you click on download Processing, it downloads one zip file. Unzip that file and inside the unzipped folder you will find Processing application (see the following image). And to run Processing, double click on that icon.
There are many libraries for different applications. You can also install some extra libraries manually or directly from the menu.
To install new library from menu, go to: Sketch -> Import Library... -> Add Library...
But at the moment we are interested only in GUI design. And there is a very nice library called ControlP5 is available to create our project. controlP5 is a library written by Andreas Schlegel for the programming environment Processing. To add ControlP5 library to Processing just follow the add library process and search for ControlP5 and then click on install. Now you are ready to create your GUI application.
Once you have installed ControlP5, start with creating simple window. See the video down below to get basic idea how to create window and add buttons to the window.
Next step is to write a Arduino sketch. Write a code in such a way that when Arduino receives any character over serial port, it performs some particular task. For example
   if(val == 'r'){           //if r received
     digitalWrite(11, HIGH); //turn on pin 11 (red led in our case)
     }
So when Arduino receives char 'r', it sets pin 11 to High. Please check the codes in code section below to get exact idea.
Now comes the Processing part. There is a Serial library in the Processing and we can use that to read and write to the serial port. So what we do now is we assign a function to each of the buttons to send some character to serial port, so when you press any button, it send particular char to the serial port. For example suppose we have a button called red, when you press button red it sends char 'r' to the serial port.
void red(){
 port.write('r');
}
At the other end, Arduino receives that char 'r' and according to the received char it changes state of the pins.
Please check the code, so you can get exact idea how to add buttons and assign functions to the buttons.
Code is in the Code section. There you will find code for both, Arduino and Processing. First compile and upload the Arduino sketch to the arduino and then run Processing sketch.
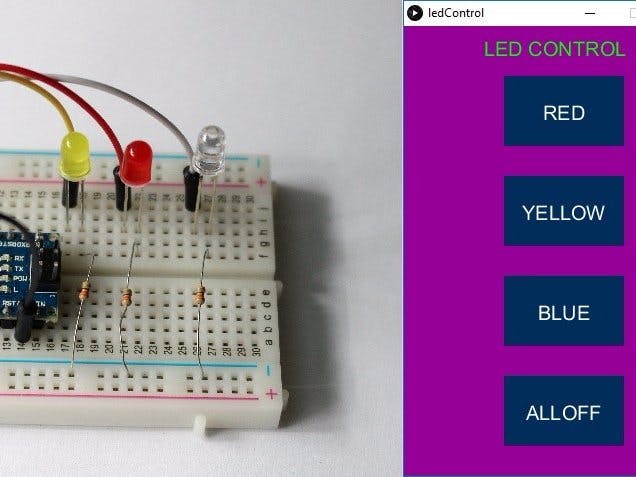
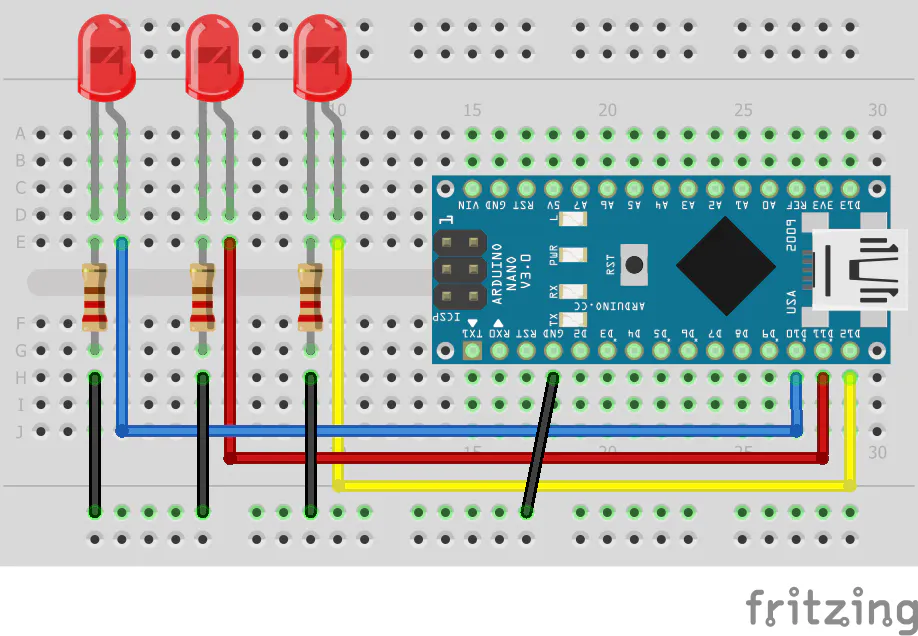
Components and CircuitProcessing window will be look like following if you use code provided below.
Summery of the project is in the following video.
I hope you liked this project and learned something new. Feel free to ask if you have any questions.
Thank


Comments