


In the following tutorial, we will demonstrate how to use the DOT-NET-COMS-LIB library to connect and interact with Hexabitz modules using web technology with ASP.NET core web framework.
Note: FixedTopology must be assigned to the modules before we can connect the software to them,in this project, we have the main steps configuring them in the appropriate way.
There are a few steps to set up the hardware before we can start:
1. 3D print your project case, The 3D file are available at Thingiverse.
2. Assemble your array.
3. Make a fixed topology for your project array (Wiki).
4. Load firmware on the modules (Wiki).
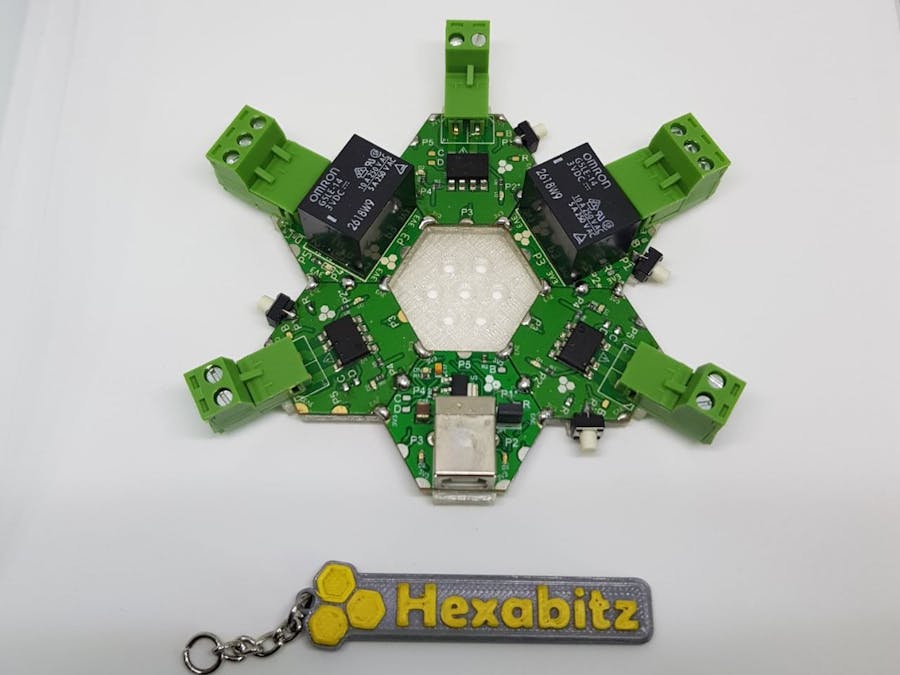
We have the Hexabitz modules soldiered in this shape:
as we can see in the bottom the USB module and 5 relays connected together forming a circle, after that it been concealed in a plastic case you can see the 3d files here at Thingiverse.
Were the relays output still visible to connect devices to them.
In this project, we are using the serial port connection to connect the application with the USB module but in the future, we will add the network connectivity as it will be the main way to interact with Hexabitz modules on a bigger scale.
Let's start with how to build the main web application which is built using Visual Studio IDE from Microsoft.
we are going to create a new web application:
after that, we are going to use the NuGet packages manager from solution to add the System.IO.Ports package from Microsoft to import the necessary libraries to let the web application communicate with the computer serial port (USB):
we created the web application and added the required code in the attached repo, and here is the main web application interface:
Where it's constructed from two main sections.
The connection option section.
- The connection option section.
Where we select the connection configurations like the COM, Baud Rate, and Source and Destination IDs for the modules.
Connect and disconnect buttons and connection status labels.
- The relays control section
here we can select the count of the relays and assign the room for them we can save and load the configurations for the rooms using the local storage in the web browser (cookies) we can turn on or off each relay or all of them together using the broadcast message code
Here is a demo video showing the web relay hub controlling 1 light and 2 leds representing connected devices.


Comments