


Hardware components | ||||||
_ztBMuBhMHo.jpg?auto=compress%2Cformat&w=48&h=48&fit=fill&bg=ffffff) |
| × | 1 | |||
 |
| × | 1 | |||
| × | 1 | ||||
| × | 1 | ||||
Software apps and online services | ||||||
 |
| |||||
Hand tools and fabrication machines | ||||||
 |
| |||||
This project is related to basic steps in robotics world. You will learn to assemble a 4WD robotic car kit, placing hardware on it and controlling it with a wireless PS2 remote.
Car Chassis and AssemblingYou can use any robotic car chassis for this project, only you need to make a lil changing in hardware and program according to your chassis. I'm using a 4WD Robotic Car Kitfor this project.
Check the attached video to learn assembling.
Components- Arduino UNO
- L298N Motor Driver
- PS2 Wireless Remote and Receiver
- 18650 Rechargeable 3.7 V Cellsx 2
- Battery/Cell Holder
- Jumper Wires
For Battery Charging/Protection Purpose you may add extra components
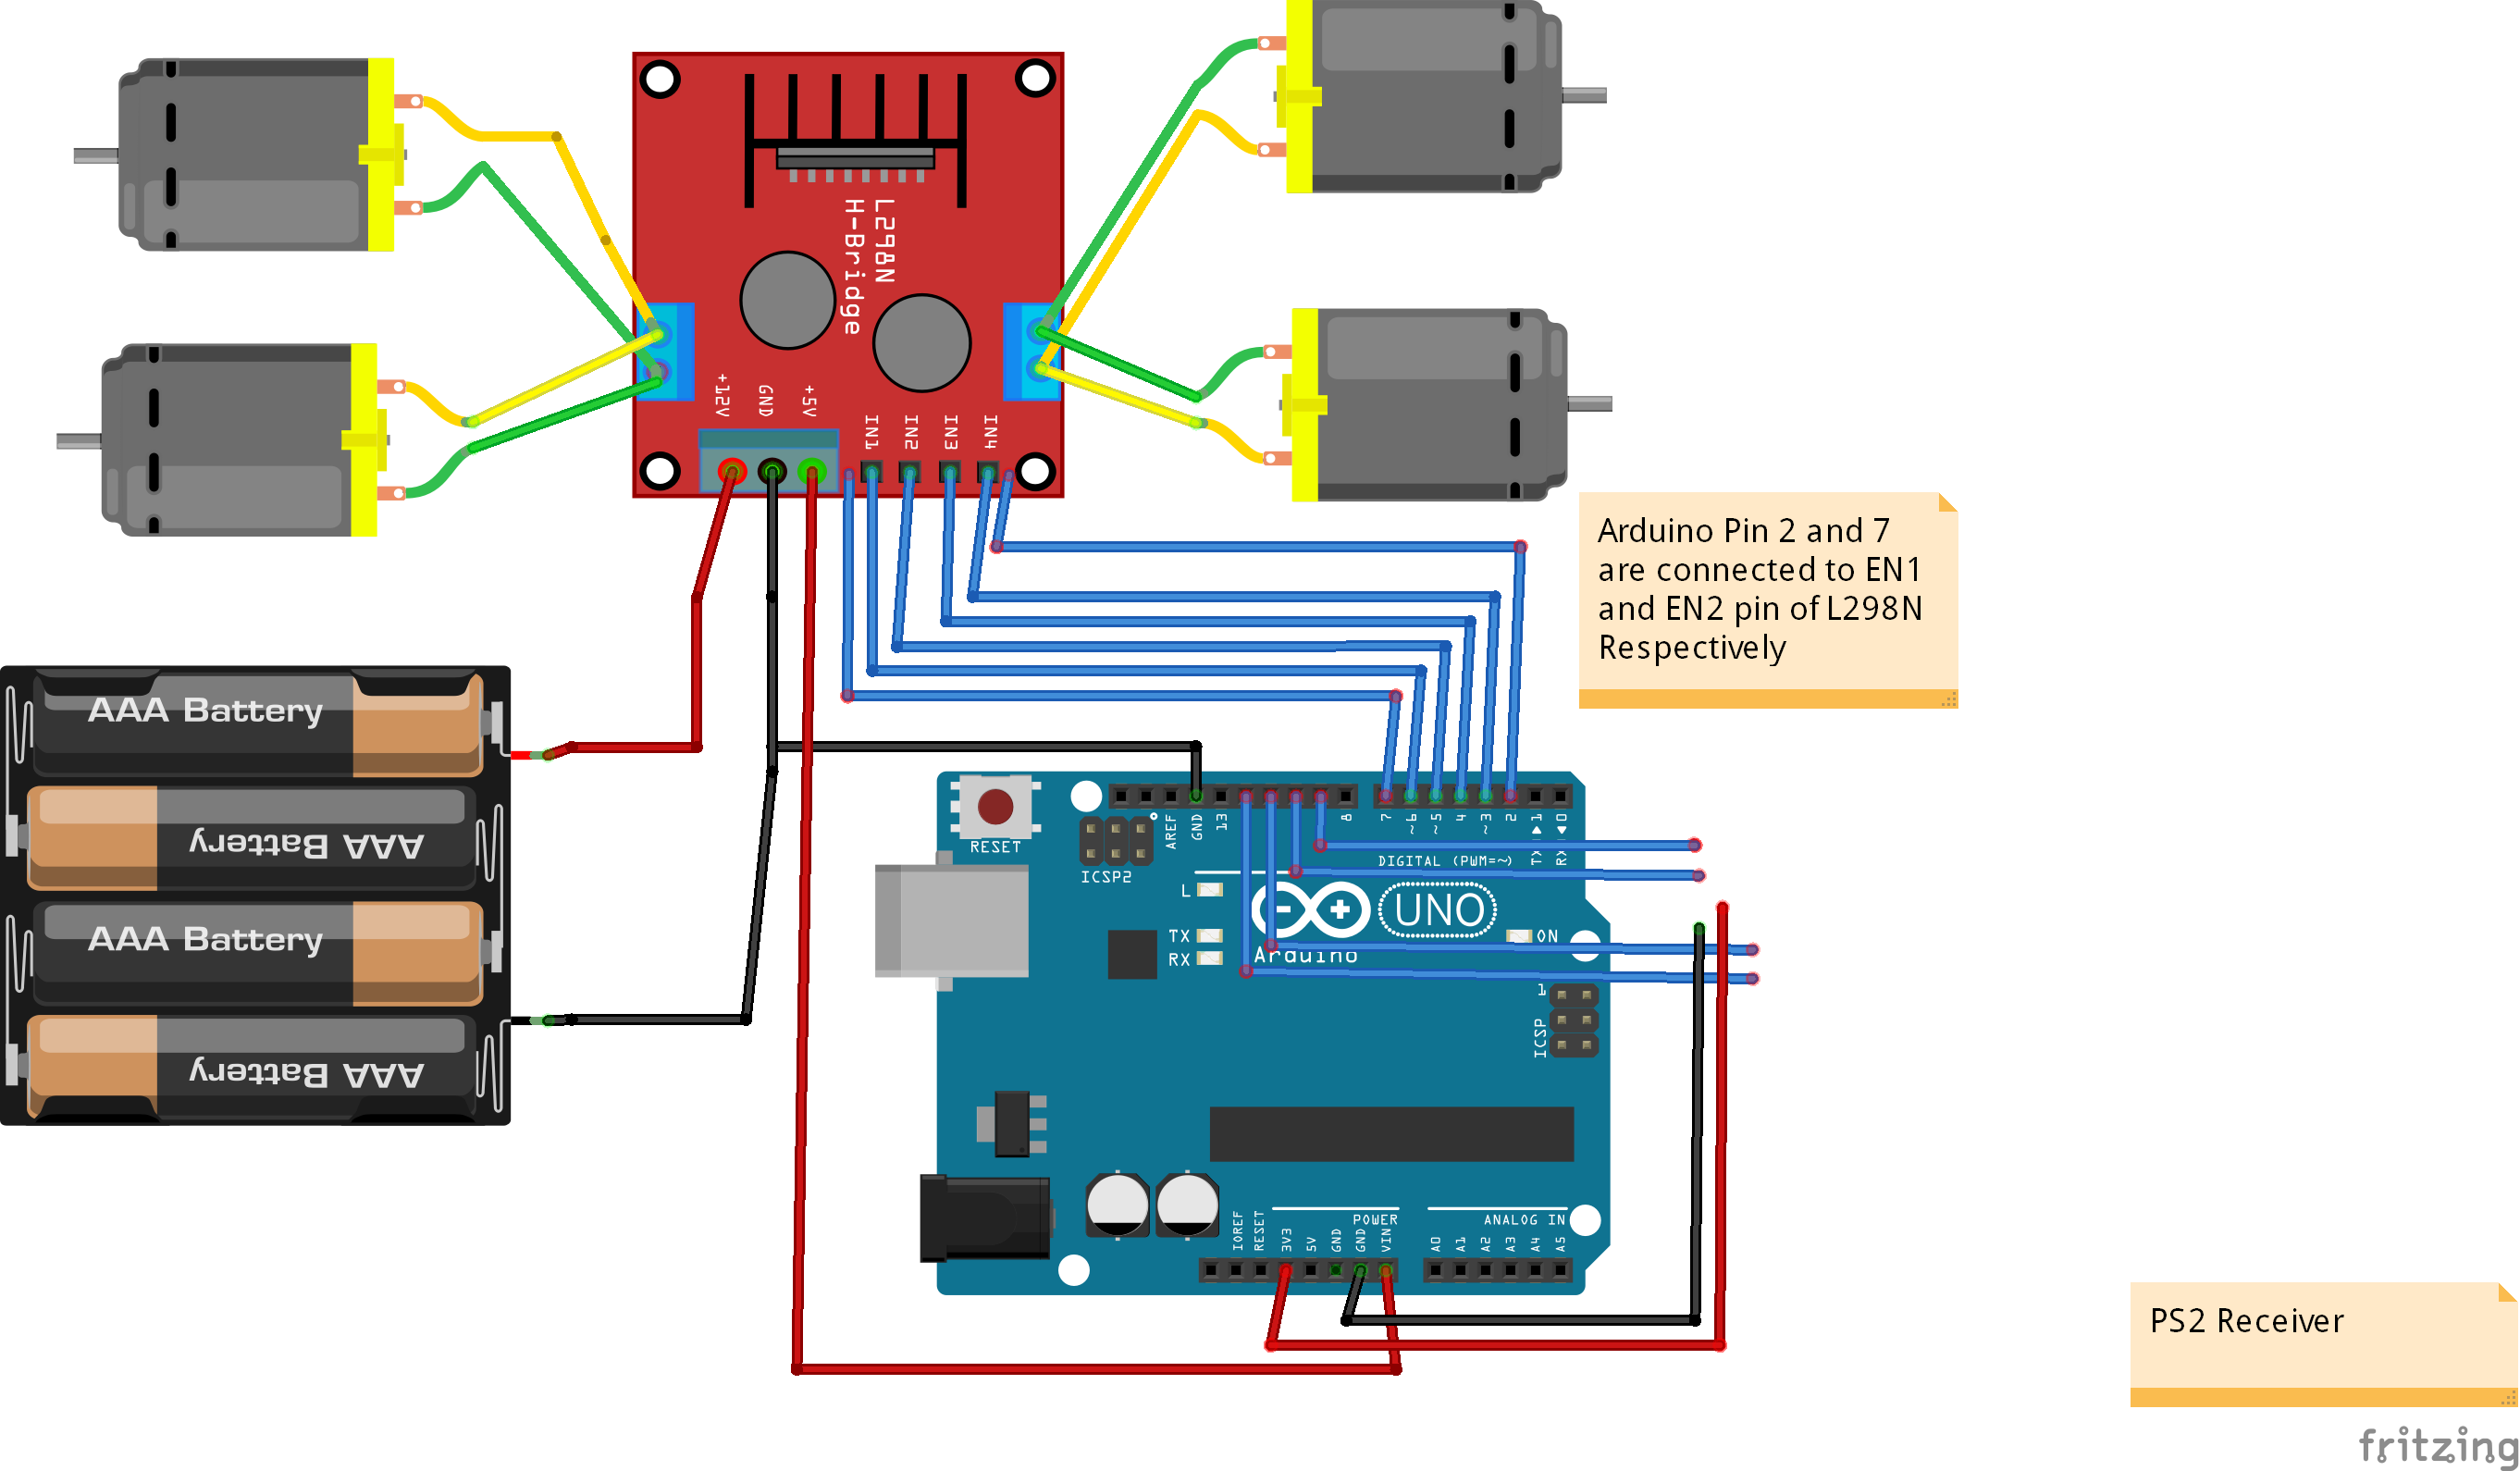
Hardware ConnectionsCheck the attached fritzing diagram, I haven't found PS2 receiver part in fritzing, so I take out some wire from Arduino pins, and I will explain its connection, its very simple.
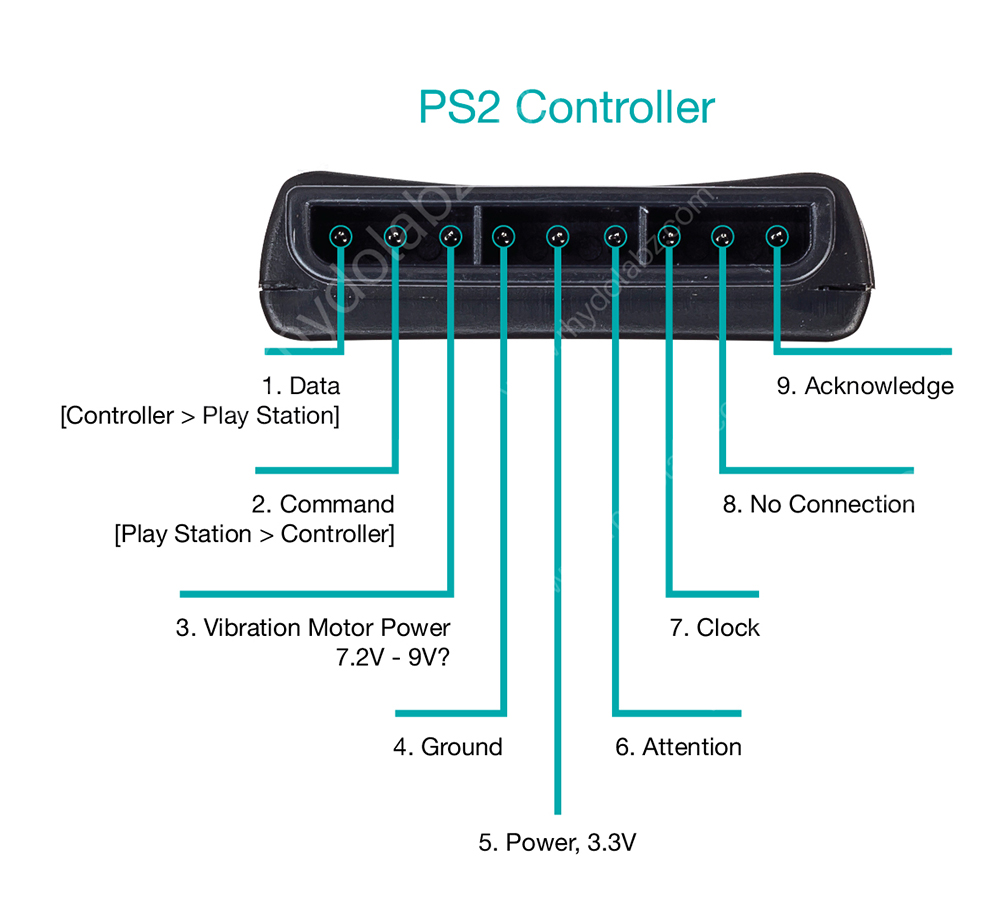
As you can see attached pictures, we are using 6 pins from the PS2 receiver (DATA, COMMAND, +3.3V, GND, ATTENTION, CLOCK).
Arduino Pin----------------------PS2 Receiver Pin
DATA----------------------------------Pin 12
COMMAND--------------------------Pin 11
+3.3V----------------------------------3.3V pin of Arduino
GND-----------------------------------GND
ATTENTION-------------------------Pin 10
CLOCK--------------------------------Pin 9
Programming PartAdd the attached PS2 controller library in your Arduino IDE software, then upload the code in your Arduino Board.
NotePlease Check the attached video with project for complete procedure.
You can use both joysticks on PS2 remote to control the car, press L1 to use left joystick, and R1 to use right joystick.
Debugging
- Make sure the two right side motors are running in same direction and left side motors also runs in same direction. Change the polarity of any one motor from a side if both motors do not run in same direction.
- If you pushed the joystick forward and car goes reverse, alter the polarity of motors, or simply change the Arduino pins.
Hope this procedure help out you in some way to achieve your goal, please subscribe our YouTube channel to motivate us to make more tutorials.
To show some support: https://www.paypal.com/paypalme/nextlifetech
Thank you!


_3u05Tpwasz.png?auto=compress%2Cformat&w=40&h=40&fit=fillmax&bg=fff&dpr=2)
Comments