
Software apps and online services | ||||||
| ||||||
In today's time, security in the home, office and many other places is very important. In our absence, these place are not so secure. In order to make these places secure, some people keep guards and many people prefer an electronic security system. At the present time, many types of security systems are available on the market. These security systems are very accurate and easy to control and cheaply available and the most important thing is that they can be operated on low voltage (up to 12 voltage).
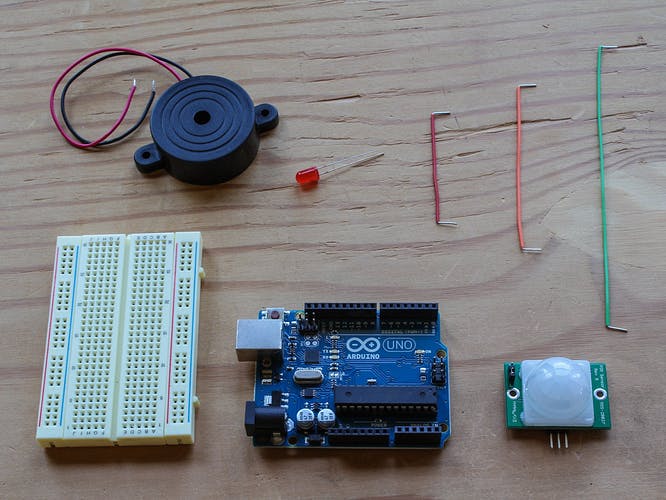
What's ConnectedThis project requires just a few parts, and because you're using a solderless breadboard and pre-cut jumper wires, you won't need any tools at all — except your computer and USB cable to connect the Arduino.
Dashboard Screenshots1) Connecting Arduino Device with Cayenne Dashboard.
2) Add new widgets to the project.
3) Adding a Digital Motion sensor widget to my project.
4) Selecting Virtual pins.
5) Configuring sensor data with Cayenne. When it is LOW, No Motion Detected.
When it is HIGH, Motion Detected.
A PIR module is basically made of a pyroelectric sensor (see it below as the round metal can with a rectangular crystal in the center), which can detect levels of infrared radiation. Everything emits some low level radiation, and the hotter something is, the more radiation is emitted. The sensor in a motion detector is actually split in two halves.
The reason for that is that we are looking to detect motion (change) not average IR levels. The two halves are wired up so that they cancel each other out. If one half sees more or less IR radiation than the other, the output will swing high or low.
This give us 2 options for powering it up: using the existing 5V pin or if you want to use it in a 3V only setup, just bypass or remove the regulator and that's it.
Connecting the PIR sensor module is pretty trivial, as it has only 3 PINs: GND, DOUT and VCC.
The PIR acts as a digital output, so all you need to do is listen for the pin status to change to HIGH (motion detected) or LOW (no motion detected).
Whenever and wherever you leave your home to go on vacation, you just need to switch on the trigger system and you can monitor it from your Cayenne app. If anything new is detected in your home, it will send notifications to you. No need for any other external device.
1) Creating New Trigger in Cayenne Dashboard.
A notification message will be sent to your mobile phone when a person enters your home.
 #define CAYENNE_PRINT Serial  // Comment this out to disable prints and save space
         #include <CayenneEthernet.h>
        // Cayenne authentication token. This should be obtained from the Cayenne Dashboard.
        char token[] = "AuthenticationToken";
         // Virtual Pin of the Digital Motion Sensor widget.
        #define VIRTUAL_PIN V1
       const int motionSensorPin = 4;
       void setup()
      {
Serial.begin(9600);
Cayenne.begin(token);
      }
    void loop()
    {
Cayenne.run();
checkSensor();
     }
      int previousState = -1;
     int currentState = -1;
     unsigned long previousMillis = 0;
    void checkSensor()
     {
unsigned long currentMillis = millis();
// Check sensor data every 250 milliseconds
if (currentMillis - previousMillis >= 250) {
	// Check the sensor state and send data when it changes.
	currentState = digitalRead(motionSensorPin);
	if (currentState != previousState) {
		Cayenne.virtualWrite(VIRTUAL_PIN, currentState);
		previousState = currentState;
	           }
          }
        }
guru8196
 Benny Estes


Comments