Any small servo with standard 2.54 mm 3 pin header cable, and mounting gear (nuts/bolts, rubber bands, cable ties, glue, or what ever is your preference)
×
1
Software apps and online services
Raspberry Pi Raspbian Lite
balena Etcher
XinaBox OC05 Servo Driver
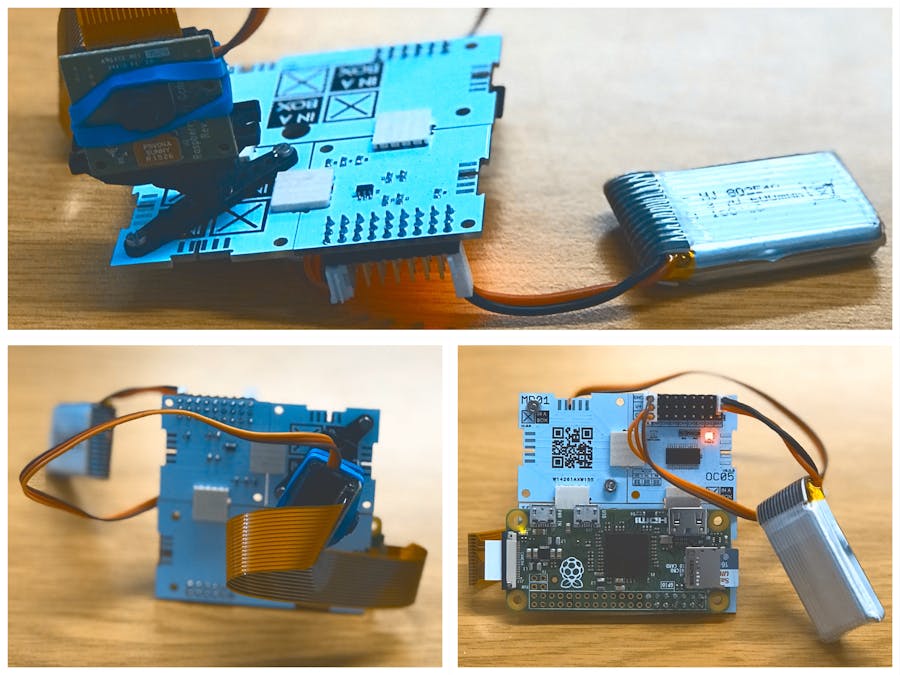
Story
Using the RasPi Zero with the PIcamera, a Servo and the OC05 Servo Driver/Controller, you can shoot a panning time-lapse video.
Step 1: Preparing the SD Card for the Rasperry Pi Zero
Download Raspbian Lite and unzip
Download Etcher and install
Flash Raspbian Lite to a Micro-SD card using Etcher
Open your terminal and go to the root of the SD Card
The last 3 lines set up the RasPi Zero (and only the Zero) to be able to network via the USB port. Just verify that the last line has no newline before ' modules...' in cmdline.txt!
Eject the SD Card
Assemble everything as per this video:
Build a Servo controlled Time-Lapse camera
Connect USB Cable between your RasPi Zero and your computer.
Either use a Mac or install Bonjour to SSH to your RasPi Zero: ssh pi@raspberrypi.local
Password is raspberry
Finally setup internet sharing on your computer allowing Broadcom Ethernet to connect to your WiFi via your computer.
from__future__importdivisionimporttimefromdatetimeimportdatetimeimportrpOC05importpicamerapwm=rpOC05.PCA9685()servo_min=150# Min pulse length out of 4096servo_max=500# Max pulse length out of 4096i=servo_max+10chan=8filename='frames/frame-%s.jpg'pwm.set_pwm_freq(50)# signal ready with a wavepwm.set_pwm(chan,0,servo_min)time.sleep(1)pwm.set_pwm(chan,0,servo_max)time.sleep(1)print('Time-Lapse Running...')whileTrue:ifi>servo_max:i=servo_minpwm.set_pwm(chan,0,i)withpicamera.PiCamera(resolution=(1920,1080))ascam:ts=str(datetime.utcnow())cam.capture(filename%ts,quality=90,thumbnail=None)# time-lapse interval in seconds.time.sleep(0.1)i+=1


Comments