

Hardware components | ||||||
 |
| × | 1 | |||
| × | 1 | ||||
Software apps and online services | ||||||
 |
| |||||
Hand tools and fabrication machines | ||||||
 |
| |||||
My love for Star Wars was re-ignited with this wonderful contest on hackster. Thanks to Spark for the wonderful Photon. So let's get started.
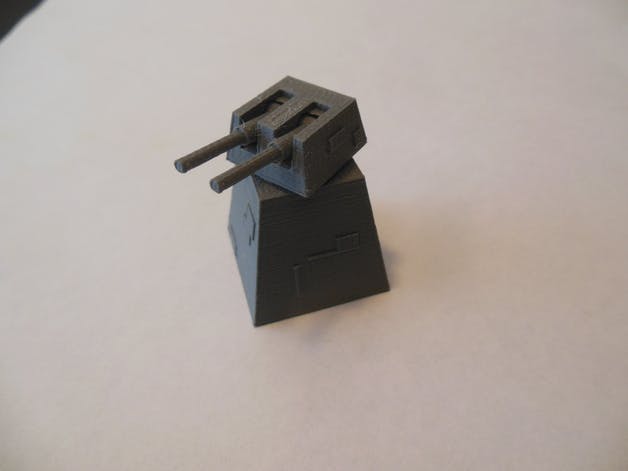
Step 1: 3D Print the Model
3D print the model I have attached. Its hollow to store batteries and our board.
Step 2: Assemble the Prints
Assemble the Upper portion. Install the gun on the mount.
Step 3: Drill from top and install the Servo.
Now comes the tricky part. I used a Groove Mini servo from the Edison Starter Kit. It was perfect fit. You need to keep in mind the servo size before printing the file.I had to cut these shafts a little as I was unable to find smaller ones.
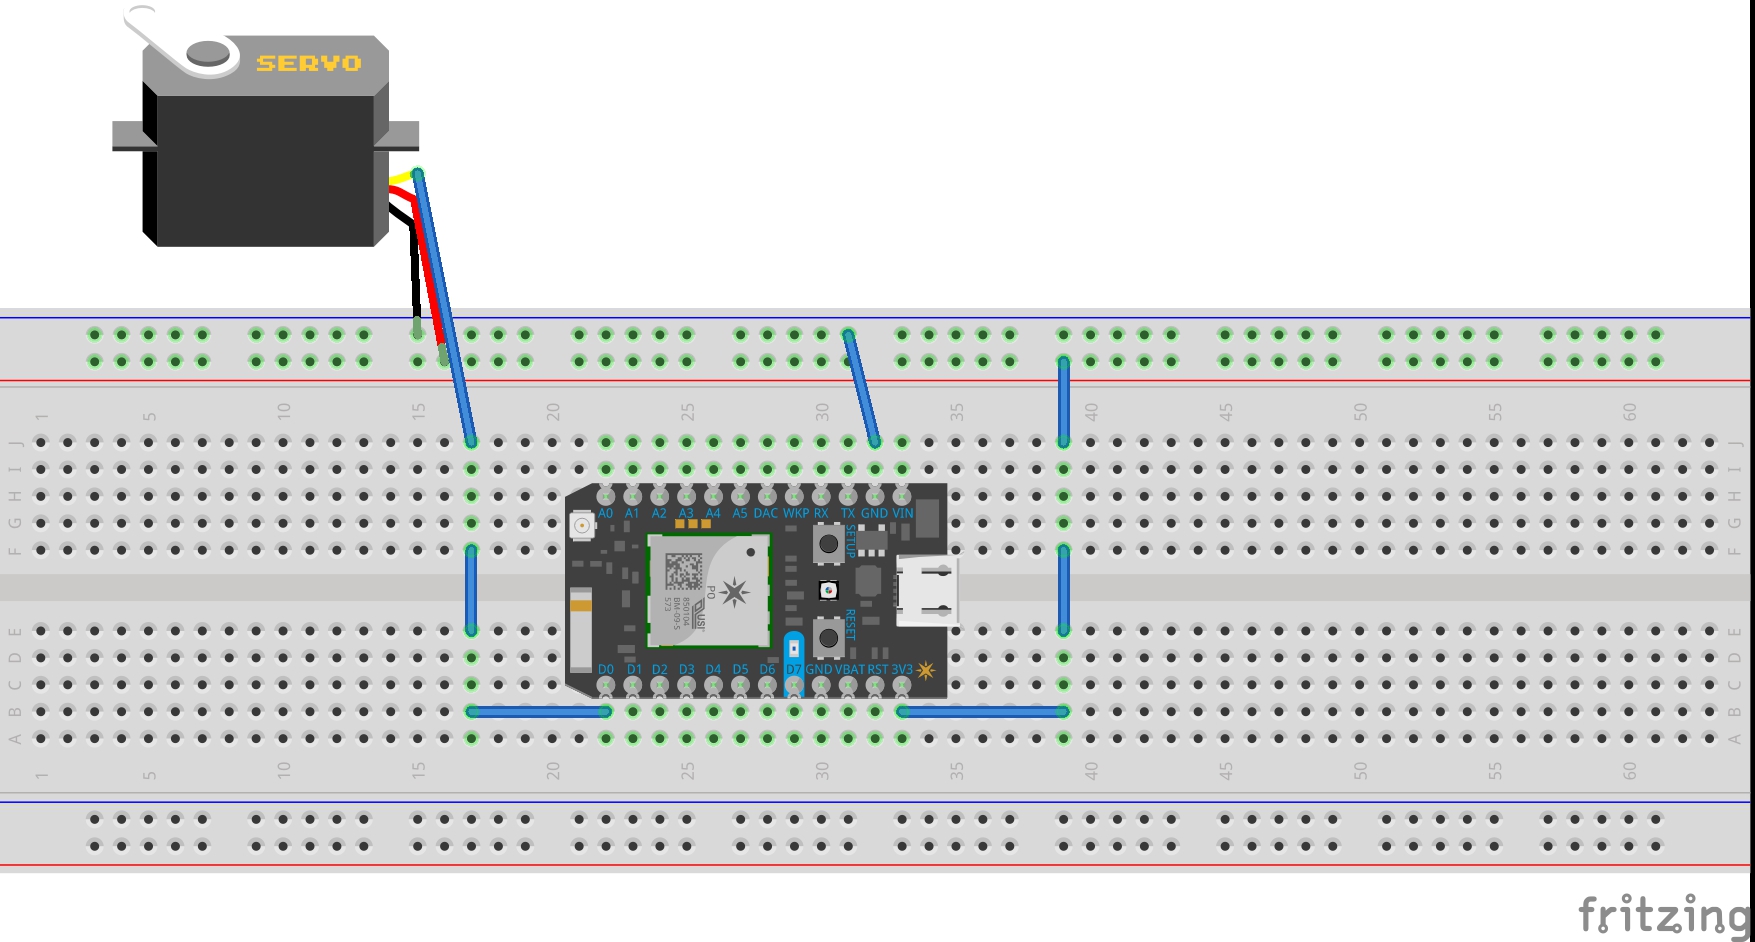
The Image show a Spark Core as initially I had used it till the shipment of the photon arrived. The same code is applicable for the Photon. I have tested it.
Step 4: Program the Particle Photon
Upload the code to your Particle photon using Build.
If you need to set up your Particle you can refer to this page.
Step 5: Set up the webpage to control the turret
Use the attached code and update access token and device ID and save it as a web page(.html)Find the access token and device ID at particle build.Your access token can be found in the Particle Build web IDE on the 'Settings' page.
And Your Death star turret is ready for a roll!


Comments