

Hardware components | ||||||
| × | 1 | ||||
_ztBMuBhMHo.jpg?auto=compress%2Cformat&w=48&h=48&fit=fill&bg=ffffff) |
| × | 1 | |||
Software apps and online services | ||||||
 |
| |||||
| ||||||
Hand tools and fabrication machines | ||||||
 |
| |||||
| ||||||
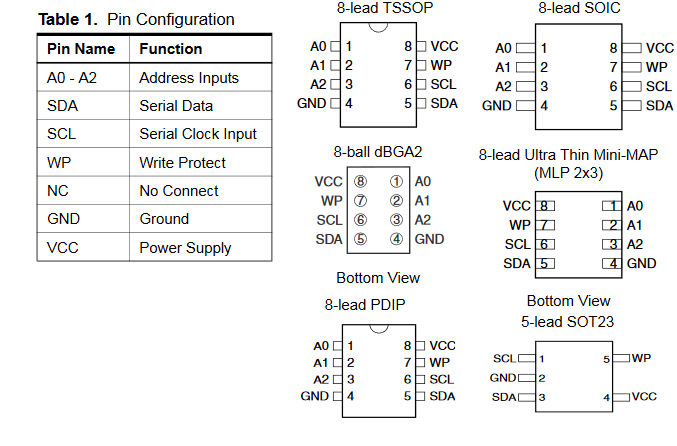
EEPROM stands for Electronically Erasable Programmable Read-Only Memory. It allows for values to be written and stored for long periods of time while using very little power. Most microcontrollers even have EEPROM directly in their circuitry, such as the ATmega328P (Arduino Uno chip), which has 1KB of it. But what if that’s not enough? SD cards have much greater storage sizes, but are also more complex, physically larger, and use more power. In this tutorial, I will show how easy it is to add another 2KB of non-volatile storage to a project with the 24C02 EEPROM IC.
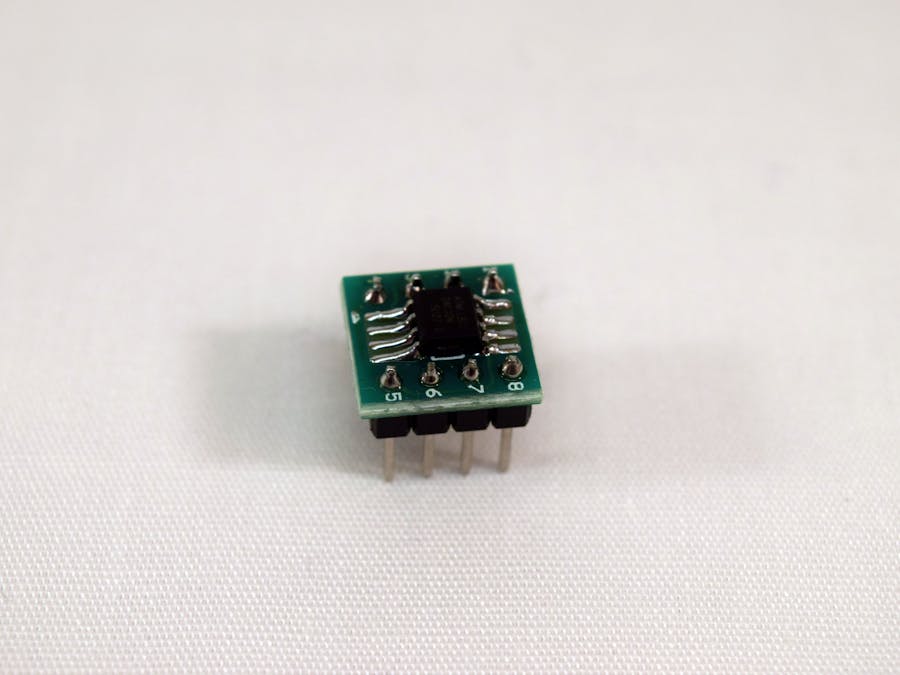
The chip I chose comes in several packages, but because I needed to mount them on PCBs, I went with the SOIC-8 package, which is a surface-mount variant. To begin, I added the EEPROM IC part into Eagle, along with a 3-pin header for the ADDR pins and a 5-pin header for the other pins. Then I simply routed net segments between the pins to connect them.
Next, I laid it all out on a PCB by placing the IC first and then the headers on either side. I made sure that they were directly lined up, as crossing the paths adds a lot of unnecessary complexity.
I used Chilipeppr to generate Gcode for my CNC router, which I used to mill the traces on the board. Then it was simply a matter of soldering everything together.
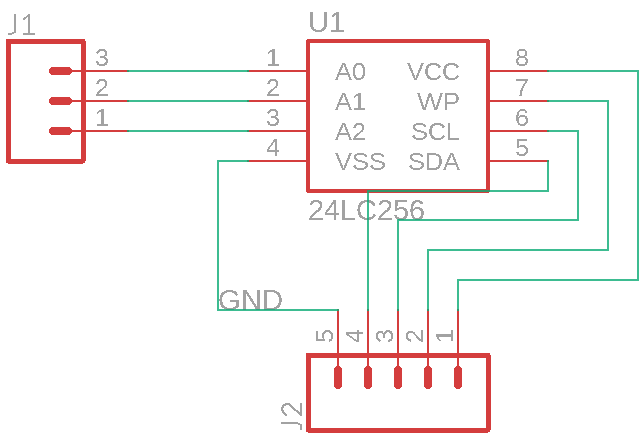
Connecting the EEPROM chip to an Arduino Uno board was simple. Here is a list of connections:
AT24C02    |     Uno
GND | GND
VCC | 5v
SDA | SDA
SCL | SCL
WP | GND (Connect to VCC to disable writing)
The address pins are only necessary if more than one EEPROM chips are going to be used. If that is the case, just increment the three-bit address value for each new chip. For example, the third IC would have these pins connected:
A0 | A1 | A2
0 | 1 | 0
To write data, first ensure the WP (write protect) pin is connected to GND. The device address is first sent with a value between 0x50 and 0x57. Then an eight bit must be added on to then end which toggles between reading or writing. To write, it gets set to 0. To demonstrate, the address byte of the first IC as a write operation would be 1010000.
Next, an address is specified for the data to be written to, followed by the byte to be written. Using the Wire library, this looks like:
Wire.beginTransmission(0x50);
Wire.write(address);
Wire.write(data);
Wire.endTransmission();    // stop transmitting
Reading data from the chip is done in a similar way. First, the target storage address must be selected. This is done by sending a dummy write command to load in the target address. Next, one byte is sent containing the device address and the read/write bit as 1. The EEPROM chip then sends one byte of data in return. This looks like:
Wire.beginTransmission(0x50);
Wire.send(targetAddress);
Wire.endTransmission();
Wire.requestFrom(0x50, 1);
If(Wire.available()){
  byte data = Wire.receive();
}
Wire.endTransmission();
By using an EEPROM chip instead of an SD card, you can save space, power, and complexity. If you have a project that needs to store initial values for a game or have a save state, an EEPROM chip is perfect. It allows for the storage of values even after the main microcontroller has been powered off.


Comments