

Hardware components | ||||||
| × | 1 | ||||
| × | 1 | ||||
| × | 1 | ||||
| × | 1 | ||||
Software apps and online services | ||||||
 |
| |||||
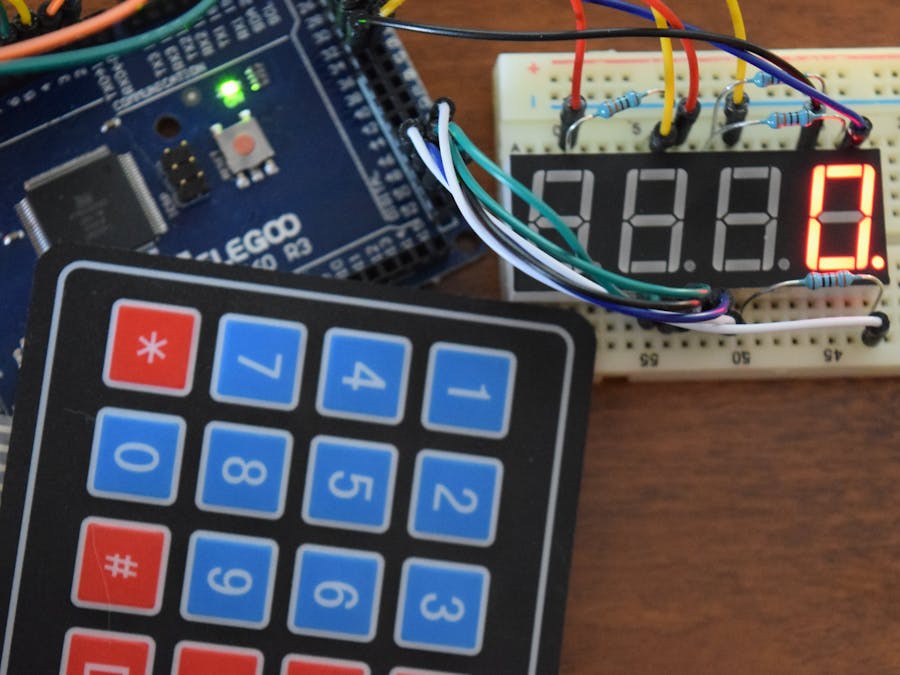
Elegoo reached out to me by giving me their Ultimate Arduino Mega Starter Kit, which has many sensors, displays, and interactive elements. This project showcases how to connect and use the 4x4 Matrix Keypad with the 4-digit 7-segment display.
The DisplayThe first thing I did was go into Sketch->Manage Libraries and install the "SevSeg" library, which greatly helps with displaying numbers on the display. Then I connected the seven segment display by following this diagram:
And connecting it to the corresponding pins on the Arduino Mega. Make sure to add 330 ohm resistors to the digit pins.
The 4x4 keypad has 8 wires that correspond to 4 columns and 4 rows. Simply attach them like so:
To the corresponding pins in the code. You will also need to install the "keypad" library.
The code simply checks if there has been a keypress, and if there has been, it converts it to a number, unless it is a '*', which sets it back to 0. Each time there is a number pressed the display shifts to the left (multiplies current number by 10 and adds the new number) until it reaches the end.
Here is a demonstration of it in action:


Comments