IdeaA while back I had the idea to create a device that could quickly determine the direction of servos and/or whether they even work correctly. It would need to be small and portable, along with being inexpensive. Then a company called PCBgogo.com reached out to me, and they wanted me to create a PCB that they would manufacture and send to me. They create good-quality PCBs at a low cost.
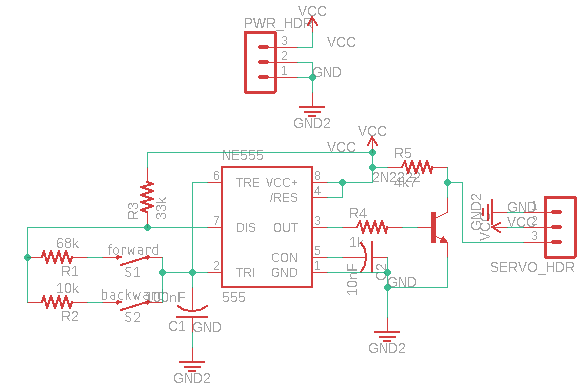
SchematicI went searching for a way to control a servo without the need for a microcontroller, and I found it on 555-timer-circuits.com. They had a design for a circuit that could turn a servo in either direction with minimal components. It utilized a 555 timer, which is cheap and reliable.
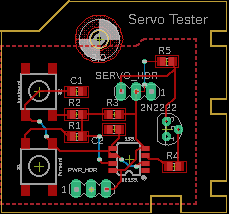
Designing the PCBCreating the board layout wasn’t too difficult. I started by laying down the 555 timer and pin headers, then I added the supporting components and buttons.
Creating the PCBNow that everything was laid out, I had to create a gerber file for it to be fabricated. The first and only step is to click the “CAM Processor” at the top and select the oshpark-2-layer.cam job file and then process it.
Then I went to PCBgogo.com and loaded their gerber file viewer to ensure I had created the files correctly.
Then I sent the files and the PCBs were fabricated and sent to me in a timely manner.
SolderingWith most PCBs, a stencil is highly recommended to ensure even and accurate coverage of solder paste.
They sent me a stainless-steel stencil that had cutouts for each pad. I began by covering the edge of a putty knife with solder paste, and then I ran it over the stencil twice: once at 45 degrees and then once at 70 degrees.
This creates a nice application of solder paste without much waste. Lastly, I placed each component with tweezers, placing the smallest components first, such as resistors and capacitors.
This prevents having to reach over large or tall parts and possibly bumping them. I reflowed the boards in a cheap toaster oven at about 300 degrees Fahrenheit.
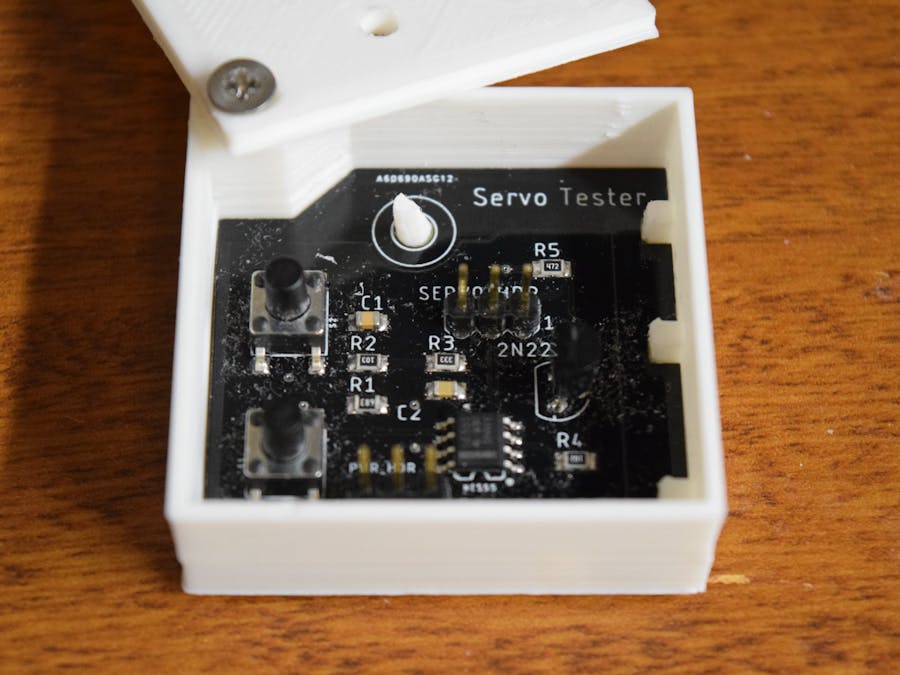
UsageUsing the device is simple. All that is needed is to plug in a 5v power source and servo motor, then pressing either button to move it.
I also designed a 3D-printable case for it that hides the board and only exposes the necessary areas.


_t9PF3orMPd.png?auto=compress%2Cformat&w=40&h=40&fit=fillmax&bg=fff&dpr=2)
Comments