


Hardware components | ||||||
_ztBMuBhMHo.jpg?auto=compress%2Cformat&w=48&h=48&fit=fill&bg=ffffff) |
| × | 1 | |||
 |
| × | 2 | |||
 |
| × | 1 | |||
 |
| × | 1 | |||
 |
| × | 1 | |||
 |
| × | 1 | |||
Software apps and online services | ||||||
| ||||||
 |
| |||||
Hand tools and fabrication machines | ||||||
 |
| |||||
This project presents a simple and effective way to build a Bluetooth-controlled 2WD robotic vehicle using the Arduino UNO microcontroller. By combining a classic Arduino board with the HC-05 Bluetooth module and an L298N motor driver, the robot can be controlled wirelessly from a smartphone using a custom or general-purpose Bluetooth controller app. This build offers a perfect entry point into the world of mobile robotics and wireless communication, making it ideal for beginners and hobbyists alike.
✅ Features
2WD mobile robot platform
Bluetooth control using the HC-05 module
Motor control via L298N dual H-bridge driver
Arduino-based logic for simple and expandable development
Ideal for beginners in robotics and embedded systems
🧱 Step 1: AssemblyMounting the Motors and Chassis
Attach the two DC motors to the chassis using screws or zip ties.
Install the caster wheel at the front or rear for balance and free rotation.
Assemble the base and top layers of the chassis (if applicable).
Fix the L298N motor driver and Arduino UNO board securely using screws or double-sided tape.
Route and secure the motor wires to prevent tangling during motion.
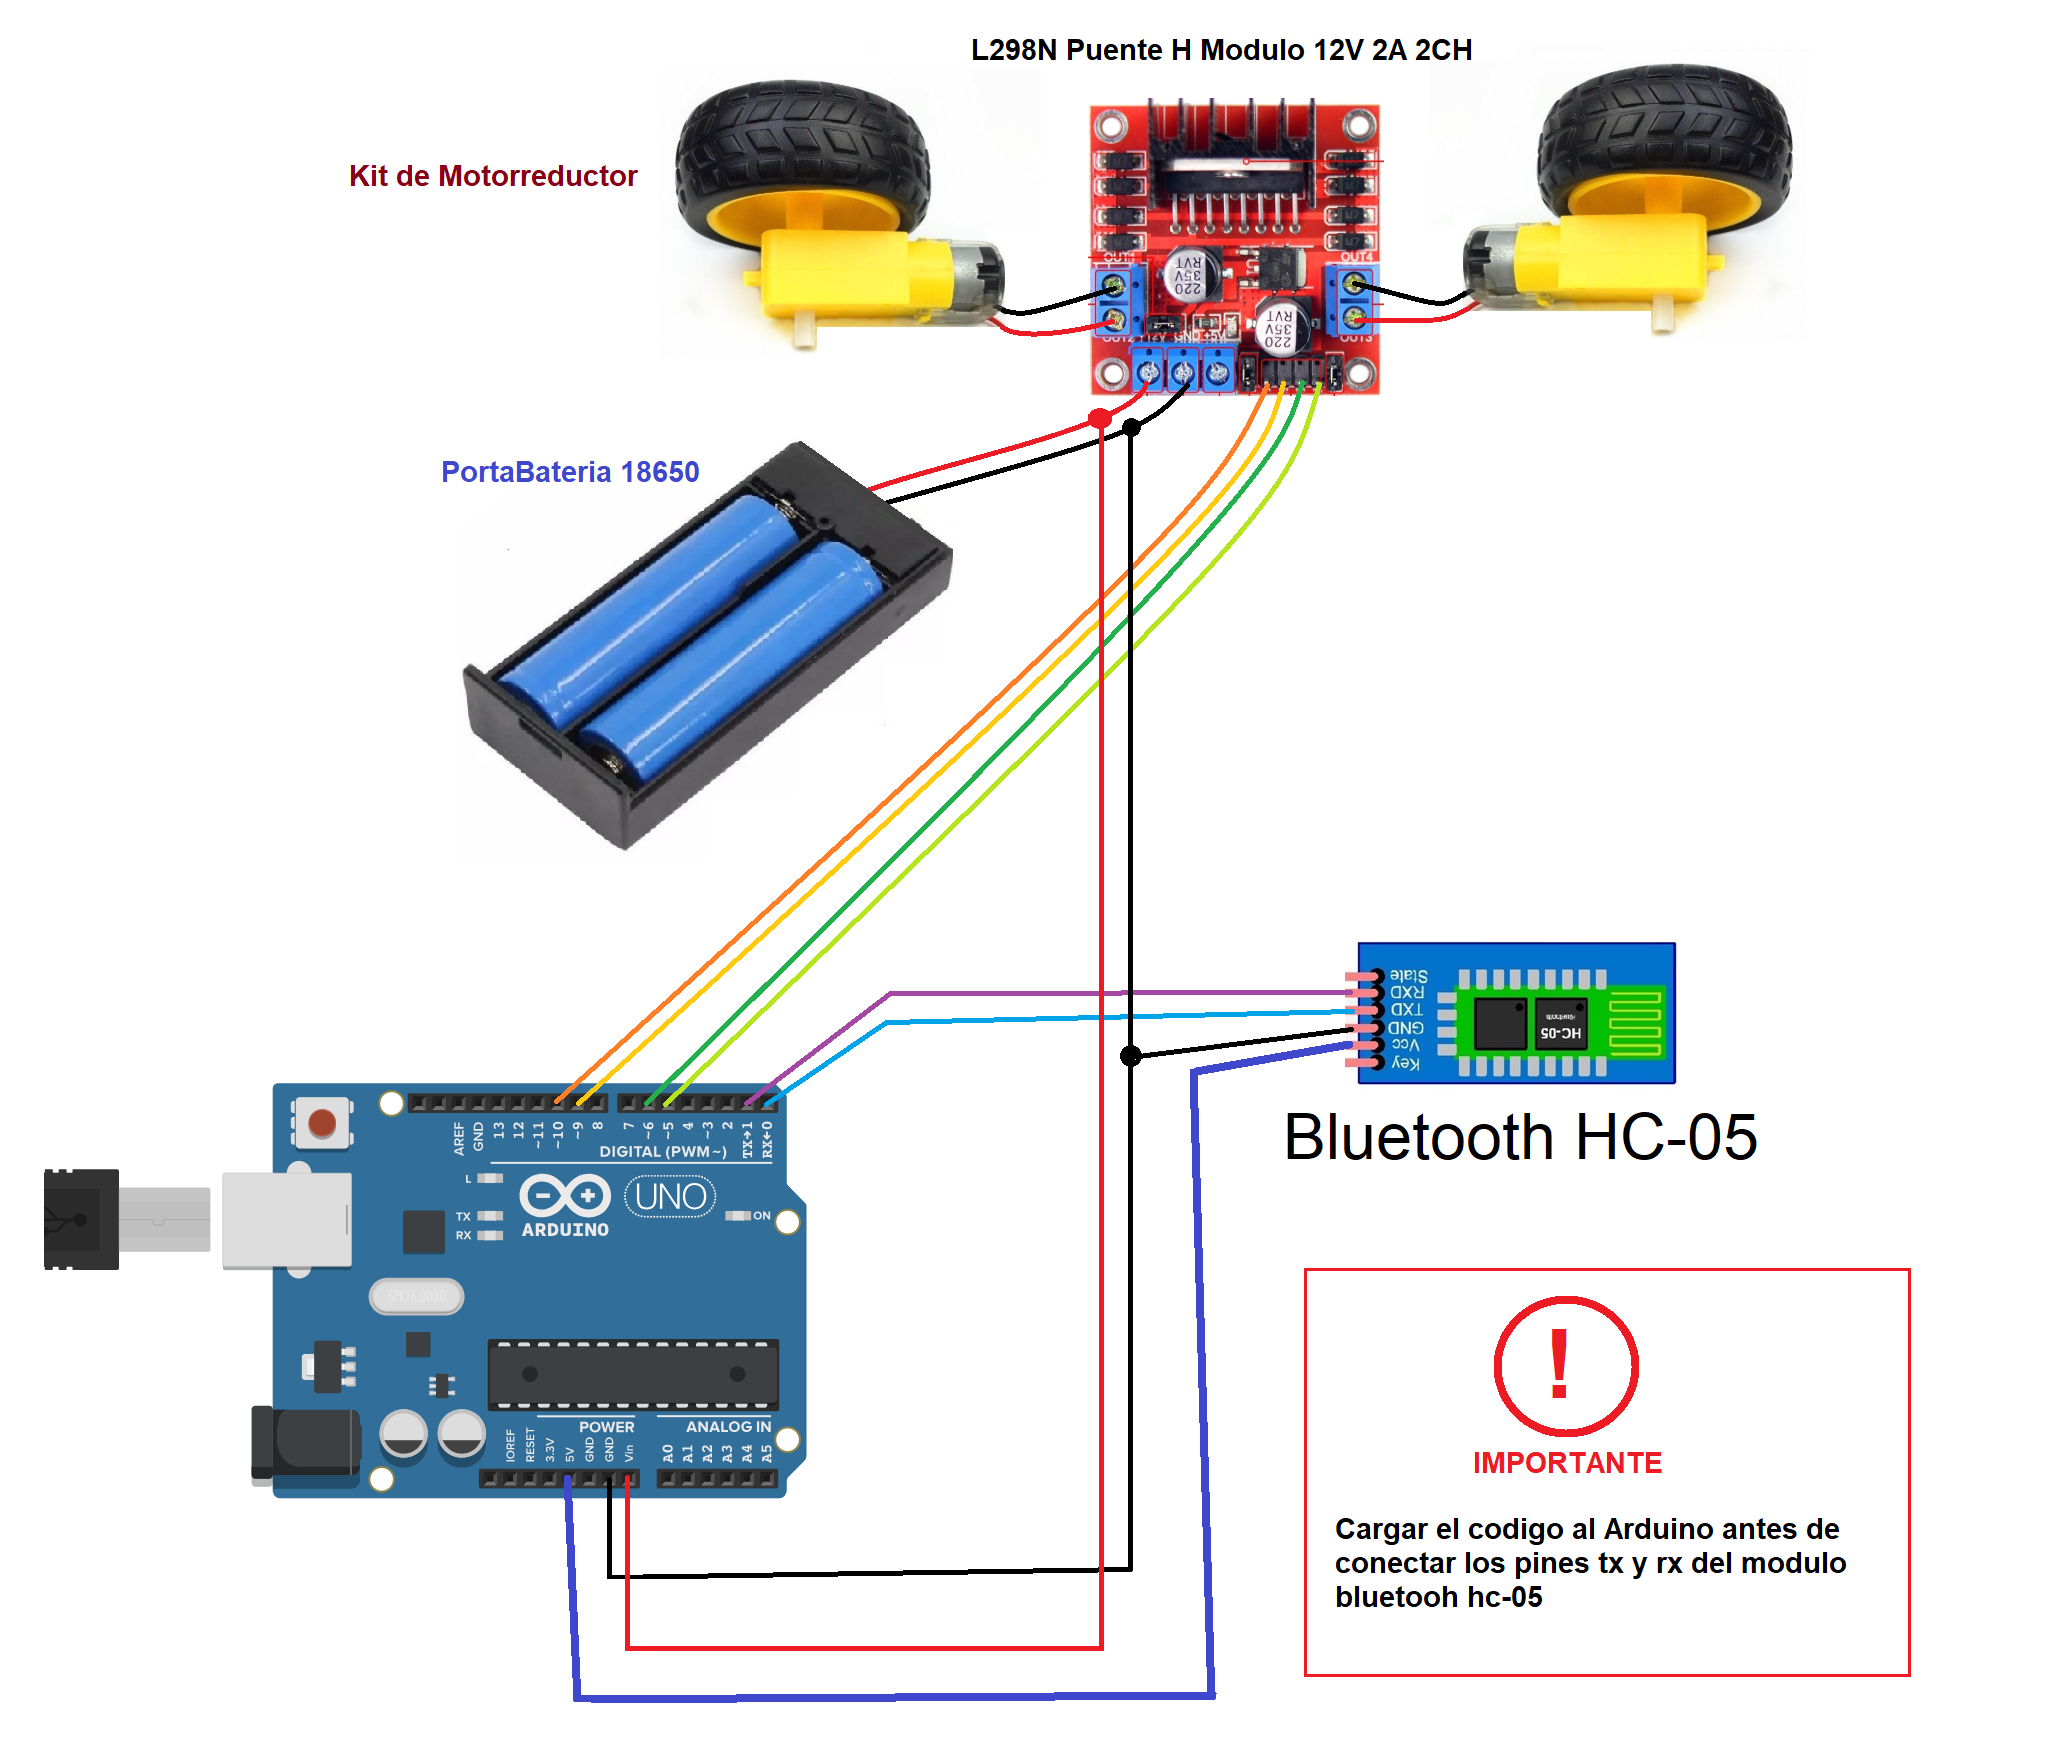
⚡ Step 2: Circuit ConnectionsConnect the right motor to OUT1 and OUT2 on the L298N.
Connect the left motor to OUT3 and OUT4.
Connect VCC of the L298N to the positive terminal of the battery (7–12V).
Connect GND of the L298N to battery negative and Arduino GND (shared ground).
Arduino UNO to L298NConnect Arduino digital pins 5, 6, 9, 10 to IN1, IN2, IN3, IN4 on the L298N (configurable).
Bluetooth Module HC-05Connect VCC of HC-05 to Arduino 5V
Connect GND to Arduino GND
Connect TX of HC-05 to Arduino RX (pin 0)
Connect RX of HC-05 to Arduino TX (pin 1)
⚠️ Note: You may need to disconnect TX/RX during code upload to the Arduino.
💻 Step 3: Uploading the CodeBefore uploading:
Use the Arduino IDE and select the correct board and port.
Write or paste the control code (see code section below).
Disconnect the HC-05 (TX/RX) before uploading.
Reconnect the HC-05 after successful upload.
📱 Step 4: Smartphone Bluetooth Control an Final DemostrationDownload and install the Arduino Control RC app from the Google Play Store.
https://play.google.com/store/apps/details?id=com.erko.control_vehiculo&pcampaignid=web_share
Pair your phone with the HC-05 (default password: 1234 or 0000).
Send basic commands like:
F – Move Forward
G – Move Backward
L – Turn Left
R – Turn Right
S – Stop


_3u05Tpwasz.png?auto=compress%2Cformat&w=40&h=40&fit=fillmax&bg=fff&dpr=2)
Comments