


Hardware components | ||||||
 |
| × | 1 | |||
For the 4th of July long weekend, I finally decided to dig up my stash of IoT “toys” and actually build something. I was also motivated since I was going away for the summer and wanted a low power, simple sensor based system to “keep an eye” on the apartment.
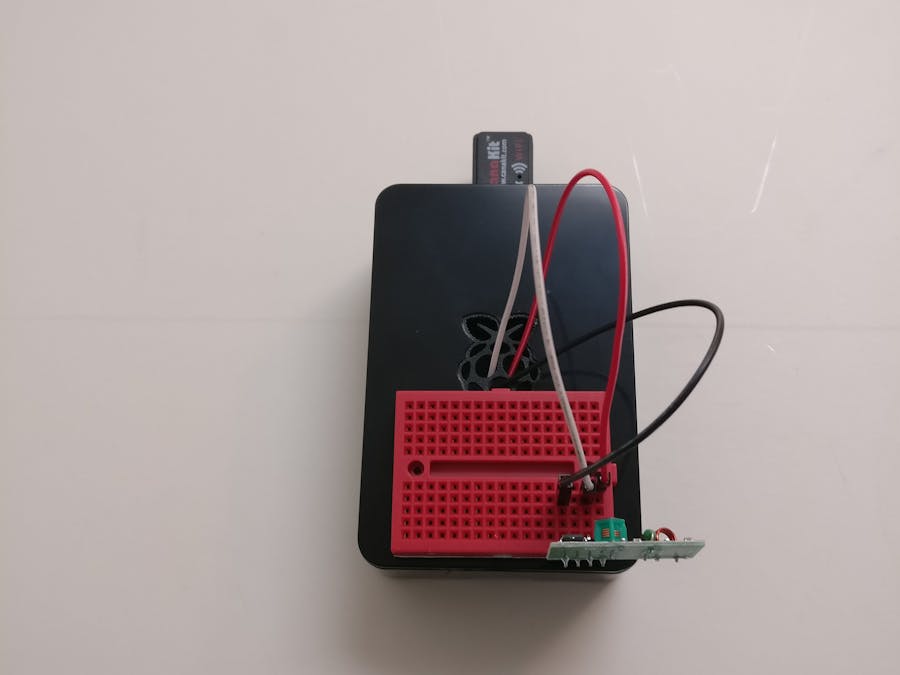
What I dug upThis is what I dug up:
- A Raspberry Pi 2 that came with USB WiFi dongle, SD card (you can get one of these kits from Amazon – https://www.amazon.com/CanaKit-Raspberry-Complete-Starter-9-Items/dp/B008XVAVAW/ref=sr_1_16?s=electronics&ie=UTF8&qid=1499106573&sr=1-16&keywords=raspberry+pi+canakit )
- An unused, now defunk Ninjablocks kit that came with a door and PIR 433Mhz sensors (you can get these on Amazon – https://www.amazon.com/TOGUARD-Wireless-Detector-Receiver-Security/dp/B01LXI9ONK/ref=sr_1_1?s=electronics&ie=UTF8&qid=1499107028&sr=1-1&keywords=433+Mhz+PIR+sensorhttps://www.amazon.com/433mhz-sensor-contact-alarm-system/dp/B01MU3H13C/ref=sr_1_1?s=electronics&ie=UTF8&qid=1499107052&sr=1-1&keywords=433+Mhz+door+sensor)
- A little starter kit with a small breadboard and some wires for connecting to the GPIO ports on the RPi (something like this – https://www.amazon.com/TTnight-SYB-170-Breadboard-Colorful-Prototype/dp/B06XTR2PSK/ref=sr_1_cc_6?s=aps&ie=UTF8&qid=1499107924&sr=1-6-catcorr&keywords=electronics+tiny+breadboard+kit and https://www.amazon.com/dp/B019SX72CI?psc=1)
- A simple USB webcam eg. https://www.amazon.com/Kinobo-Webcam-1080dp-Windows-Microphone/dp/B005Q7L6QO/ref=sr_1_12?s=electronics&ie=UTF8&qid=1499109412&sr=1-12&keywords=usb+webcam+with+stand
I figured I could easily whip up a simple sensor set up that would email me a photo of the apartment if it detected a presence or door opening.
Initial Set UpFirst was to set up the RPi using NOOBs. For those who don’t know, you can go here https://www.raspberrypi.org/help/videos/#noobs-setup on videos on how to set up NOOBs to install Raspbian (the OS) on you RPi.
Also you’ll need to set up WiFi for the Raspberry Pi.
433 Mhz RF Receiver setup and testNext is to set up the RPi to receive signals from the PIR and door sensor. You need to get one of these – https://www.amazon.com/433Mhz-Transmitter-Receiver-Link-Arduino/dp/B016V18KZ8/ref=sr_1_3?s=electronics&ie=UTF8&qid=1499108434&sr=1-3&keywords=433+mhz+transmitter+and+receiver. They come in a set but we’re only using the receiver.
Next follow the instructions found here to set up the receiver and test that you’re getting. Here are some links to instructions on how to do this:
- https://tutorials-raspberrypi.com/let-raspberry-pis-communicate-with-each-other-per-433mhz-wireless-signals/ – just follow the instructions to set up the receiver
- Build and compile the RFSniffer found here – https://github.com/ninjablocks/433Utils.git
- Test that the signals are getting through by activating the sensors (you may need to make sure the battery is still working for them)
This slideshow requires JavaScript.
Setting it all upThe code can be found here: https://github.com/foohm71/HomeGuard
I created separate folders for each component so that I could test each on its own:
- Sensors – this is the control script to listen to the RF sensors and dump it out to a file “sniff” – start.sh
- Camera – this is the script to take a photo and save it in image.jpg – capture.sh
- Email – this contains the script to uses Gmail to send an email whenever something is detected – sendmail.py
I personally recommend that you test each of these individually. But first you need to setup/configure for your needs:
- You’ll need to install fswebcam – see https://www.raspberrypi.org/documentation/usage/webcams/
- 433Utils have already been installed but you may need to config start.sh to configure the dir path
- For email, you’ll need to set up a gmail account for this. I don’t recommend using your personal email. You’ll need to config that in sendmail.py. The first time you send an email, gmail will flag it out as suspicious so you’ll need to allow it.
- For email, you’ll need to config who you want to send it to as well.
- There will be several python packages to install eg. email, subprocess etc. You need to do pip install.
- The “sensorAlertCodes” hash in HomeGuard.py are for my own sensors. You’ll need to use RFSniffer when you set up 433Utils to figure out what are the codes for your sensors and configure accordingly.
- HomeGuard.py also has locations where “Camera”, “Email”, “Sensors” dirs are located, you’ll need to configure those as well.
- I modified RFSniffer C++ code to use <iostream> cout instead of <stdio.h> printf as it wasn’t printing to stdio fast enough. YMMV.
- I added a crontab in the git repo as a reference. My set up checks “sniff” every 5mins and if there are entries in there, take a photo and send it with the Subject indicating if the door was open or motion was detected etc.
Have fun!


Comments